
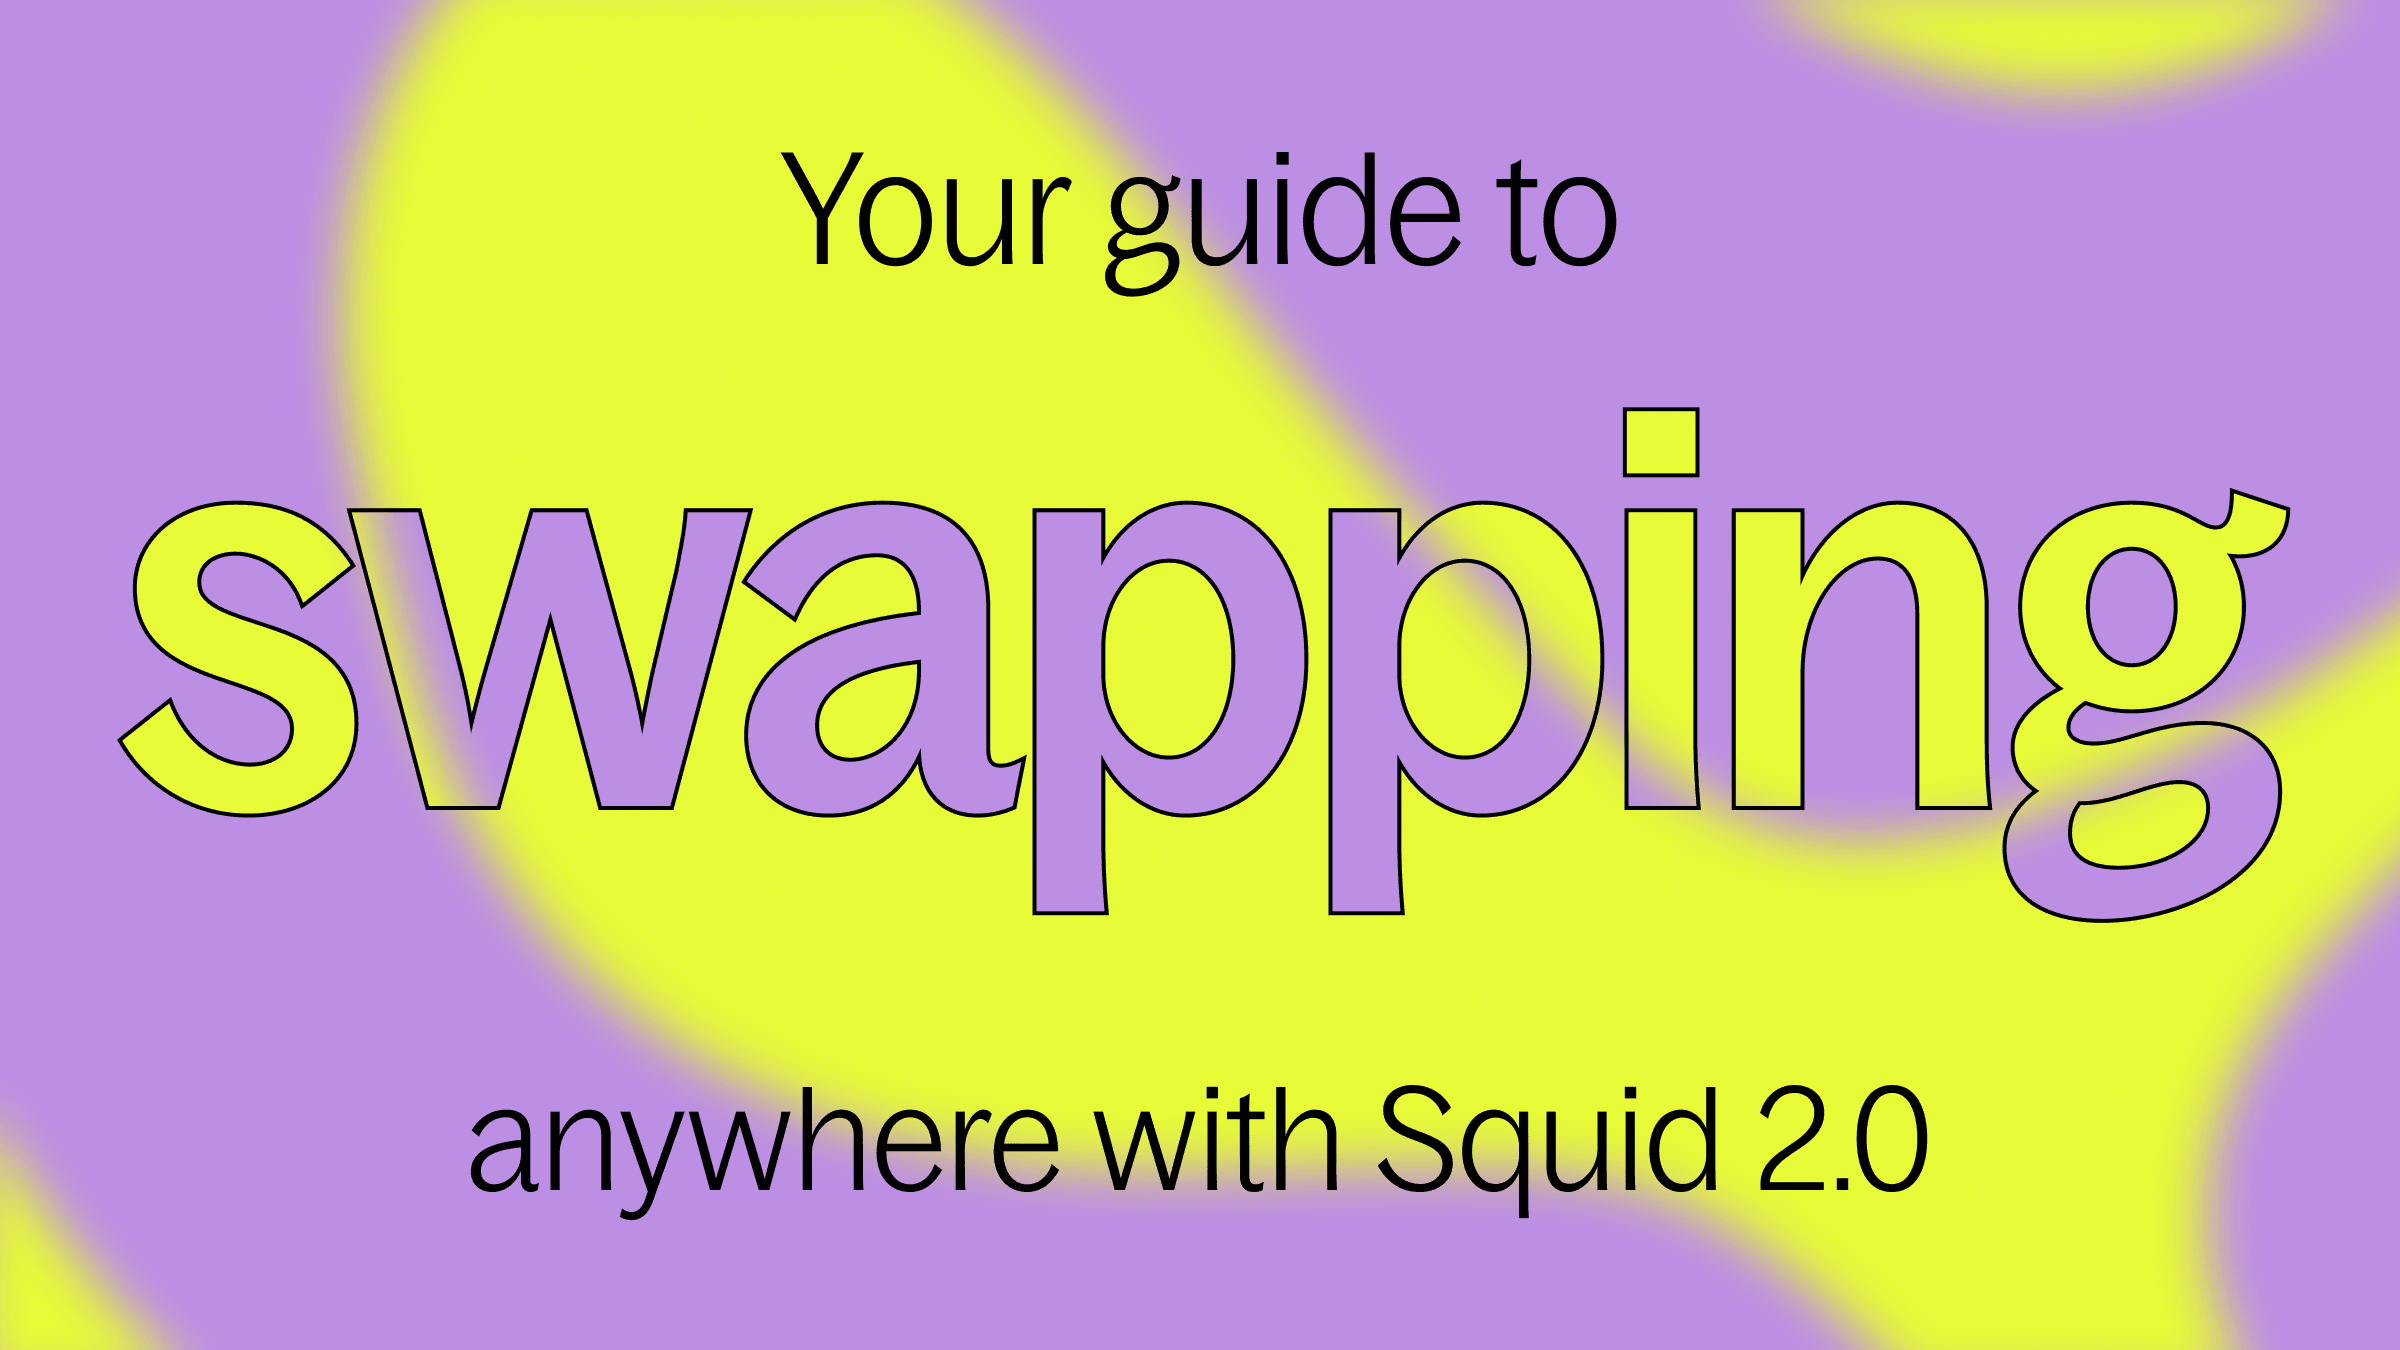
Your guide to swapping anywhere with Squid 2.0
Welcome to Squid 2.0
Squid 2.0 means more routes, better rates, same-chain swaps, 10x faster quotes, and an entirely new interface. Here’s your complete guide to Squid 2.0’s new interface. The features, the settings, the steps for selecting chains, choosing tokens, and instant swaps. Find everything you need and more, below.
Key Features of Squid 2.0
Squid 2.0’s new interface sparkles at first sight, but the more you look, the more you’ll find! Here are the key features of our redesign:
Squid 2.0 Glossary
You can take a tour of Squid 2.0 by visiting app.squidrouter.com, and find everything you need to know by looking below. Toggle to see each feature in the section below!
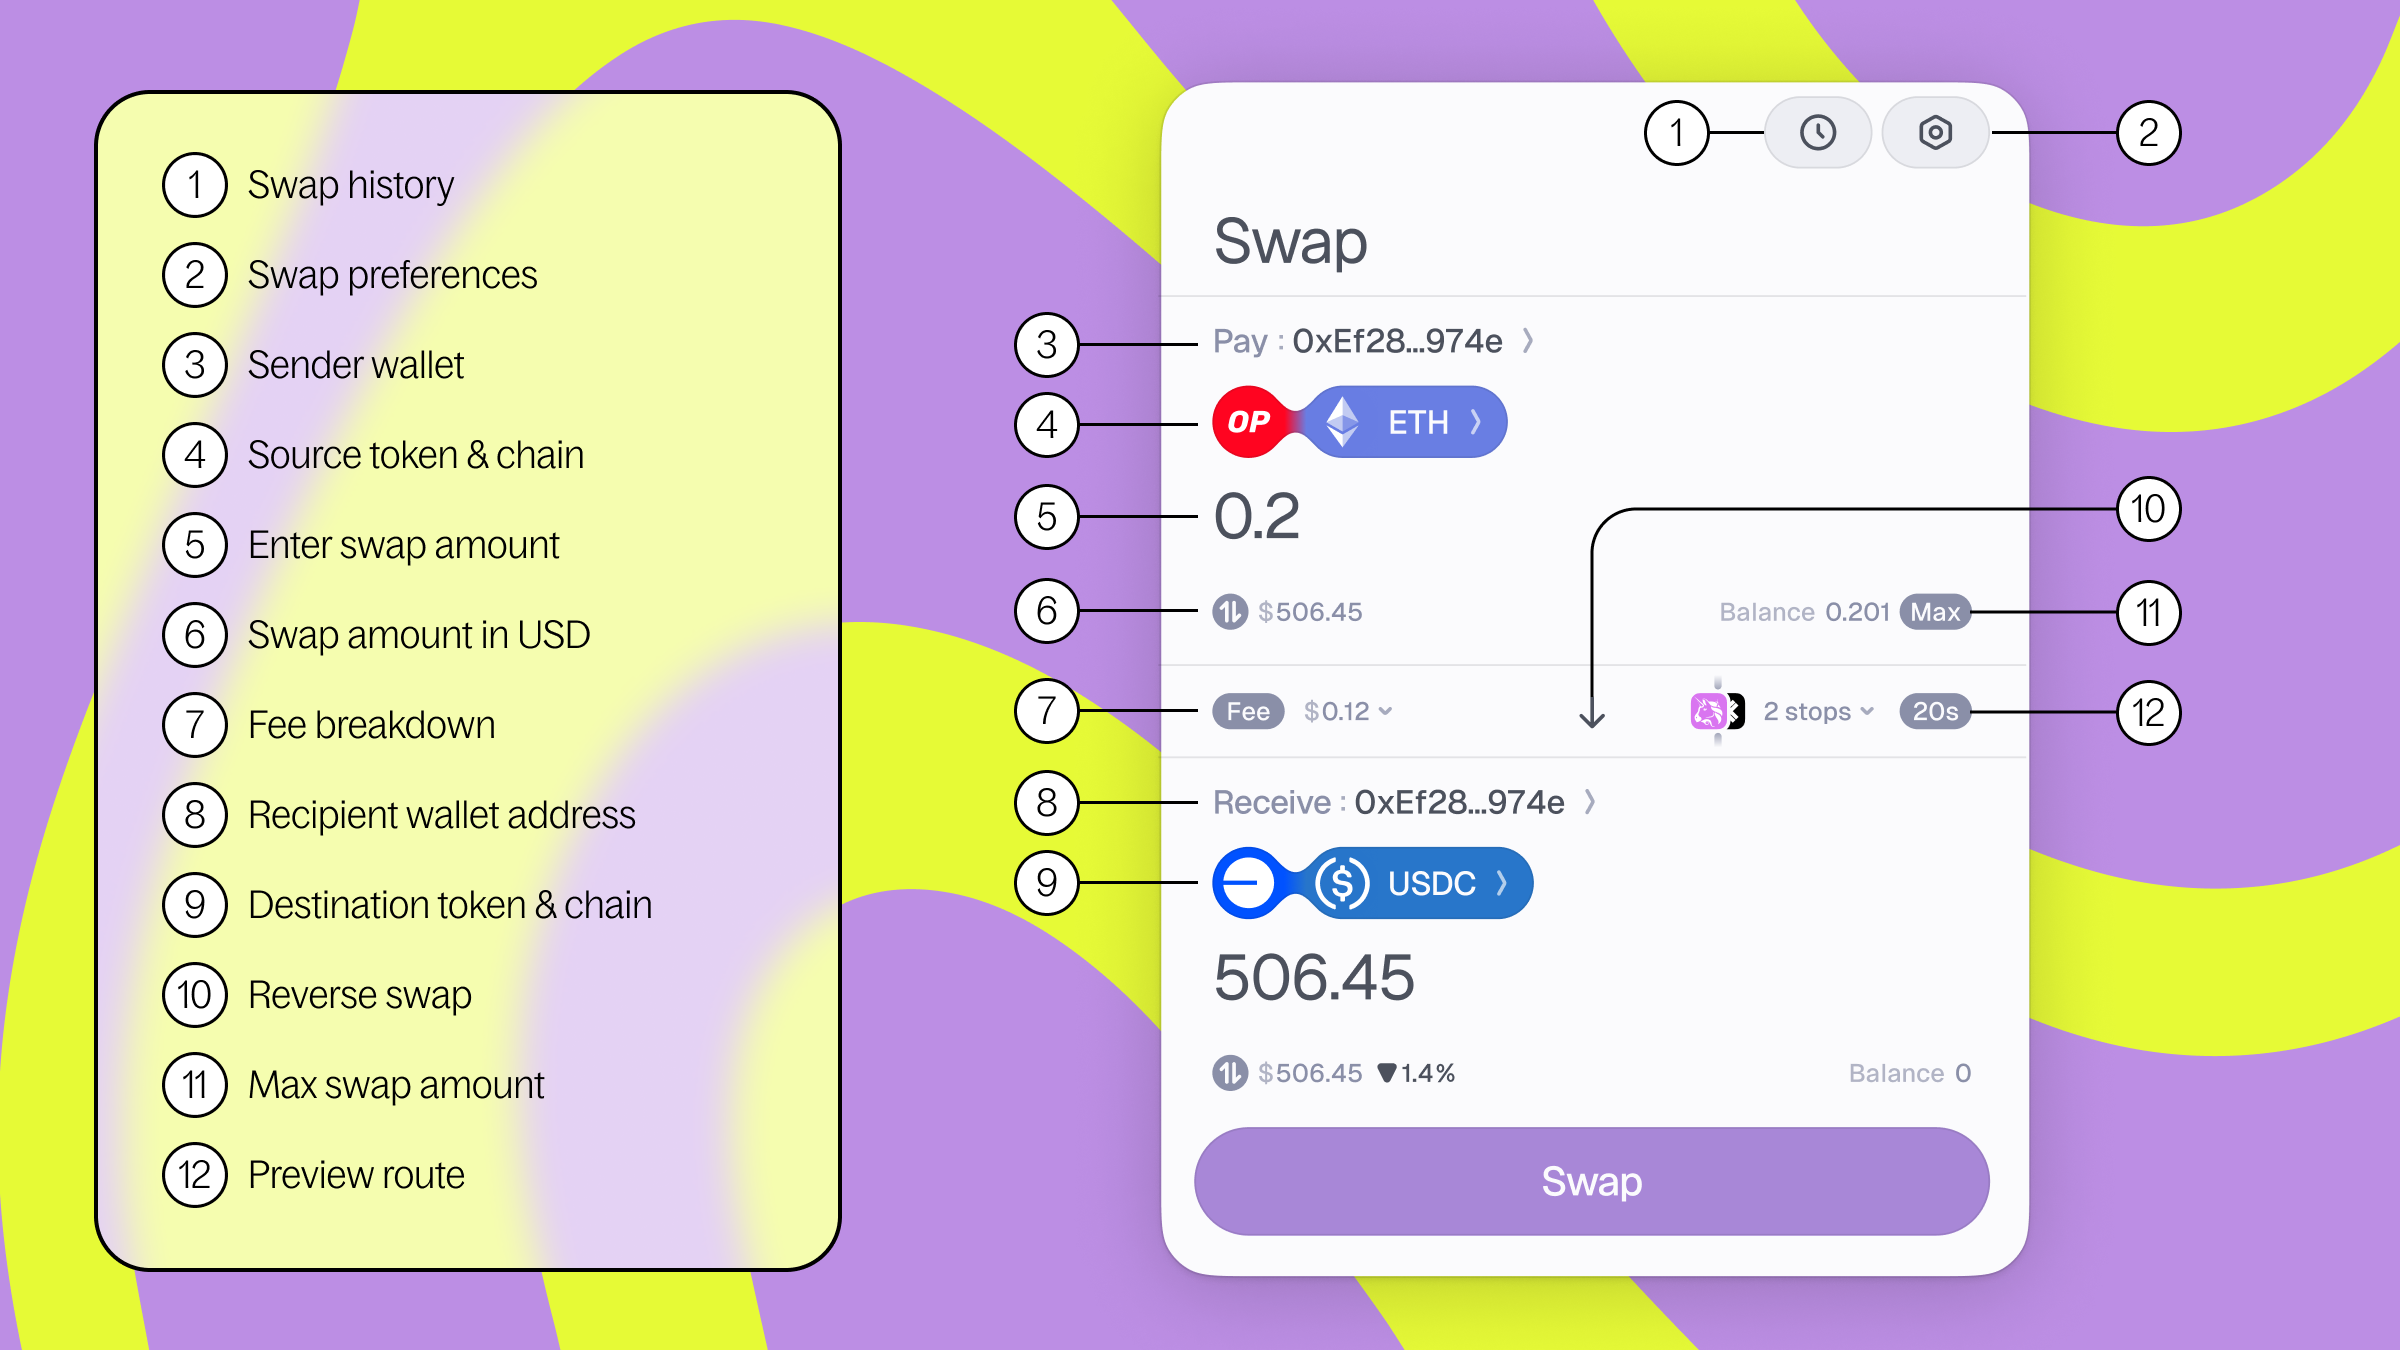
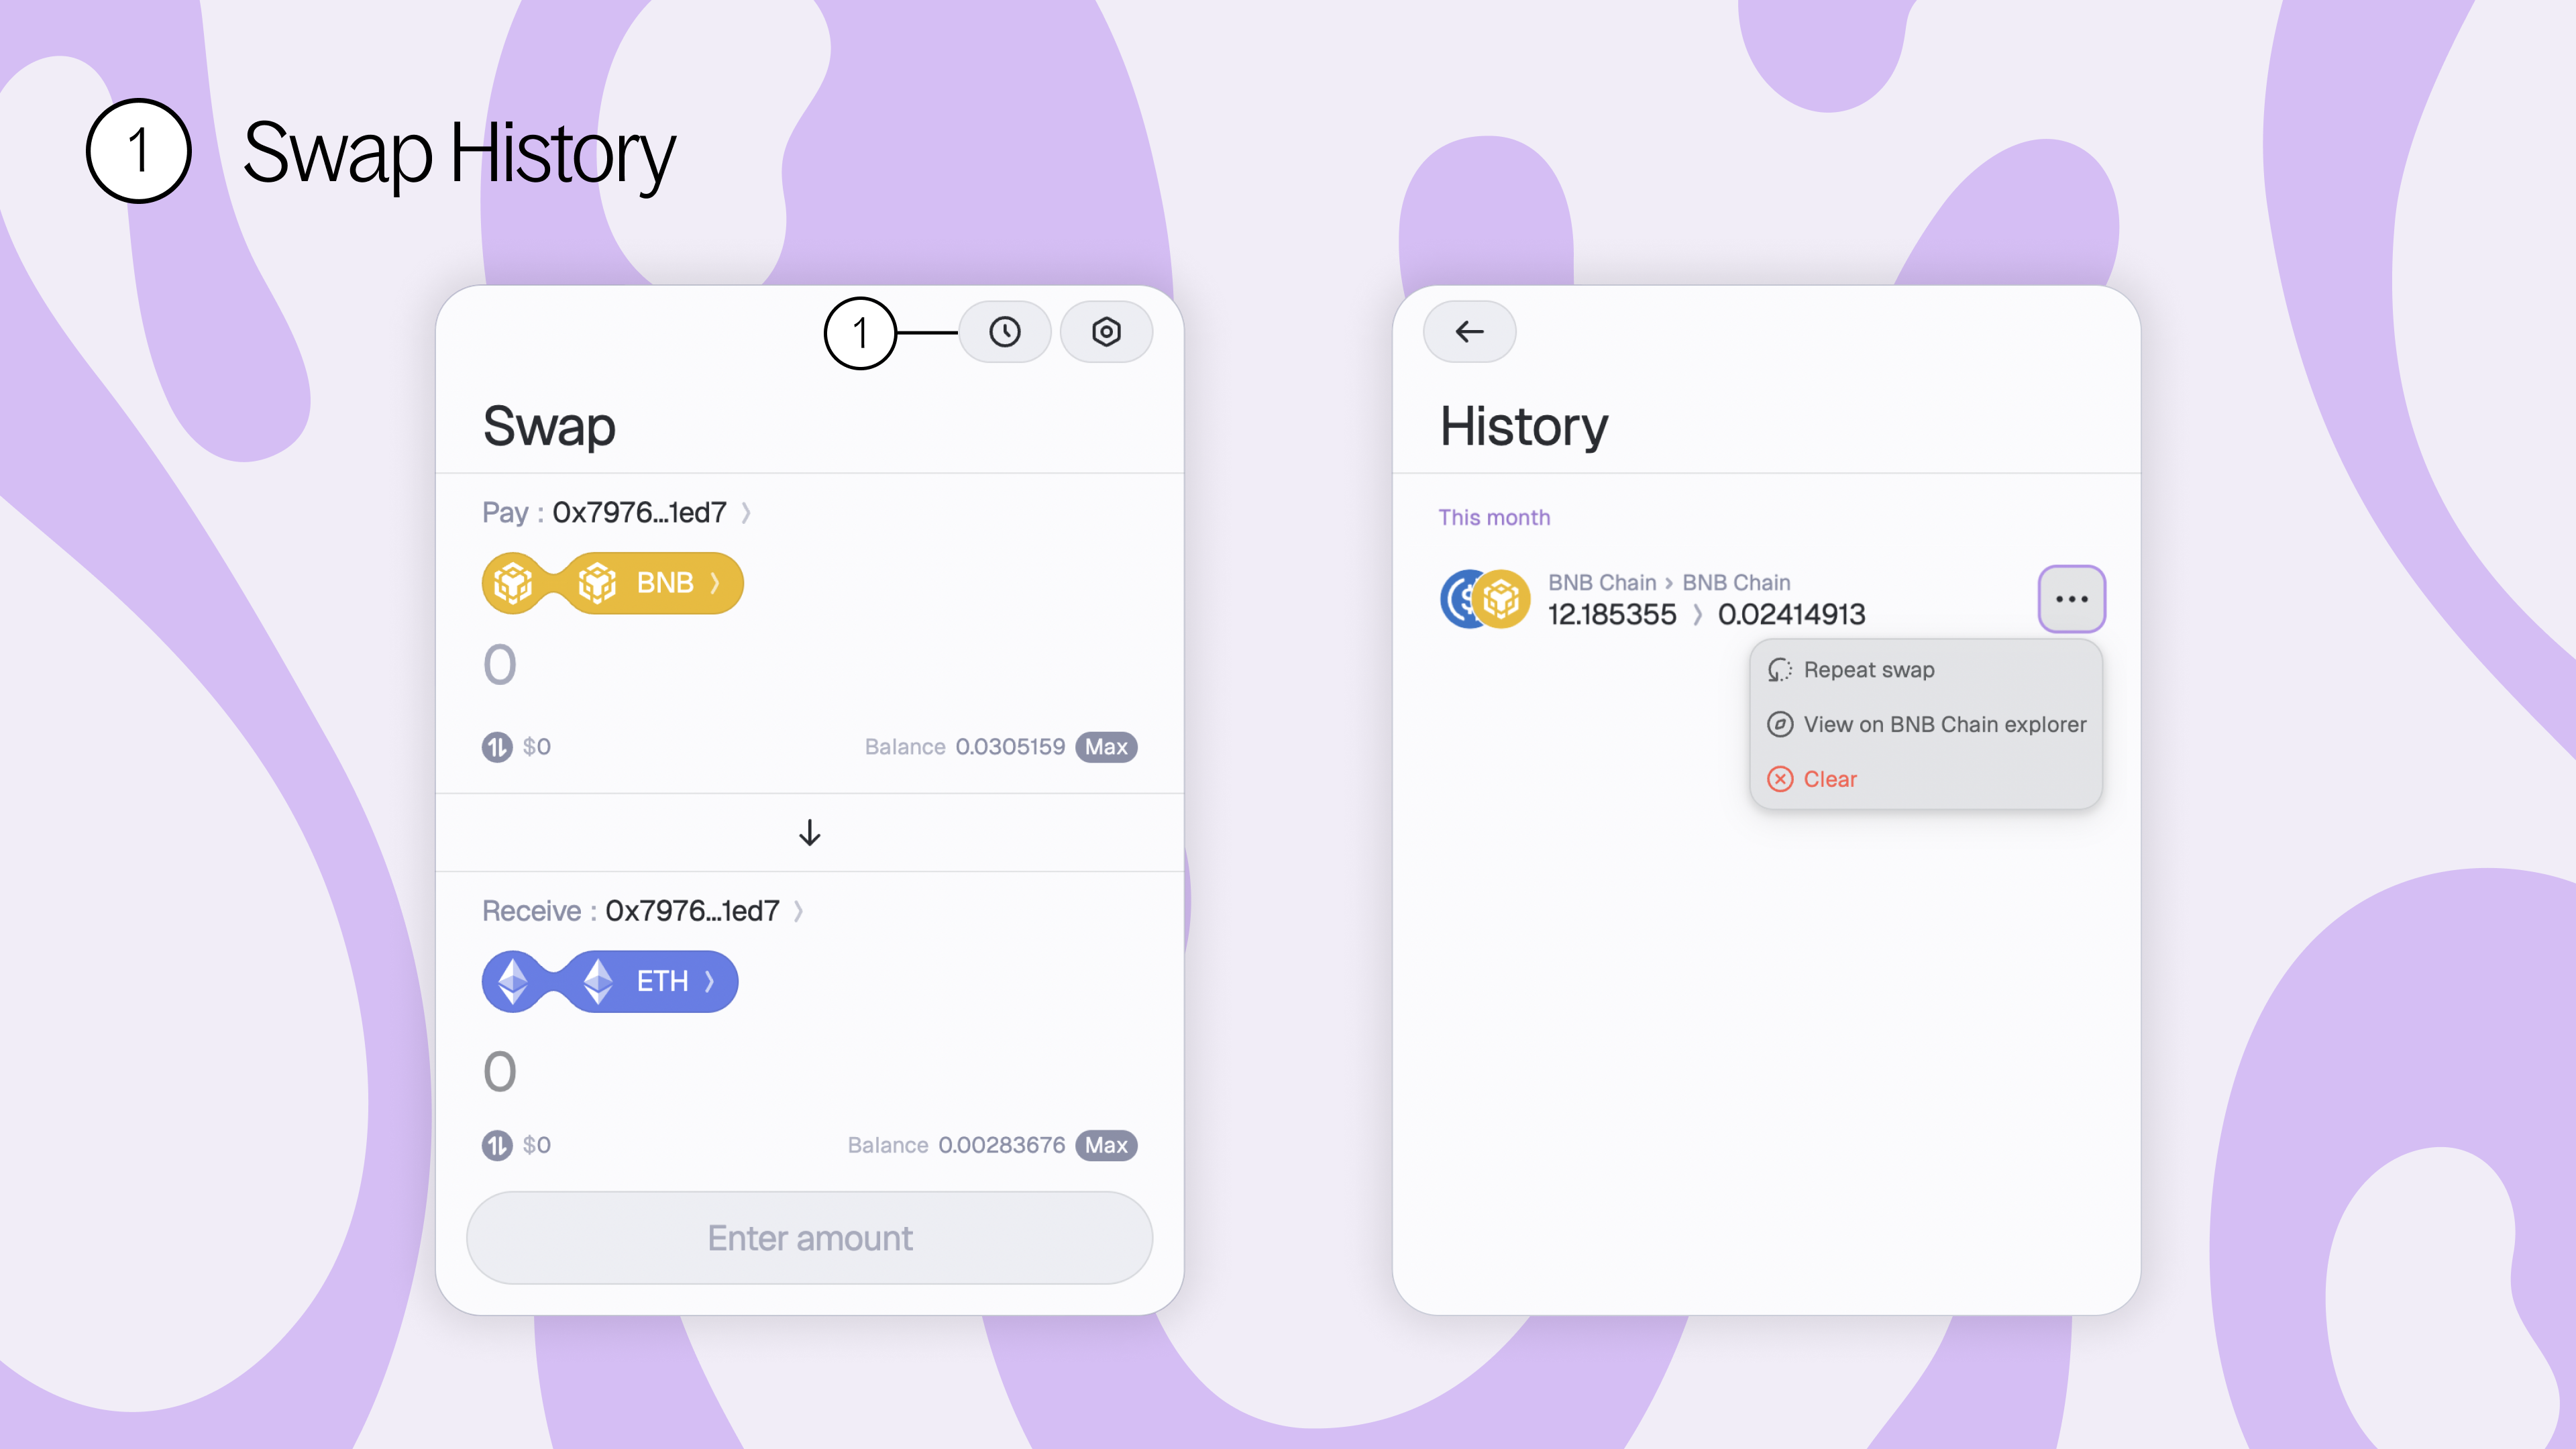
1. Swap history - connect your wallet and view your entire transaction history on Squid 2.0. View your past transactions on Axelarscan or repeat swaps in just 1-click.
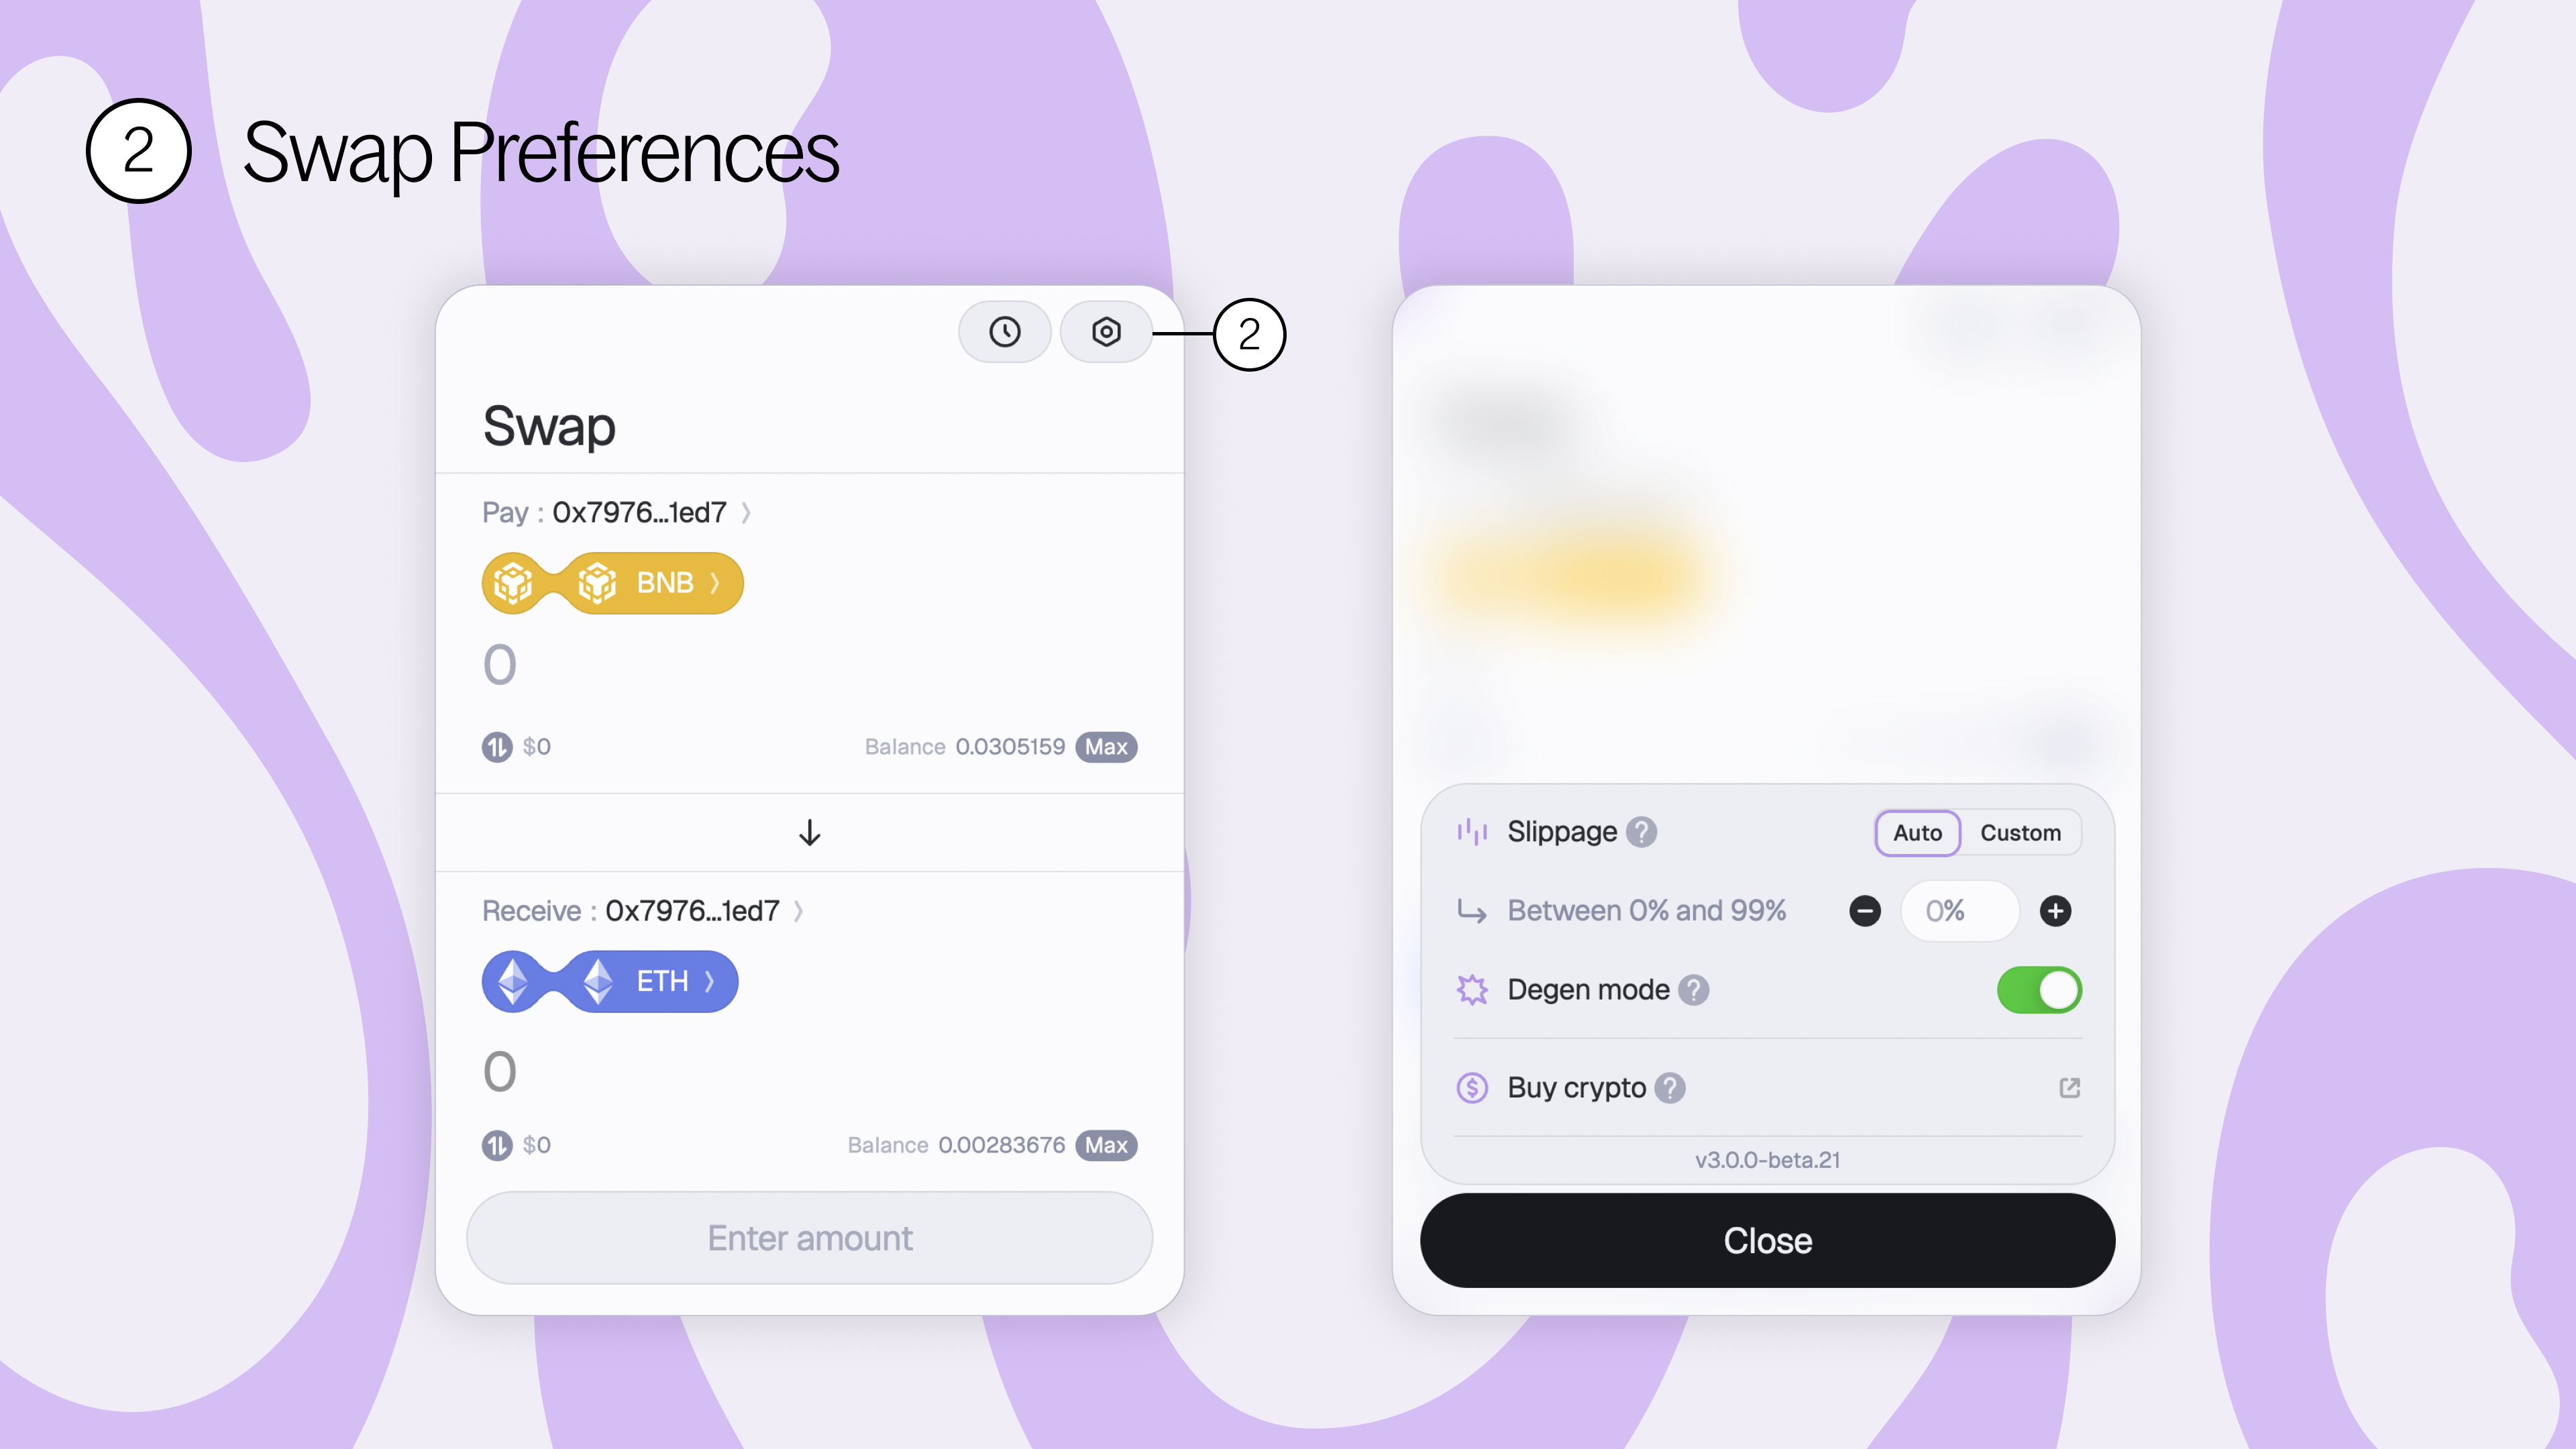
2. Swap preferences - customize your swap preferences how you like best. You can set custom slippage, toggle on Degen mode, or buy crypto here.
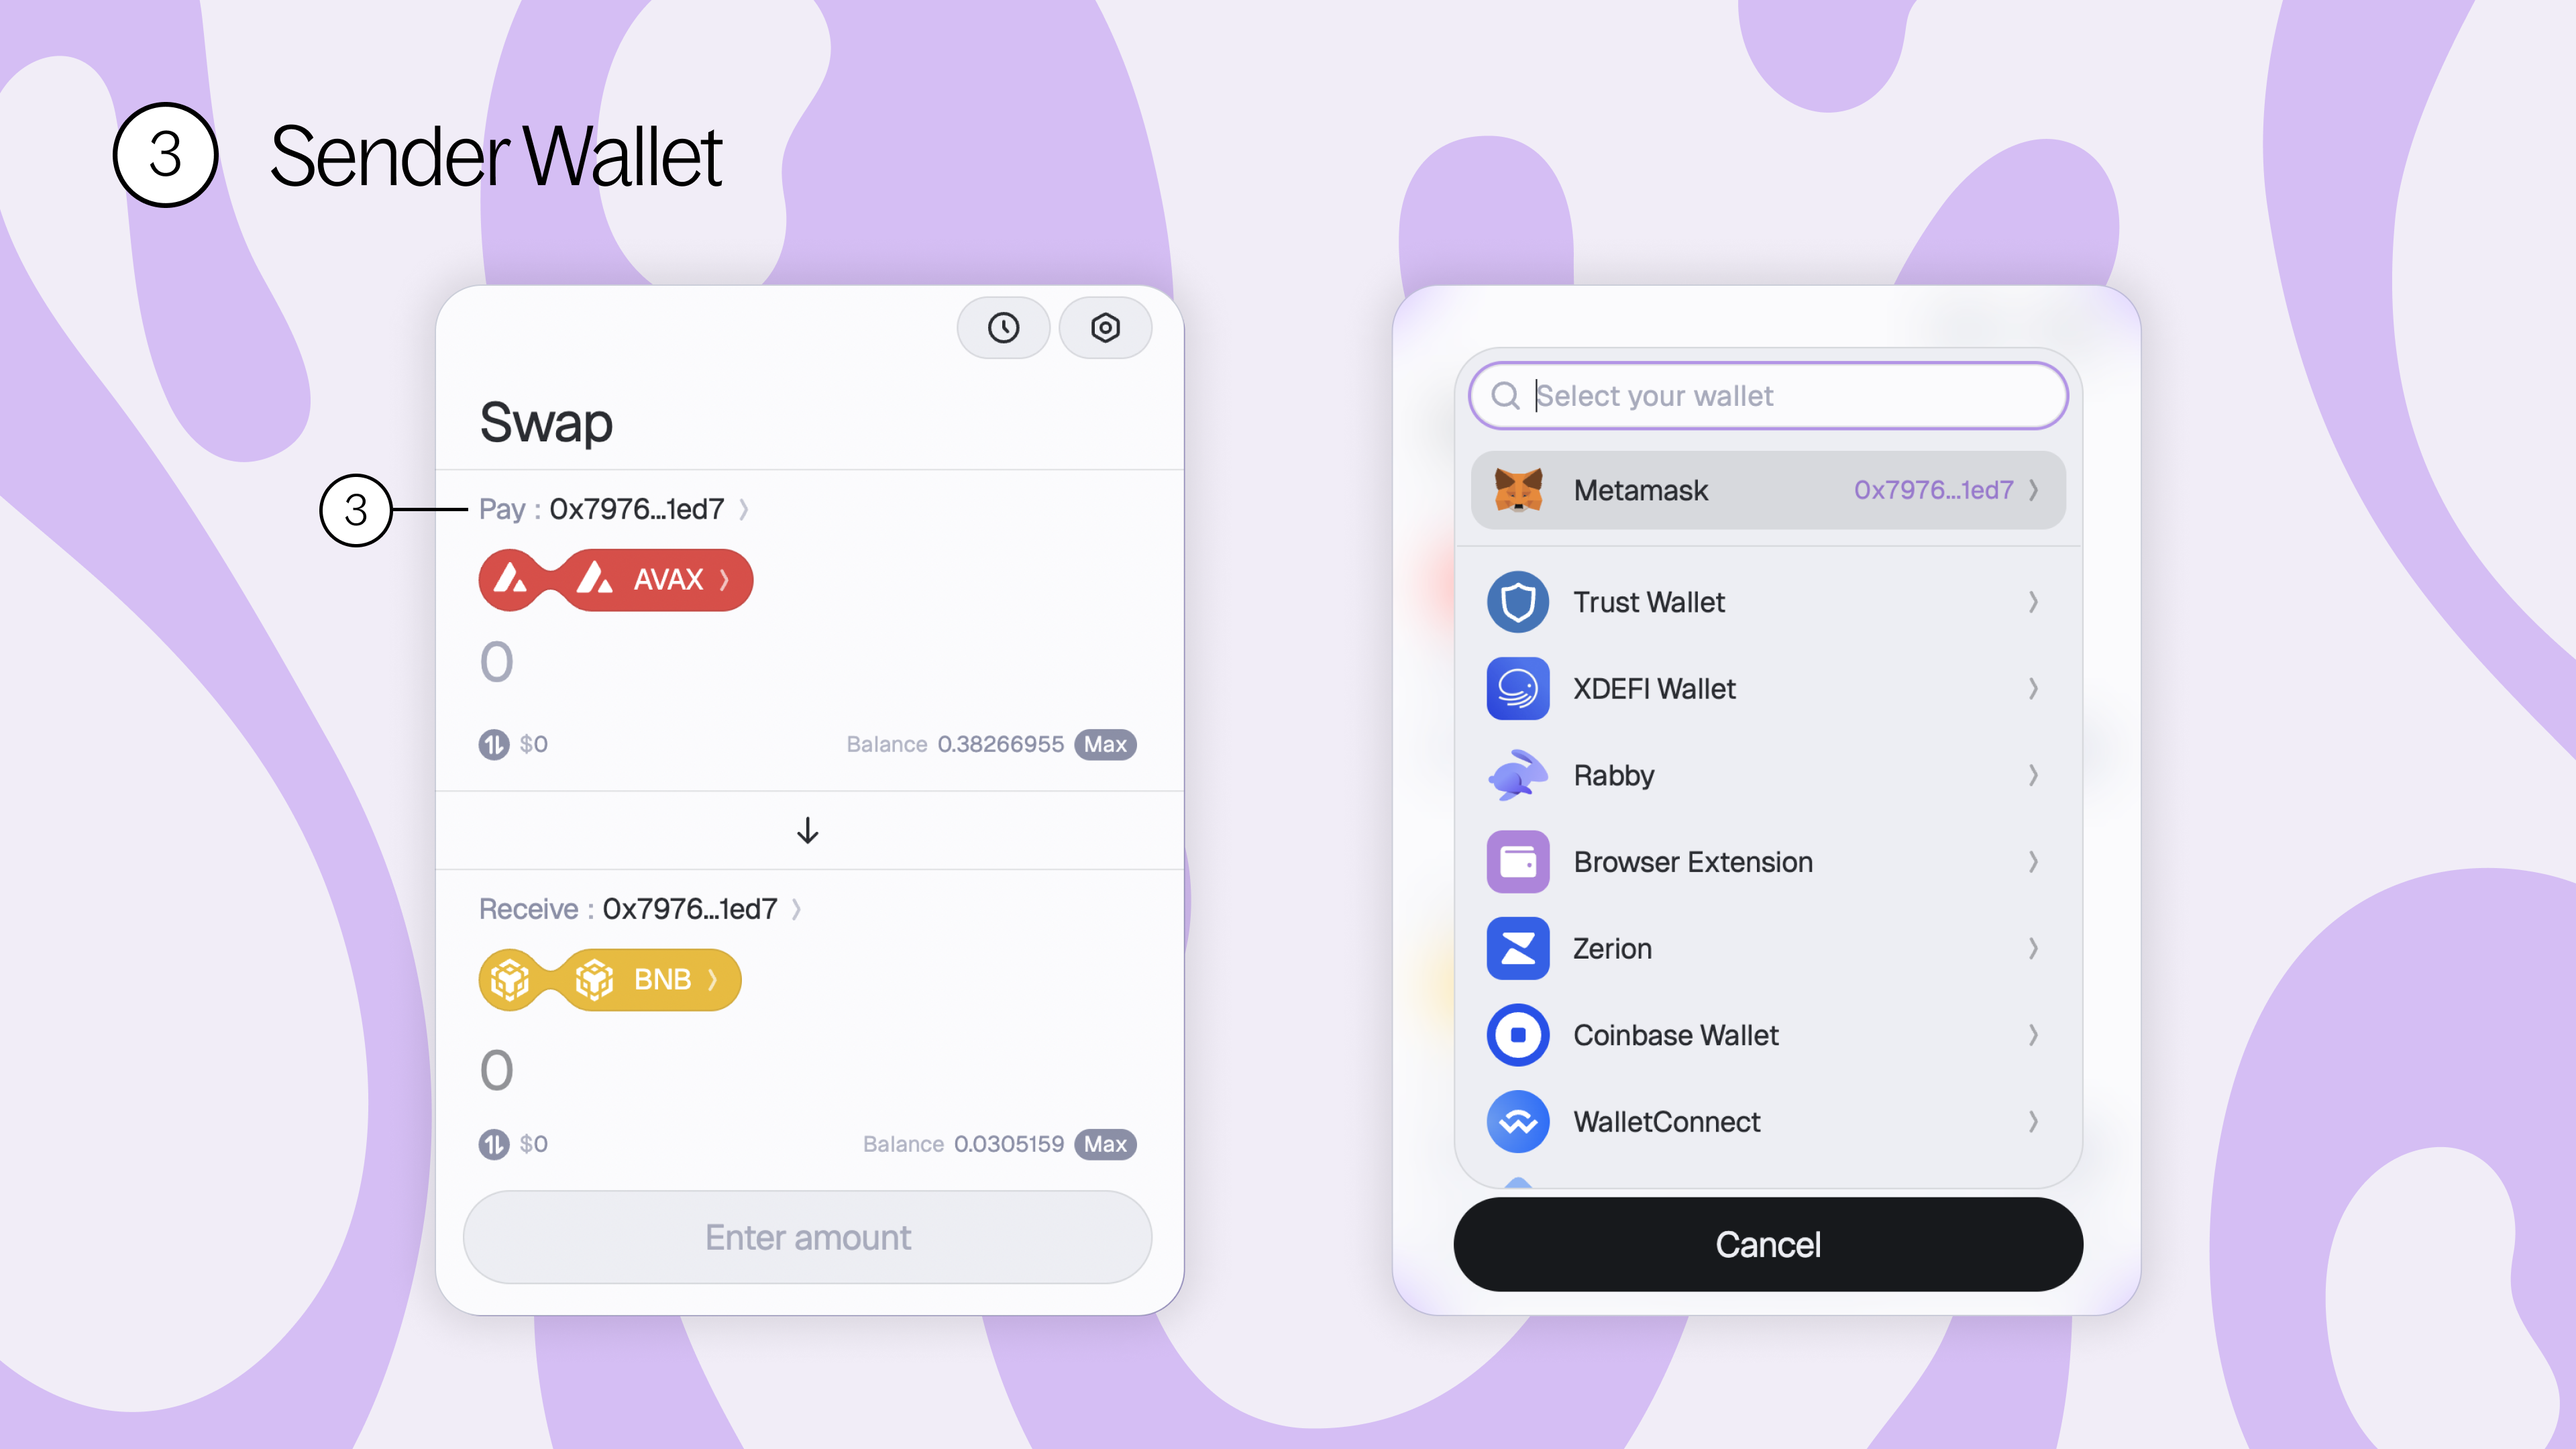
3. Sender wallet - this is the wallet address you’ll be swapping from. Make sure you have the tokens on the source chain before attempting to swap.
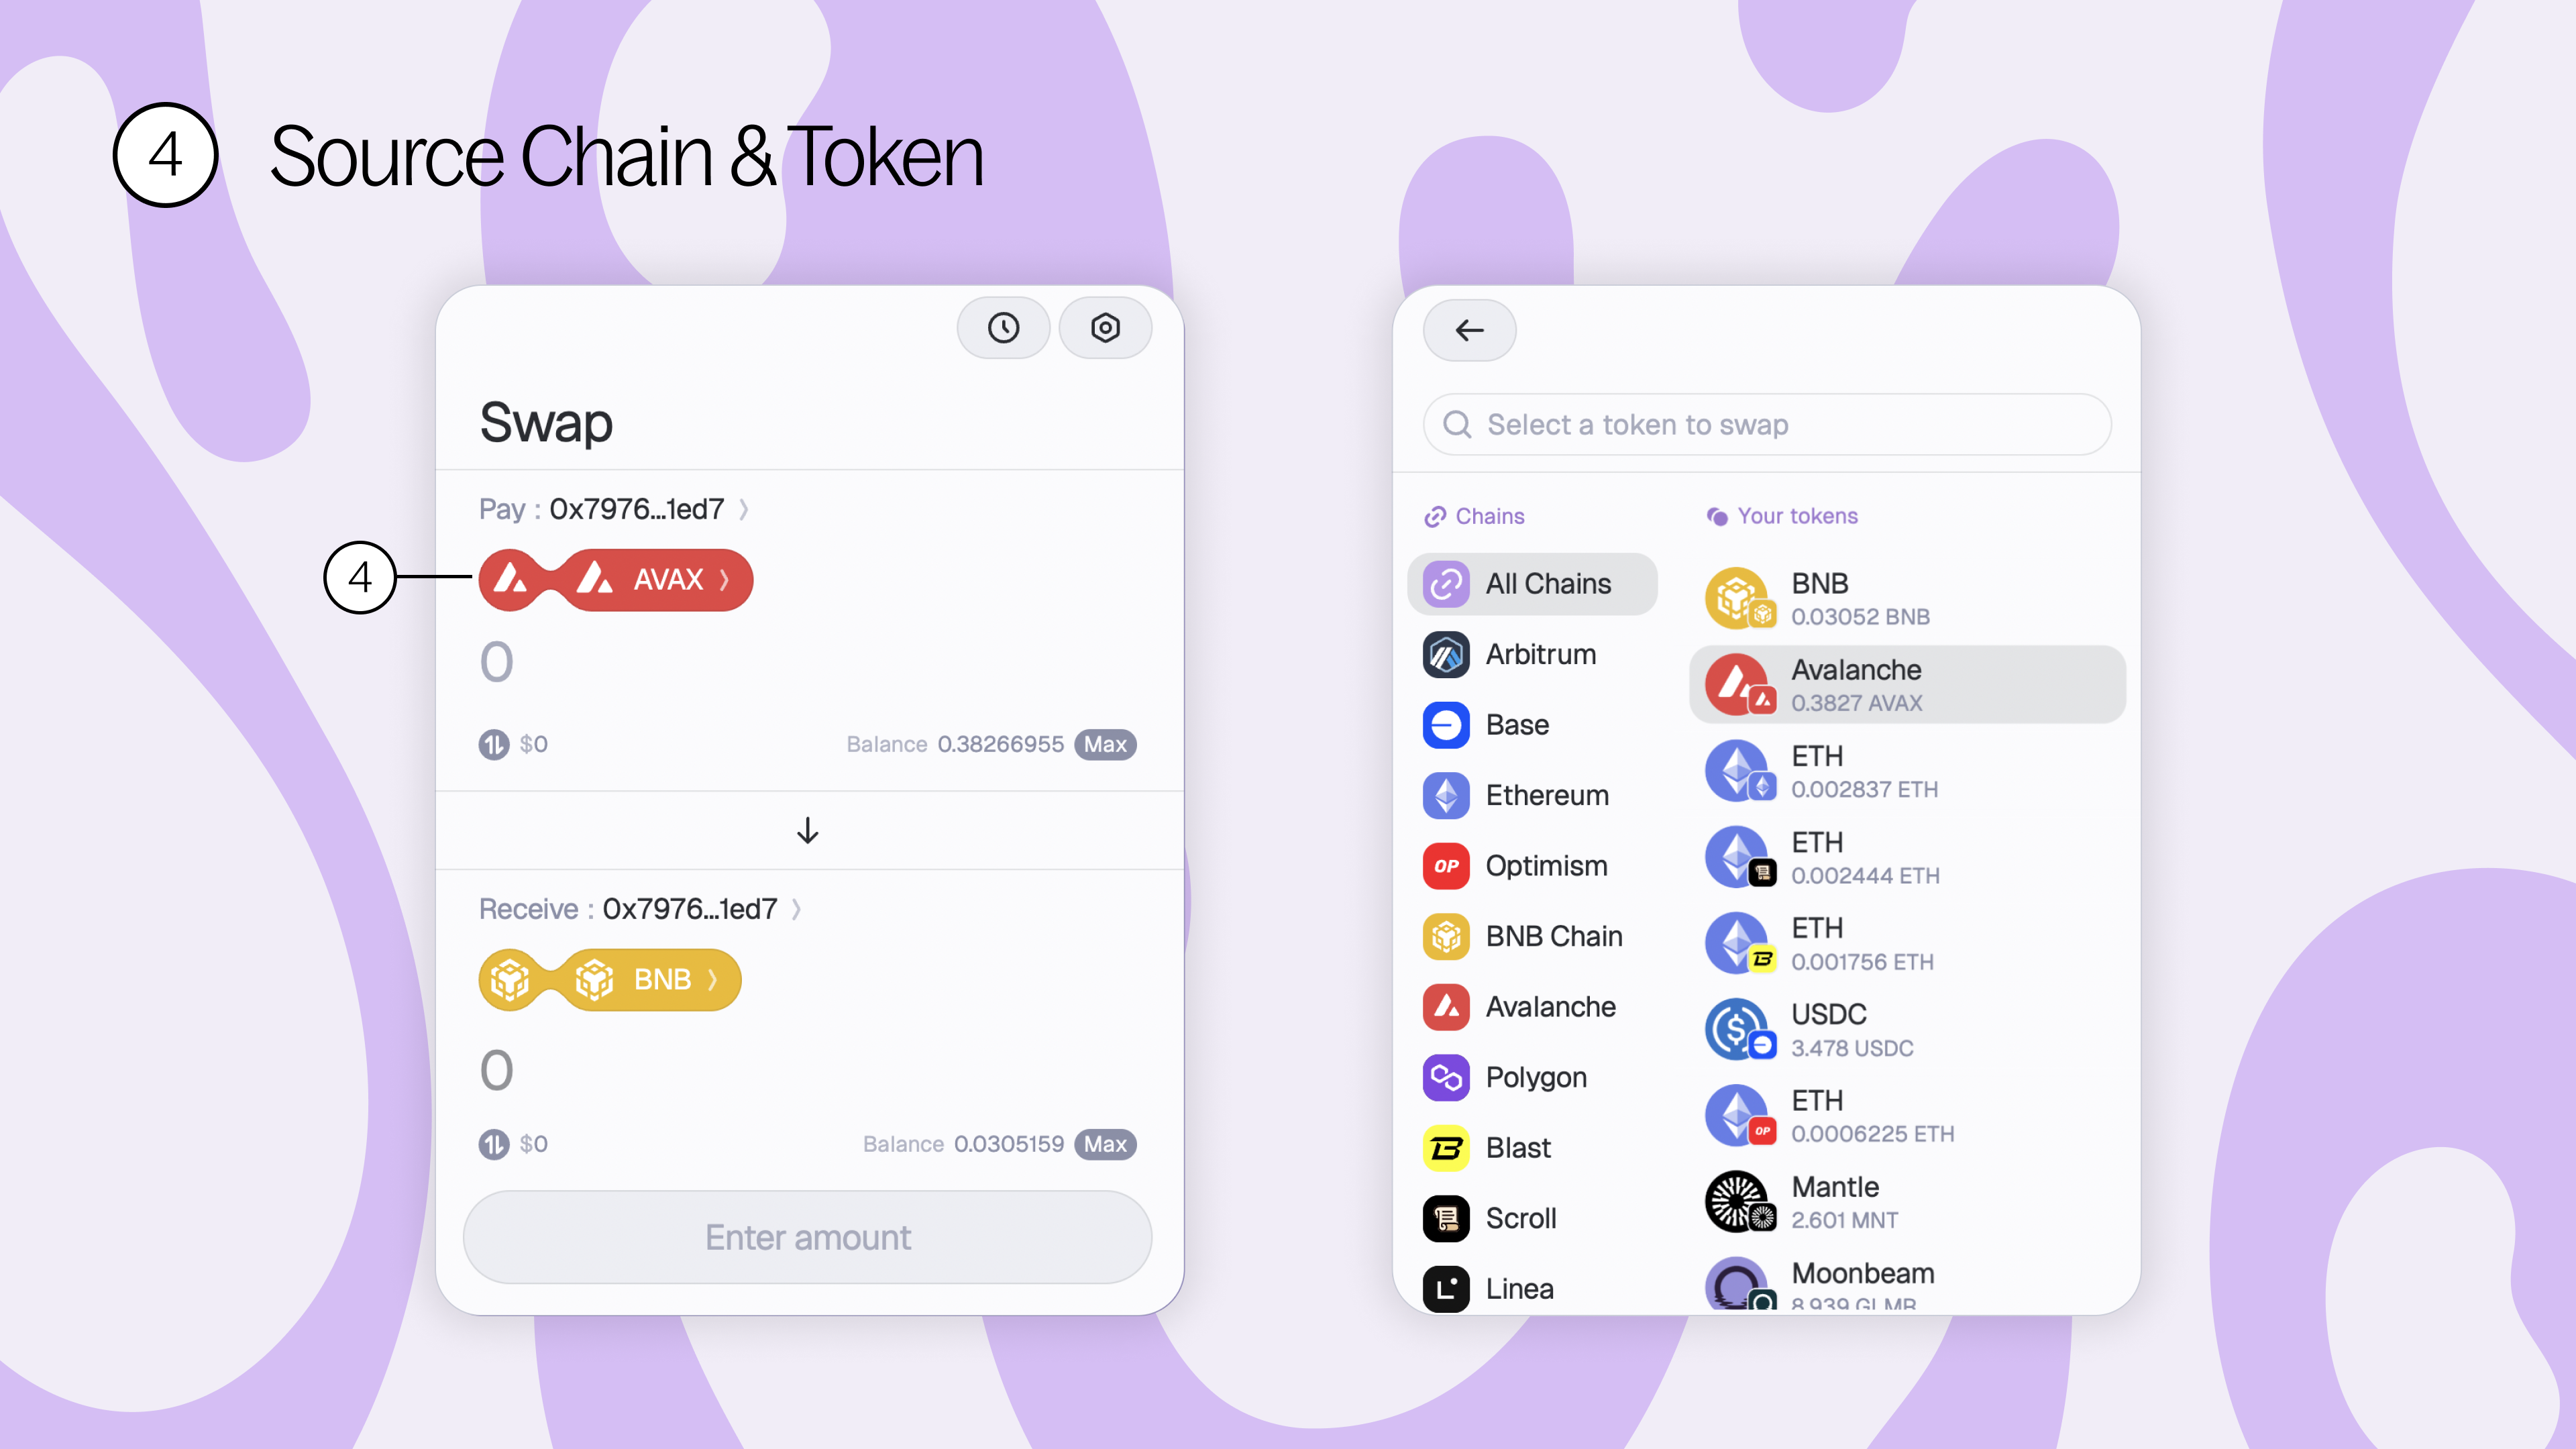
4. Source chain & token - where you can select your source chain and tokens.
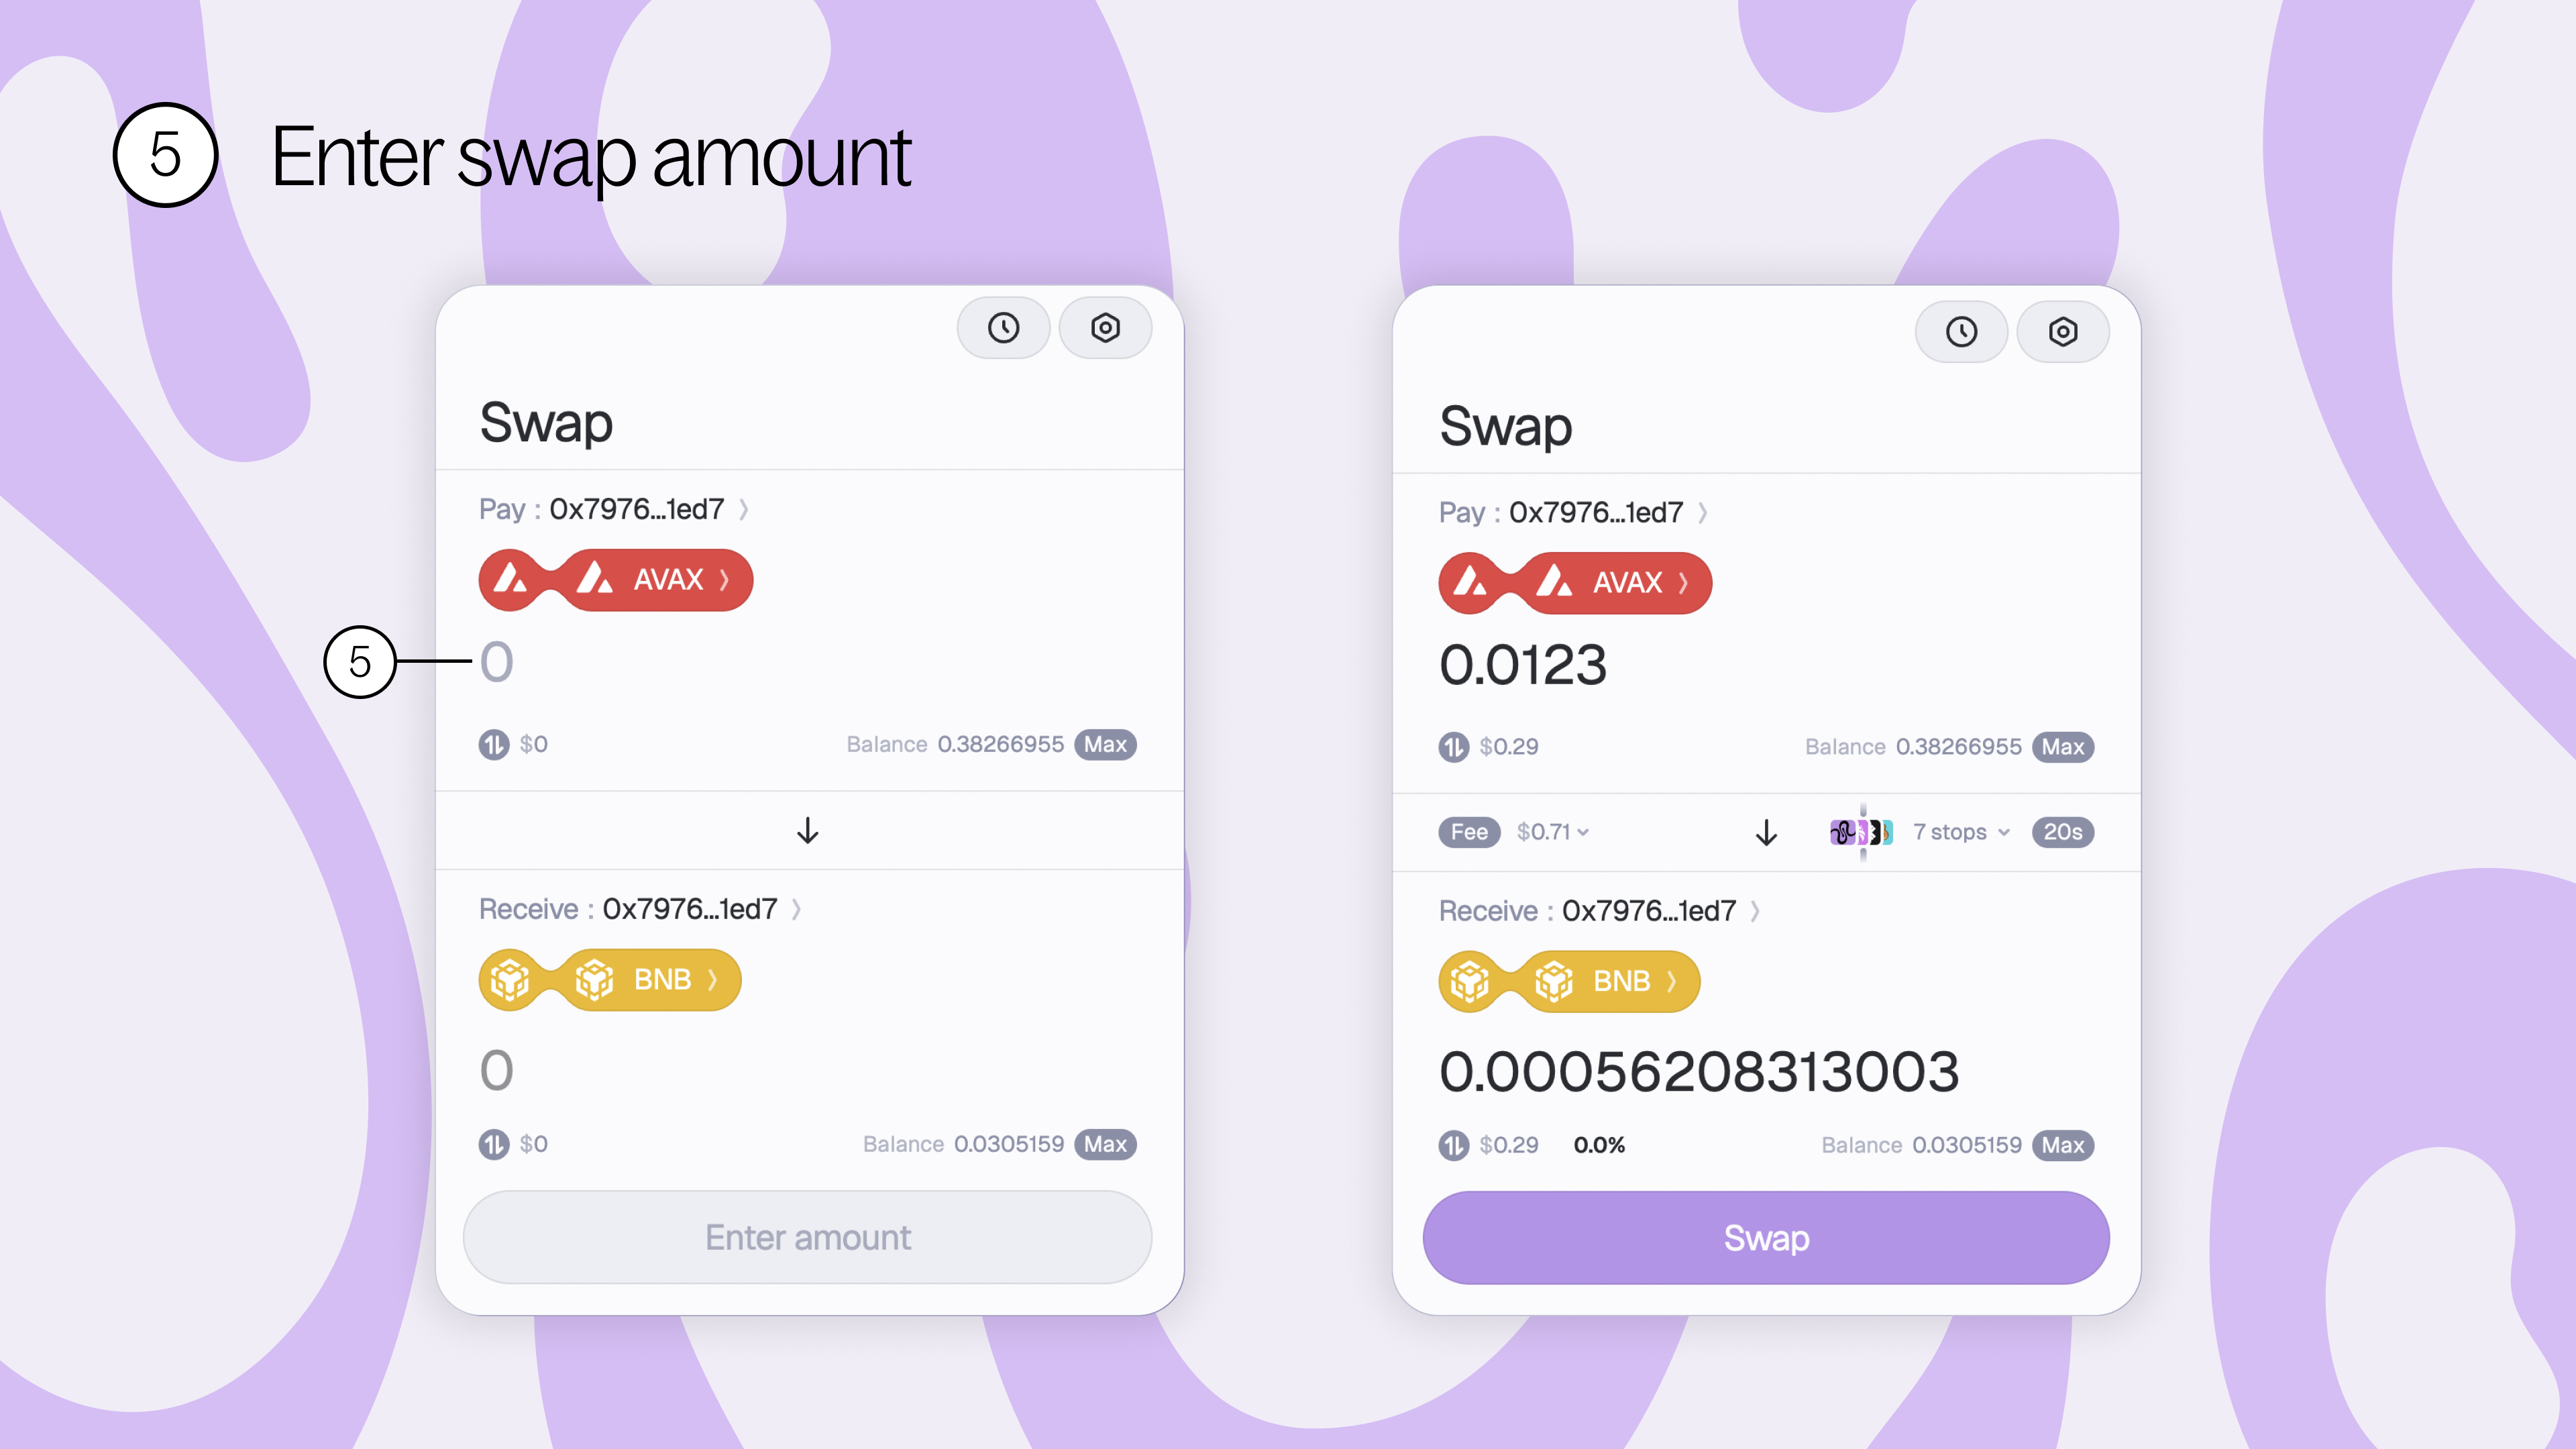
5. Enter swap amount - enter the amount of source tokens you’d like to swap here.
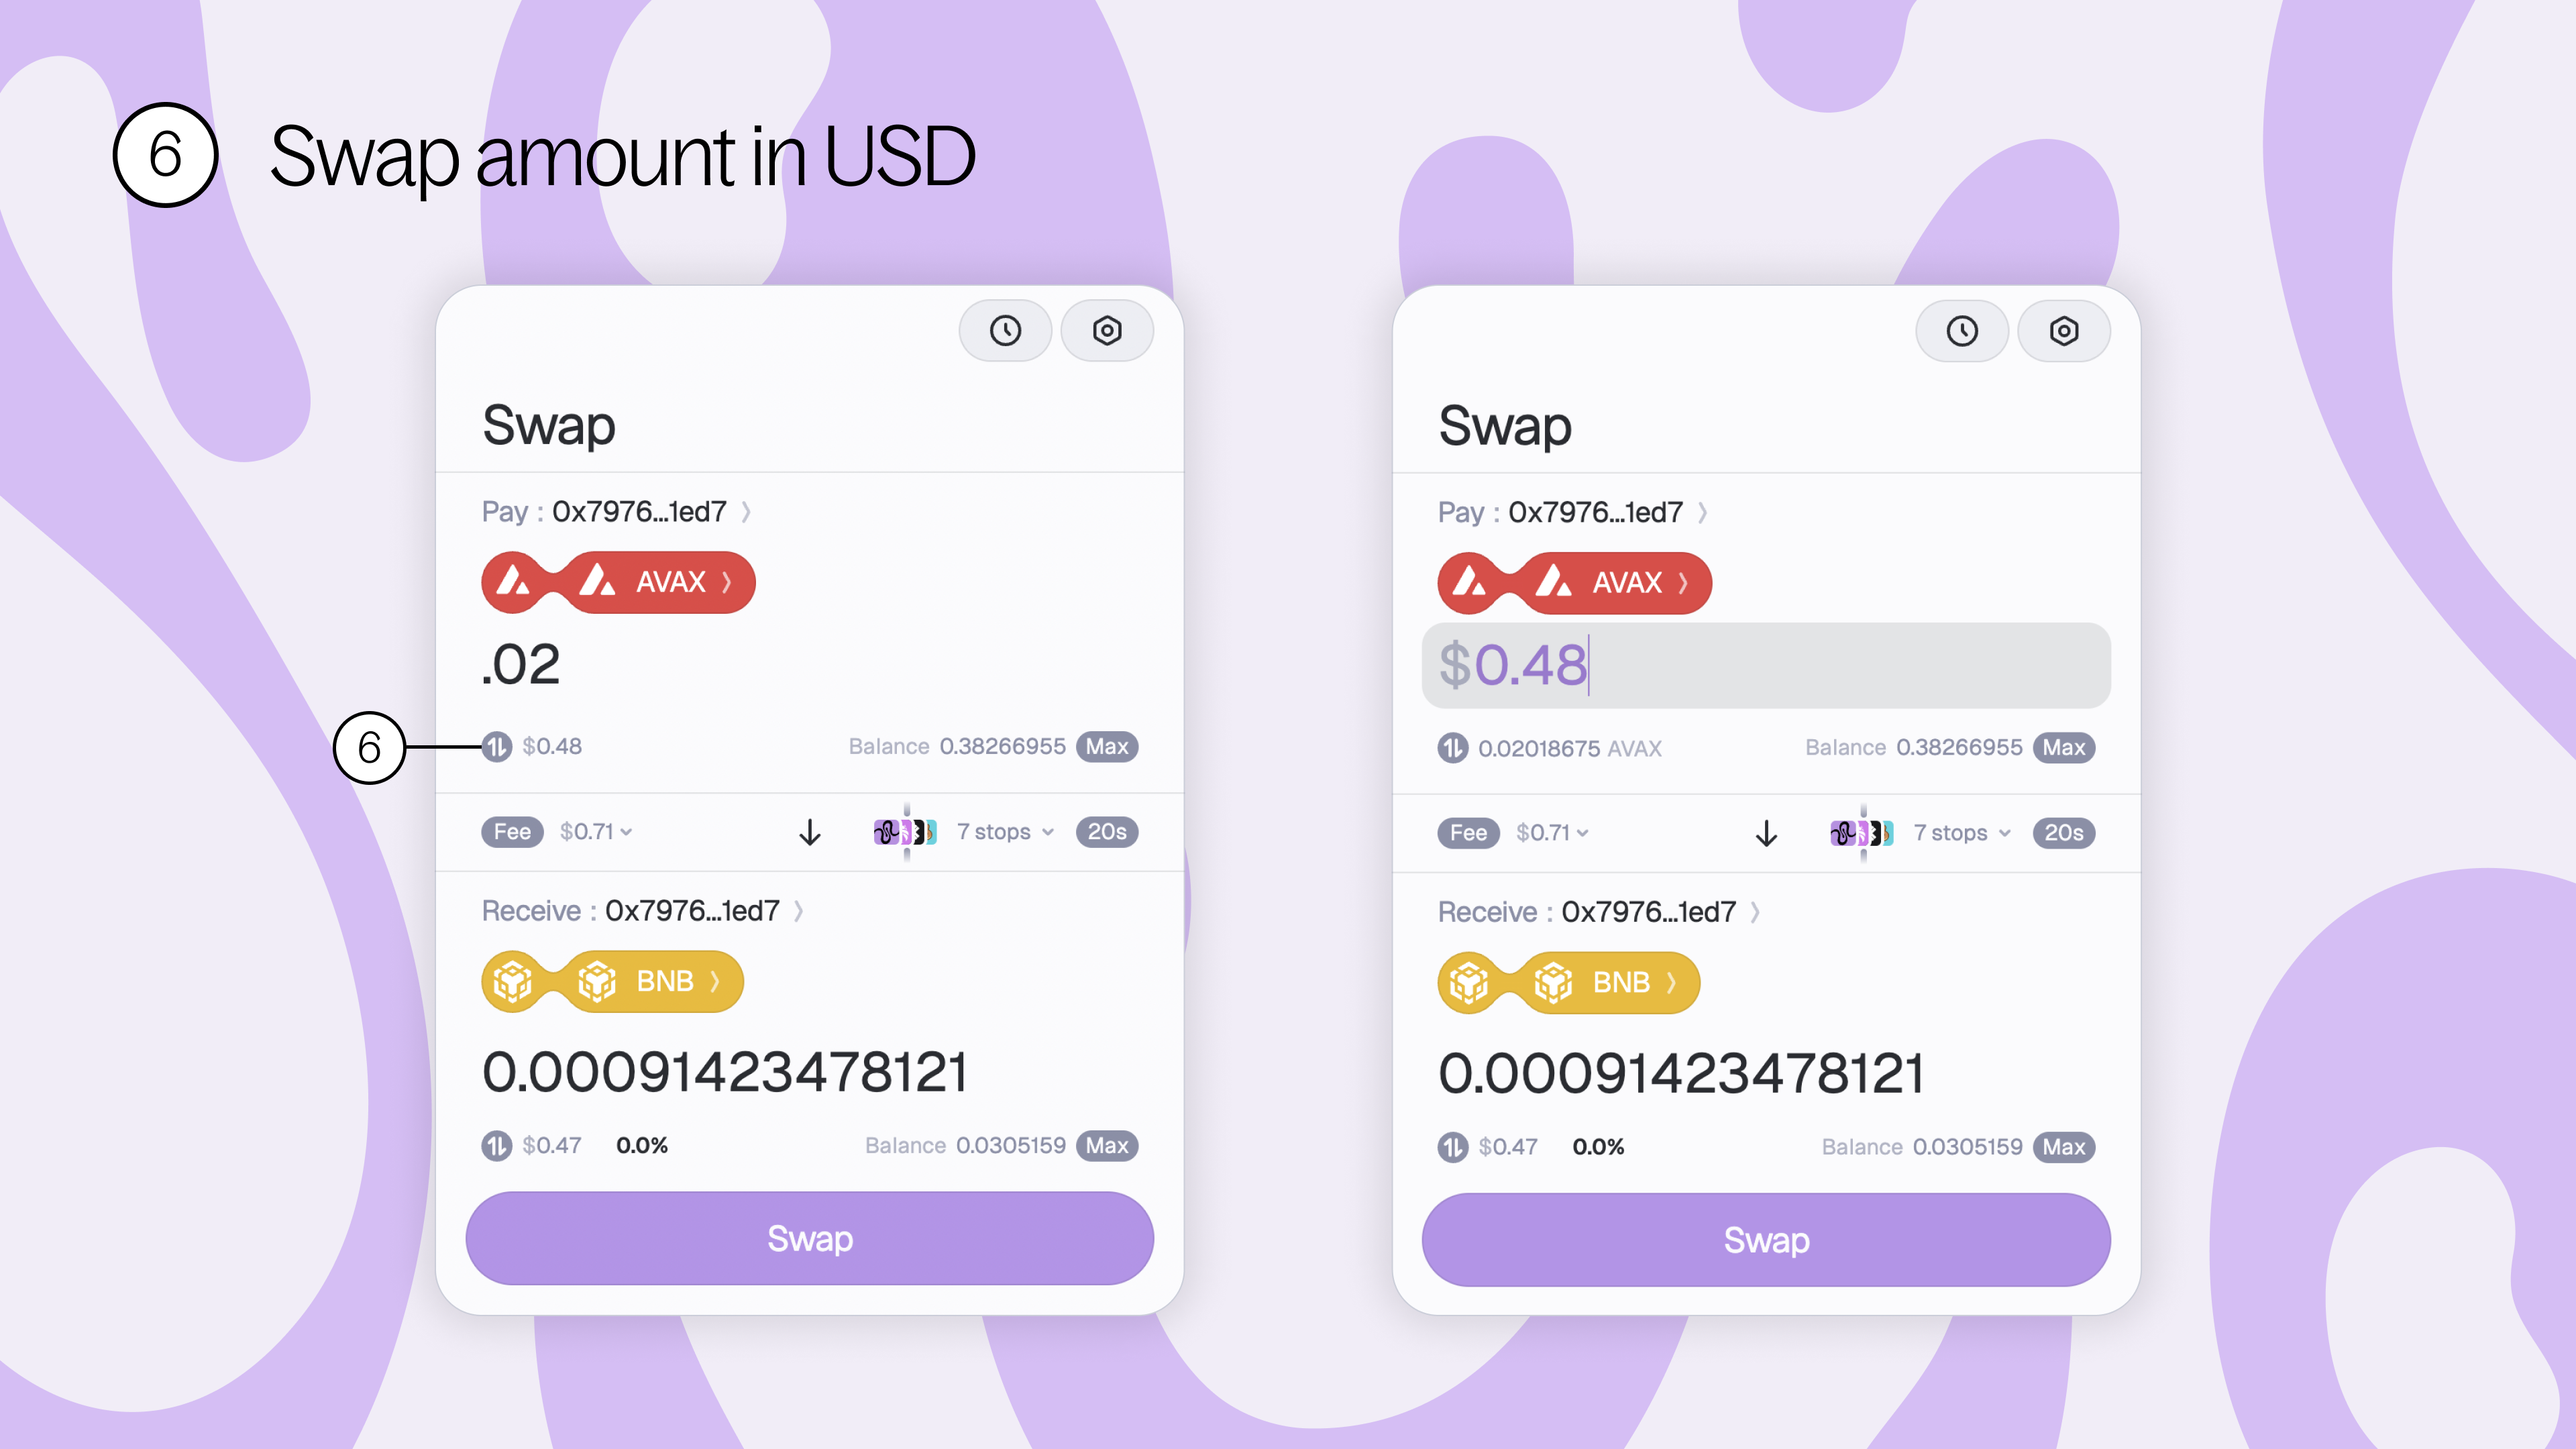
6. Swap amount in USD - toggle to see your swap amount in USD, from crypto to USD and back again.
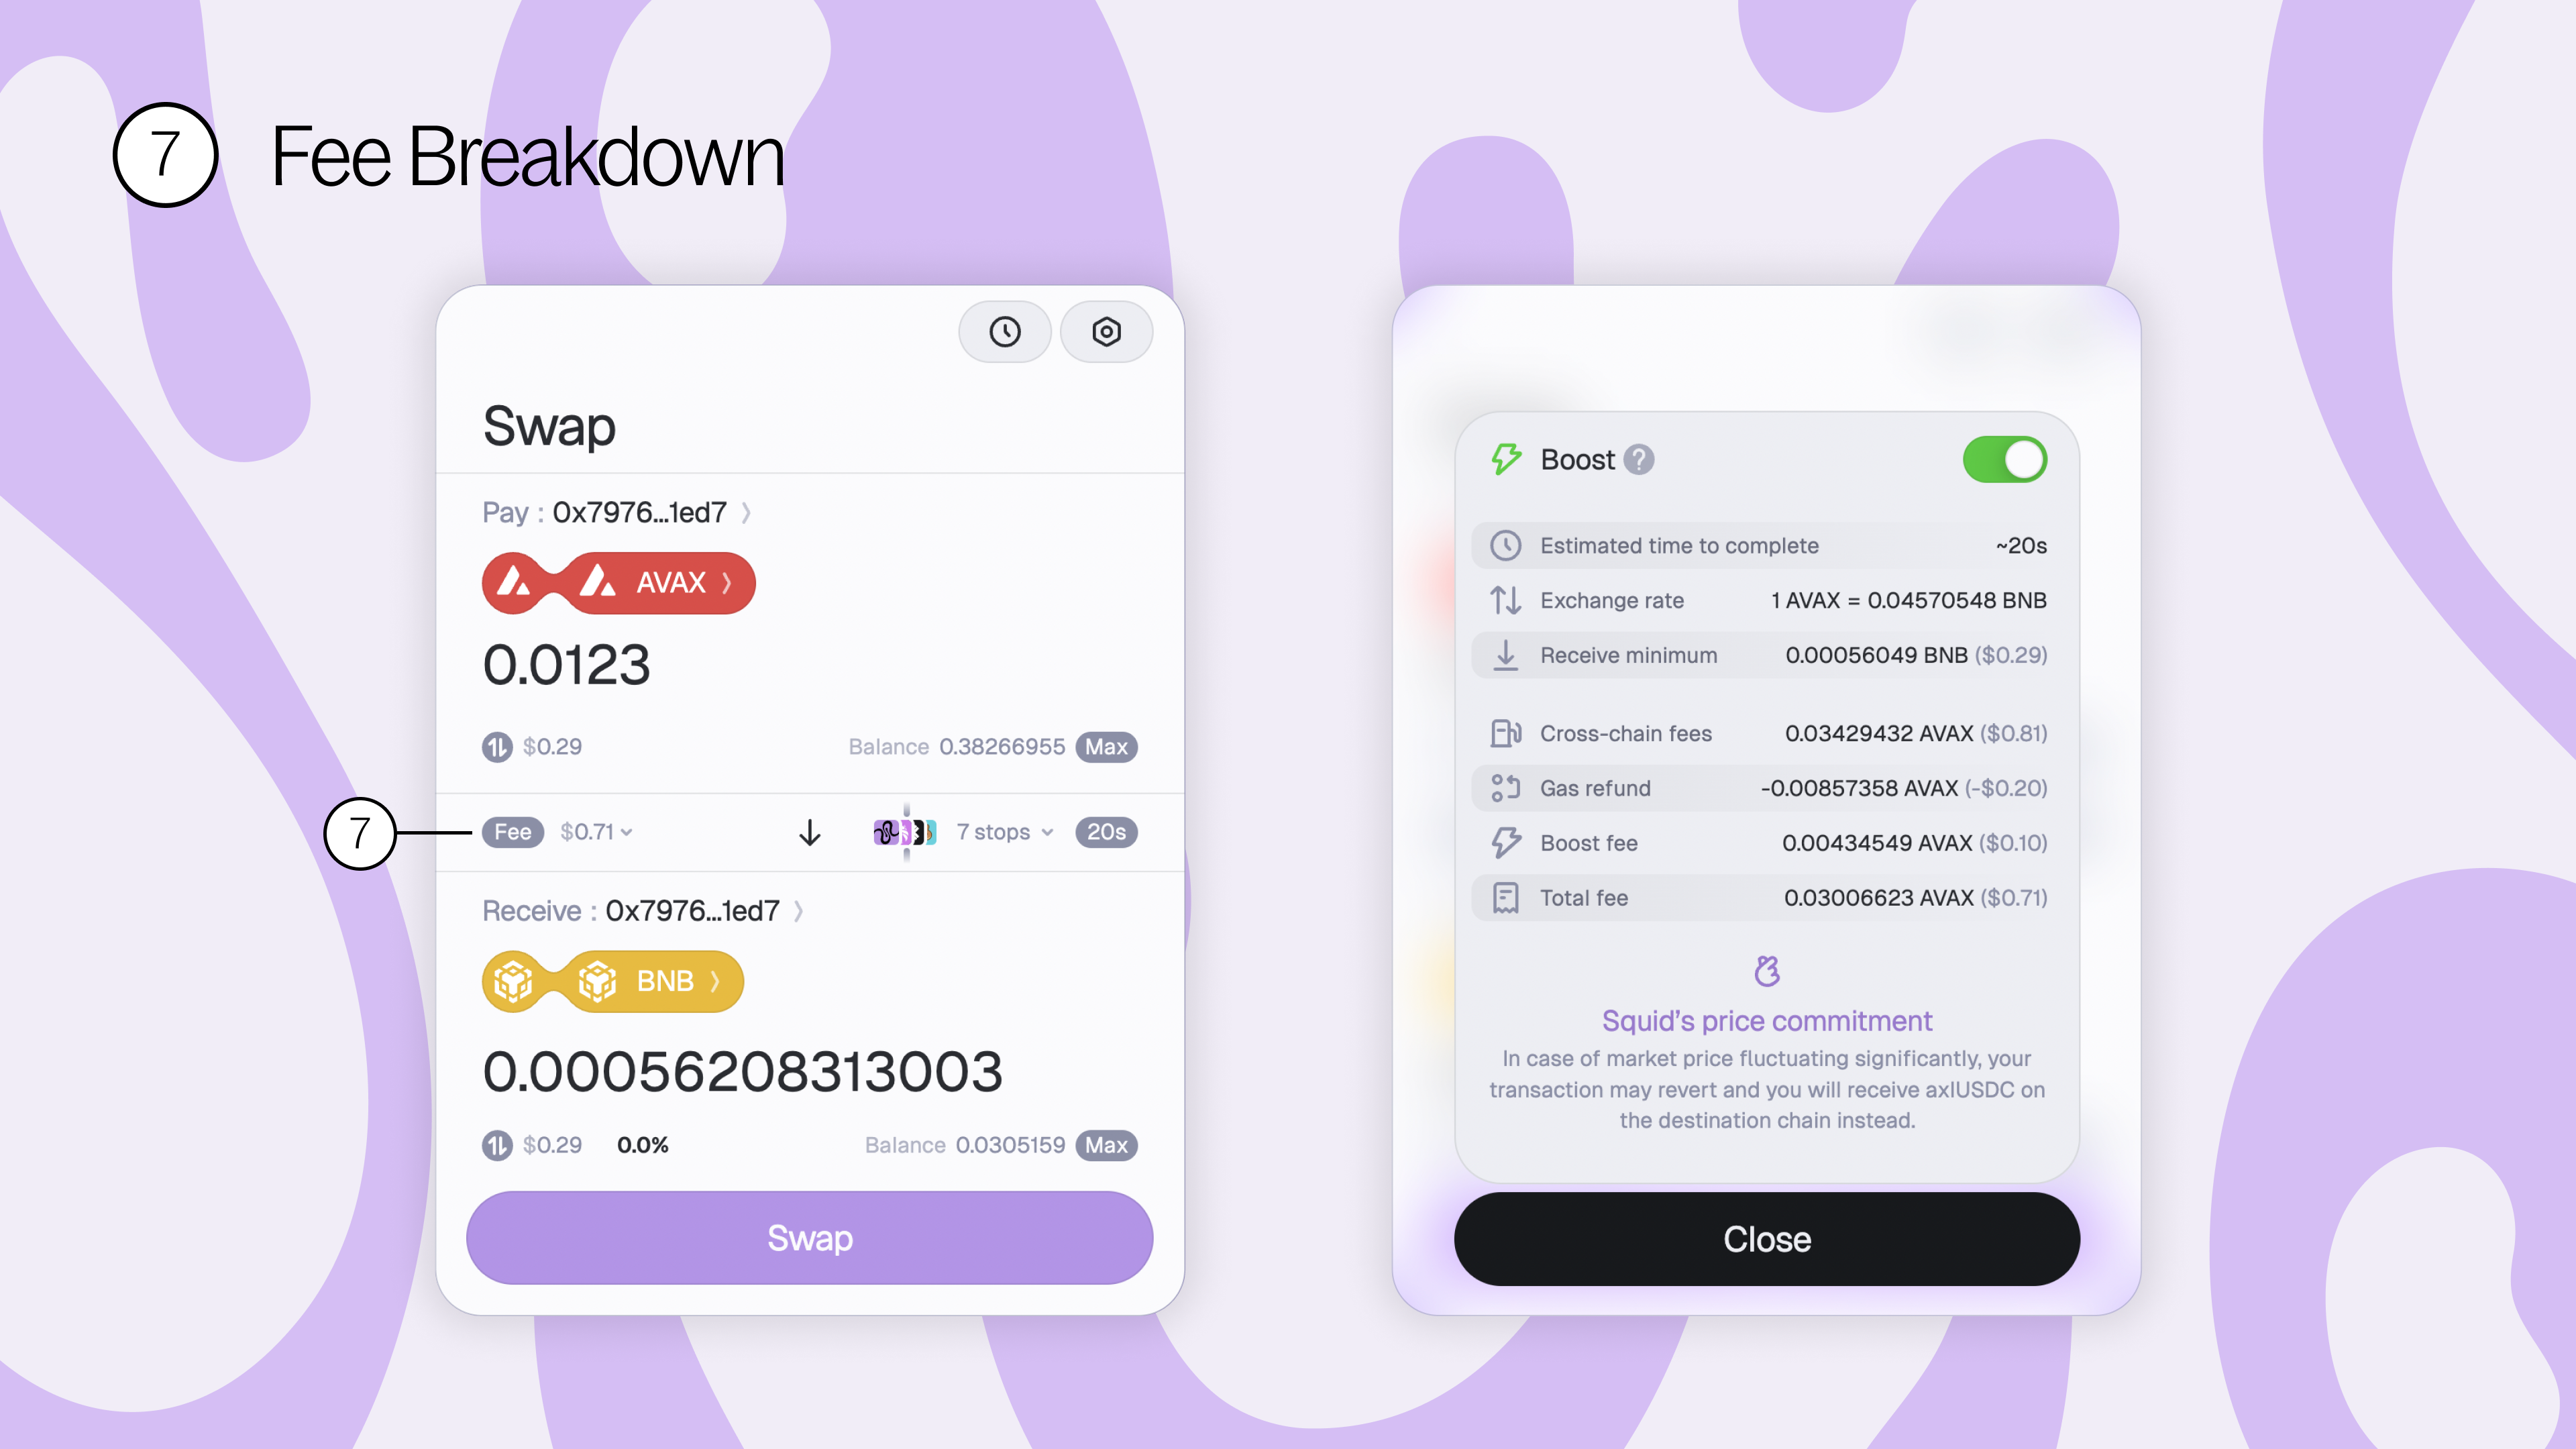
7. Fee breakdown - see the complete breakdown of your intended swap in the fee breakdown. Including the estimated time it will take to complete your transaction, the exchange rate, the cross-chain gas fees, the expected gas refund, and the total of all fees combined. Make sure to review your fee breakdown before placing your swap.
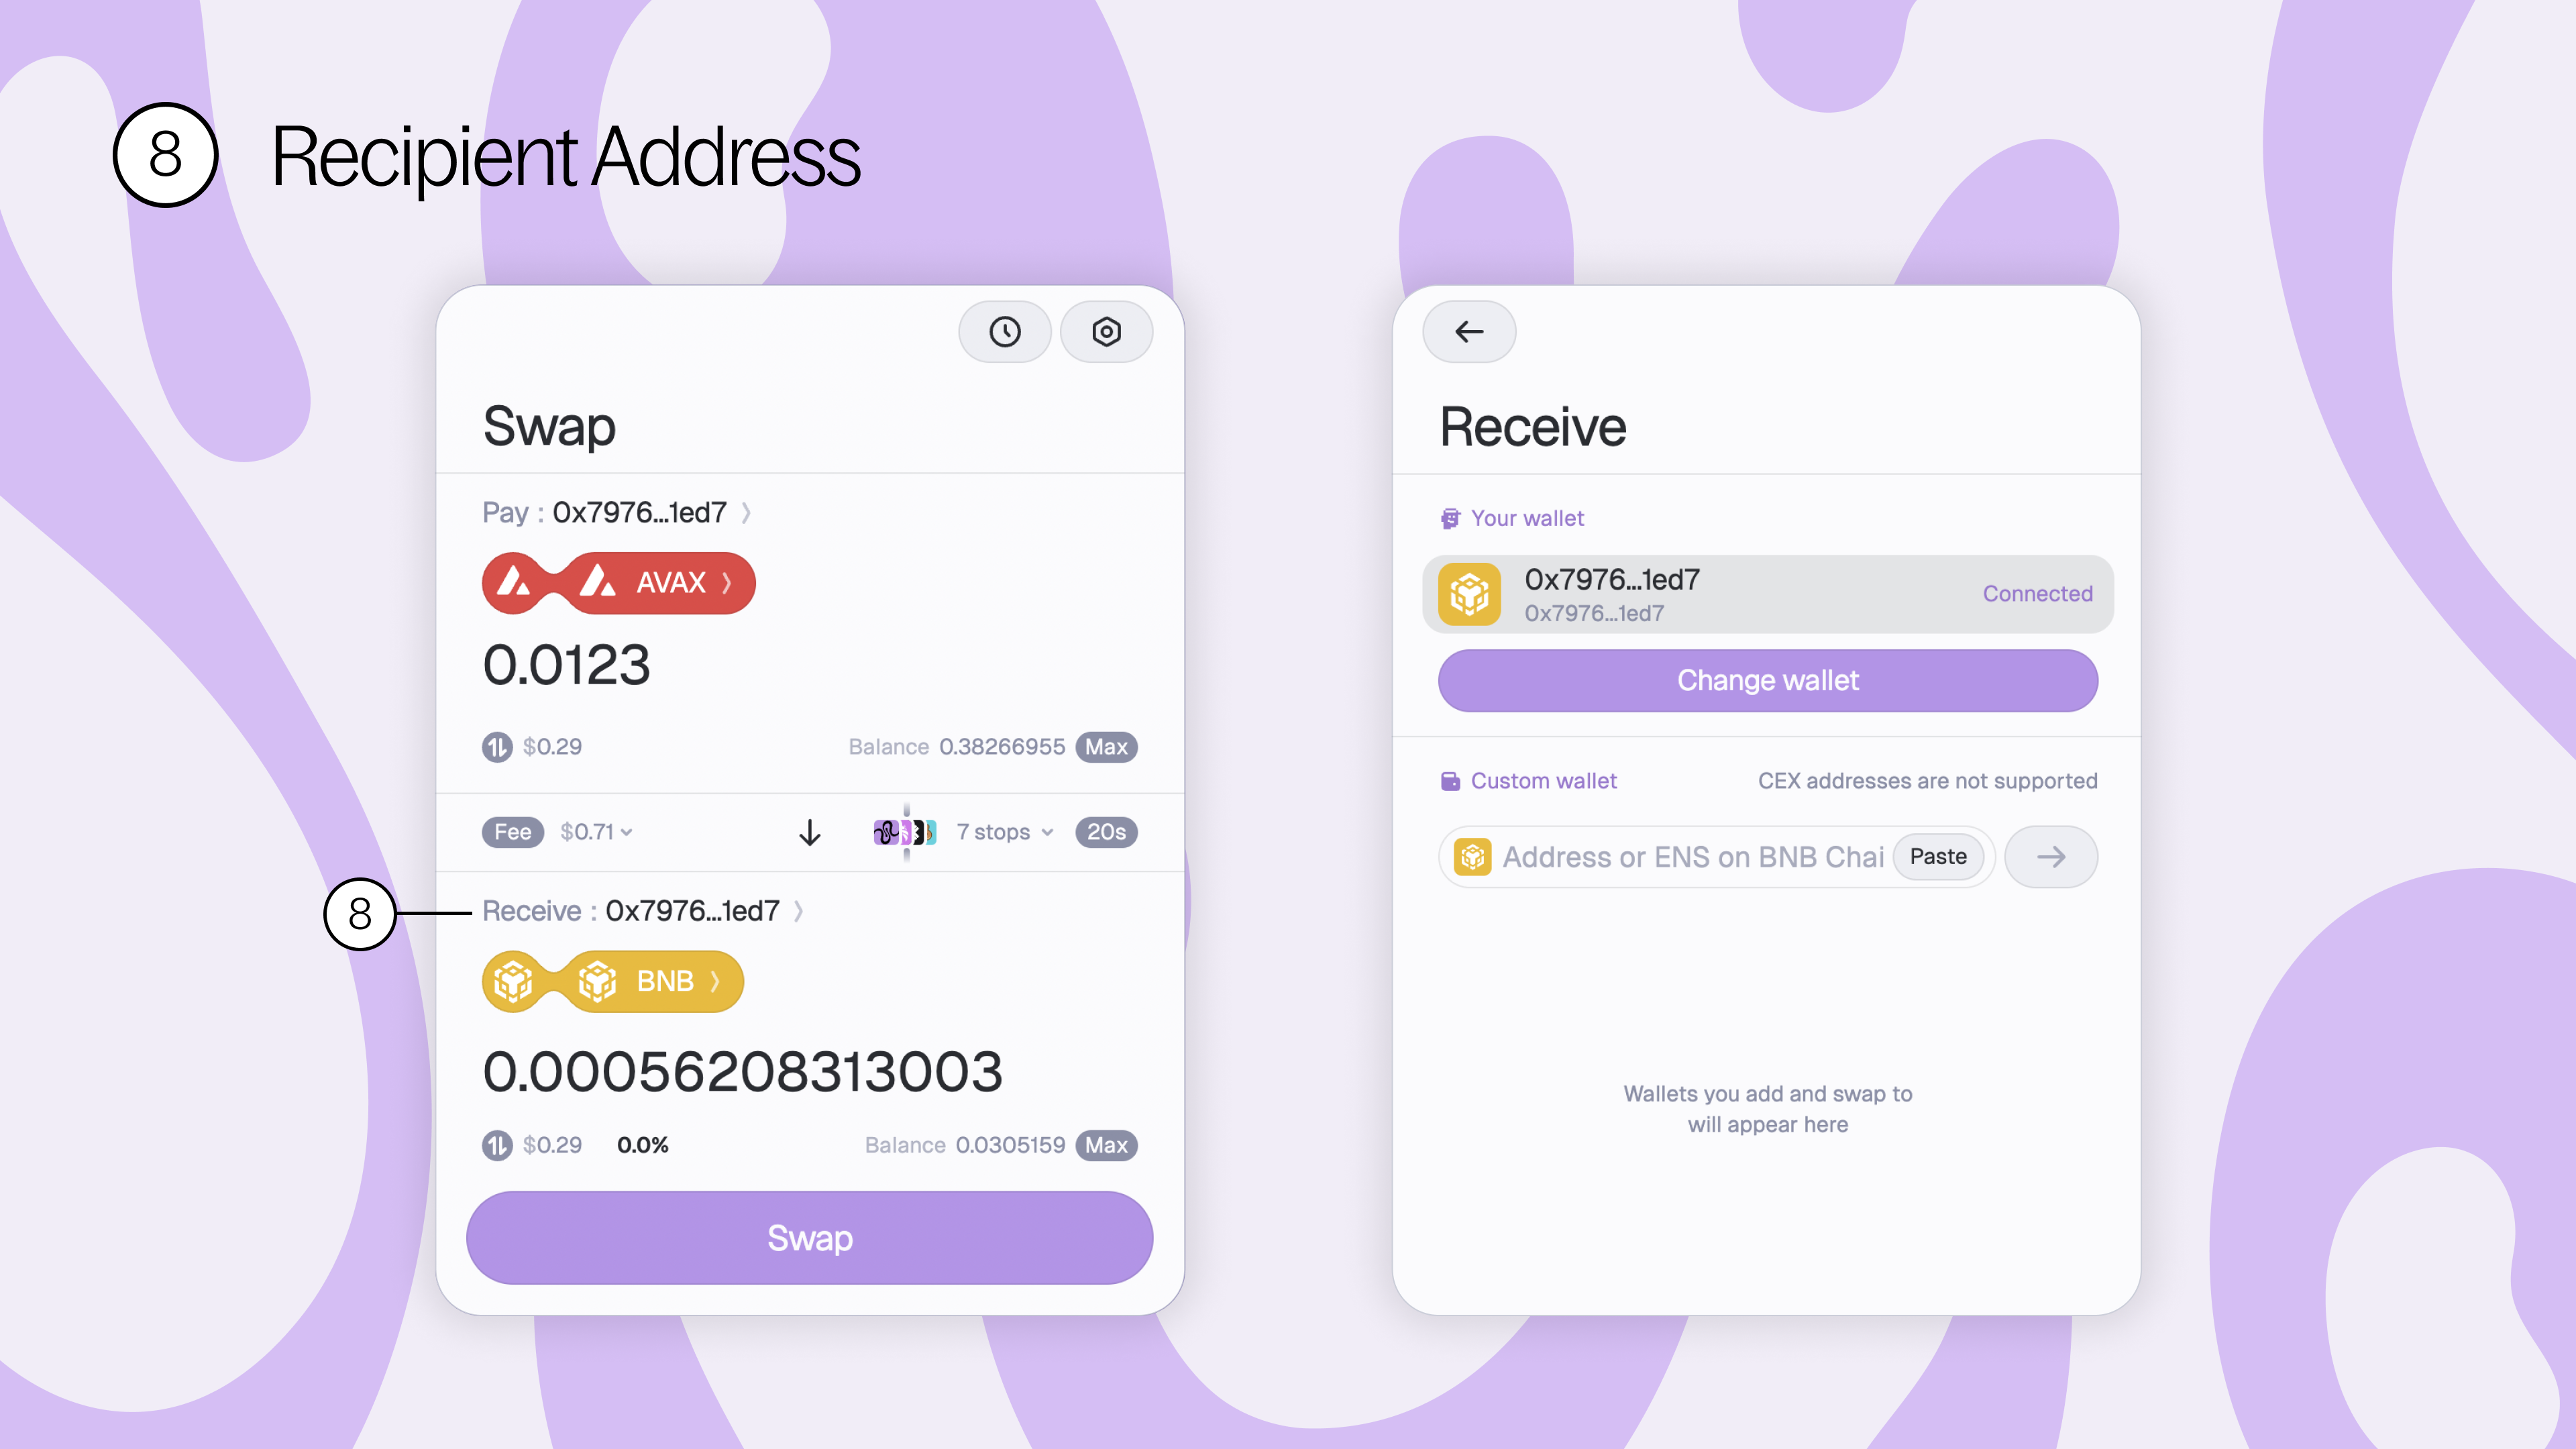
8. Recipient address - separate from your sender wallet, enter a recipient address to send and swap tokens to different addresses. Note: ENS names now supported!
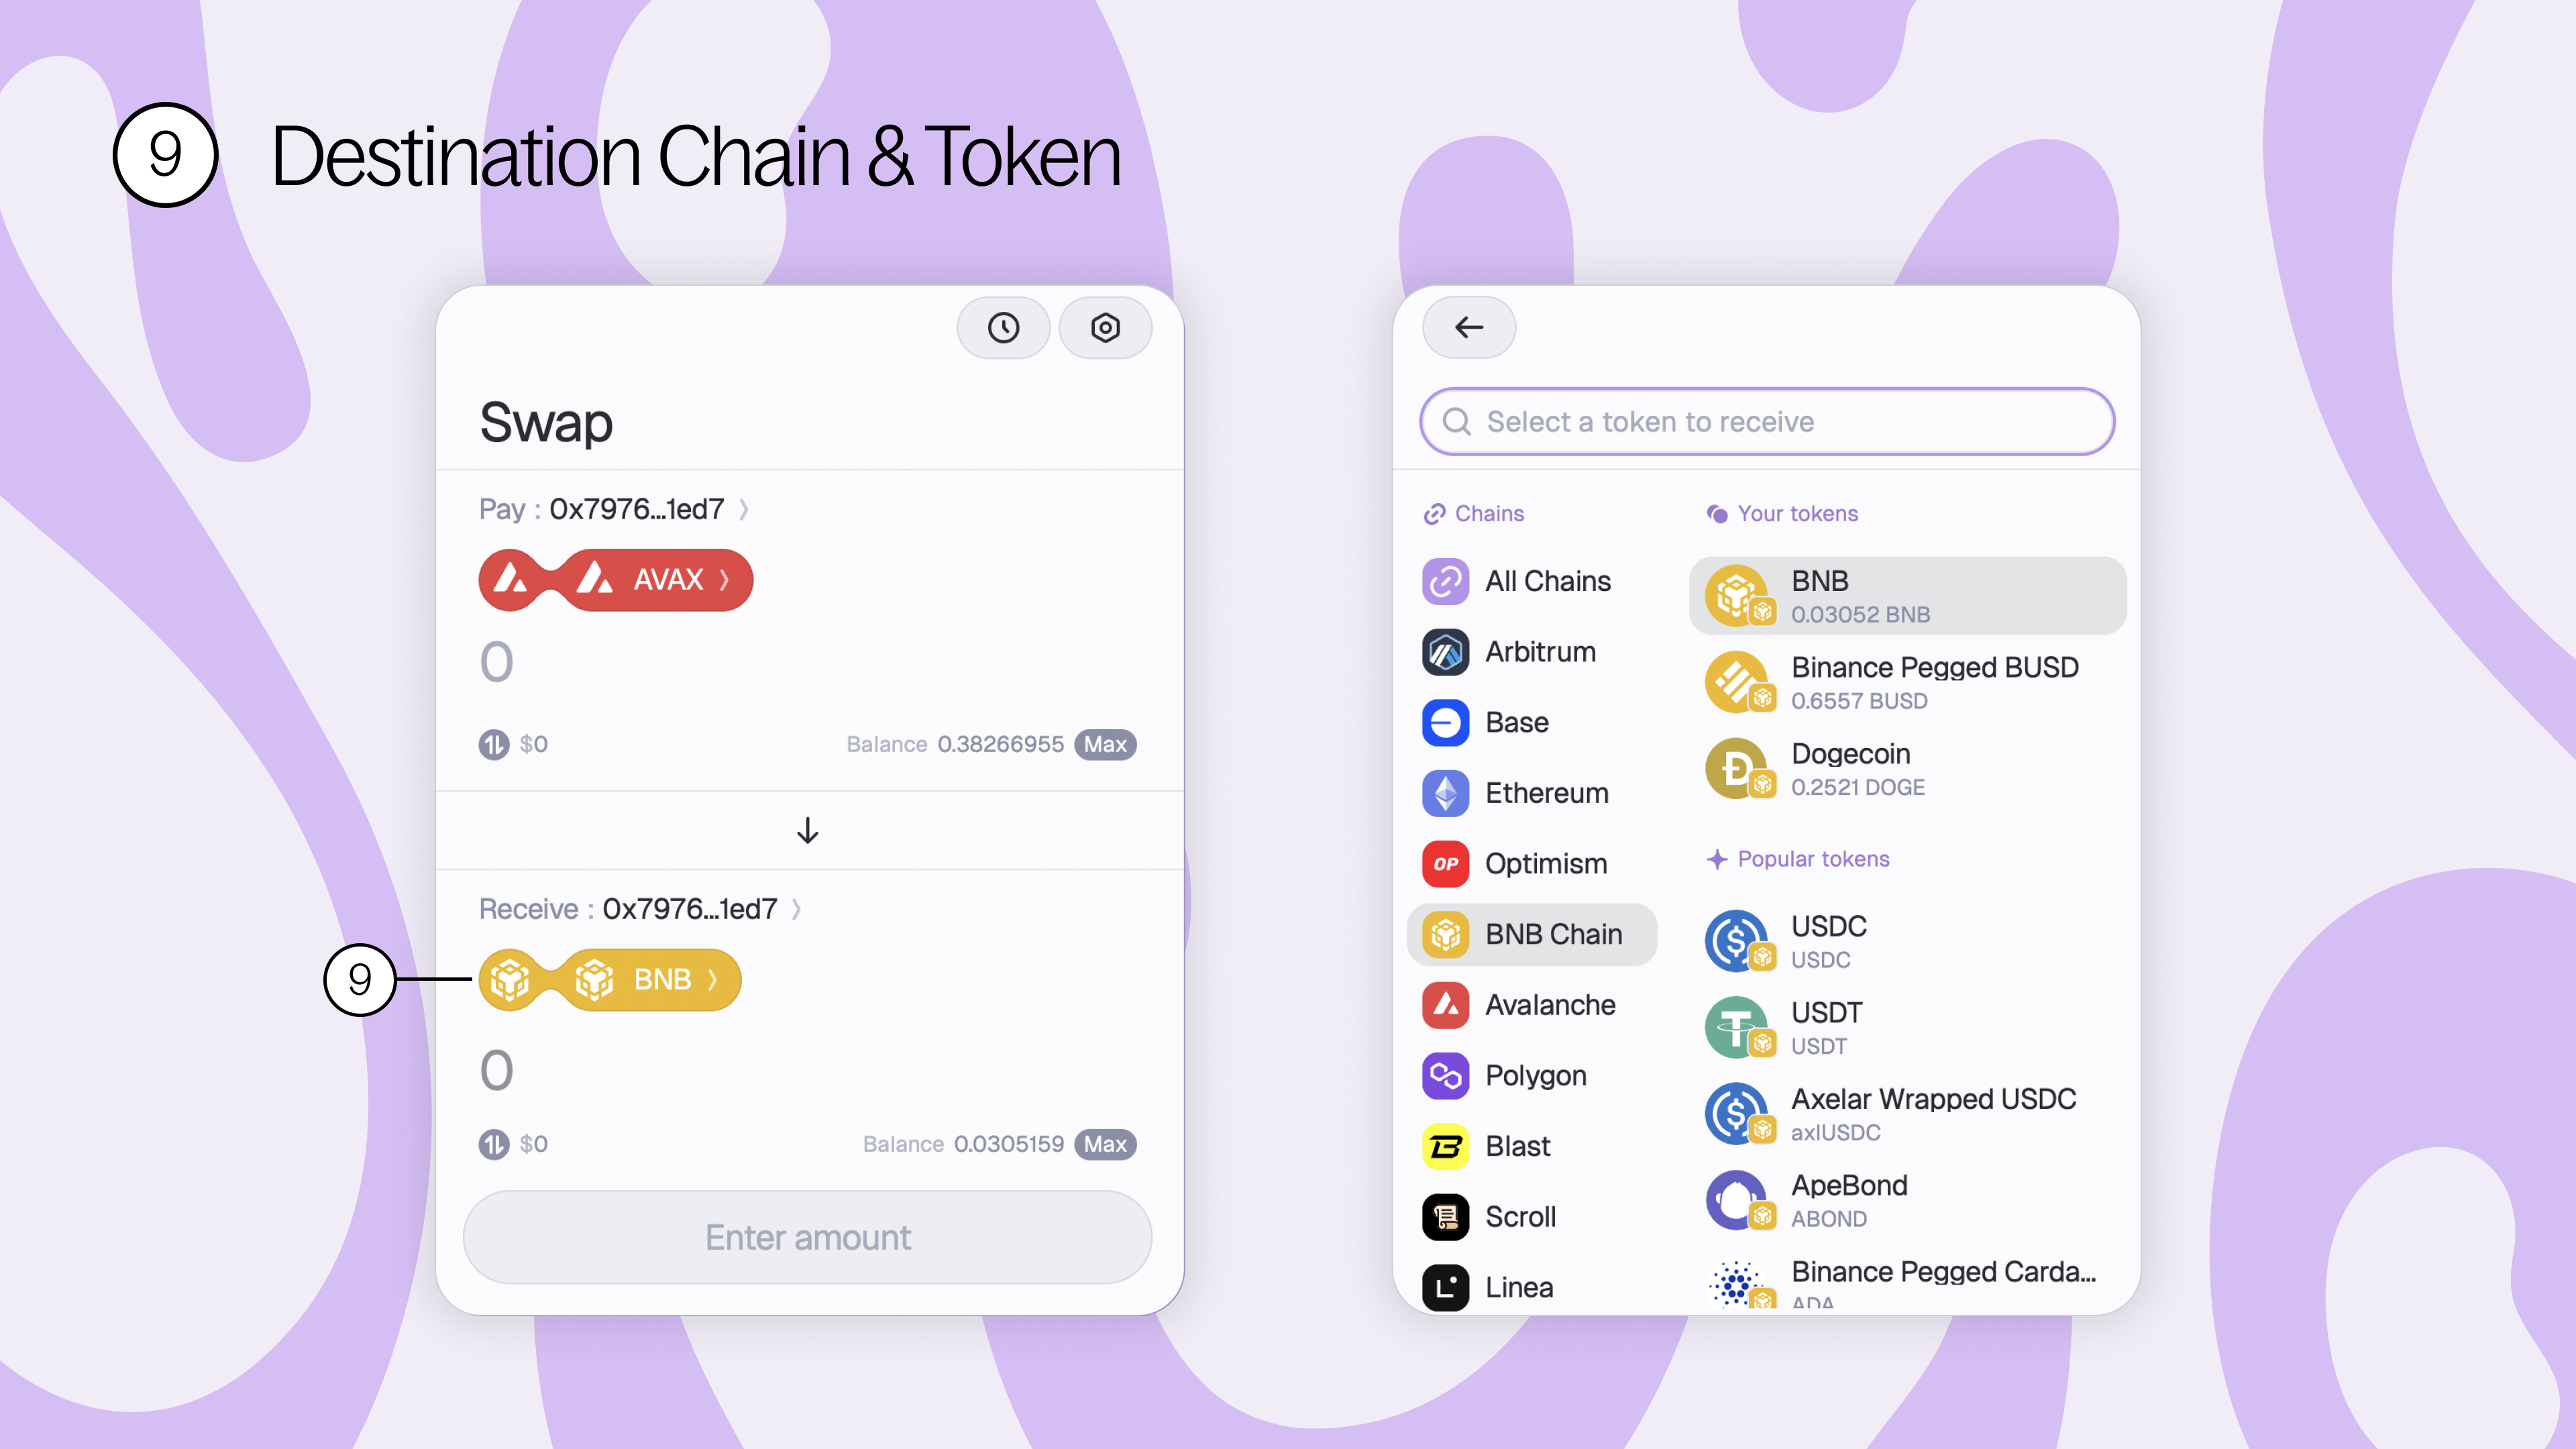
9. Destination chain & token - where you can select the destination chain and tokens you’ll be swapping to.
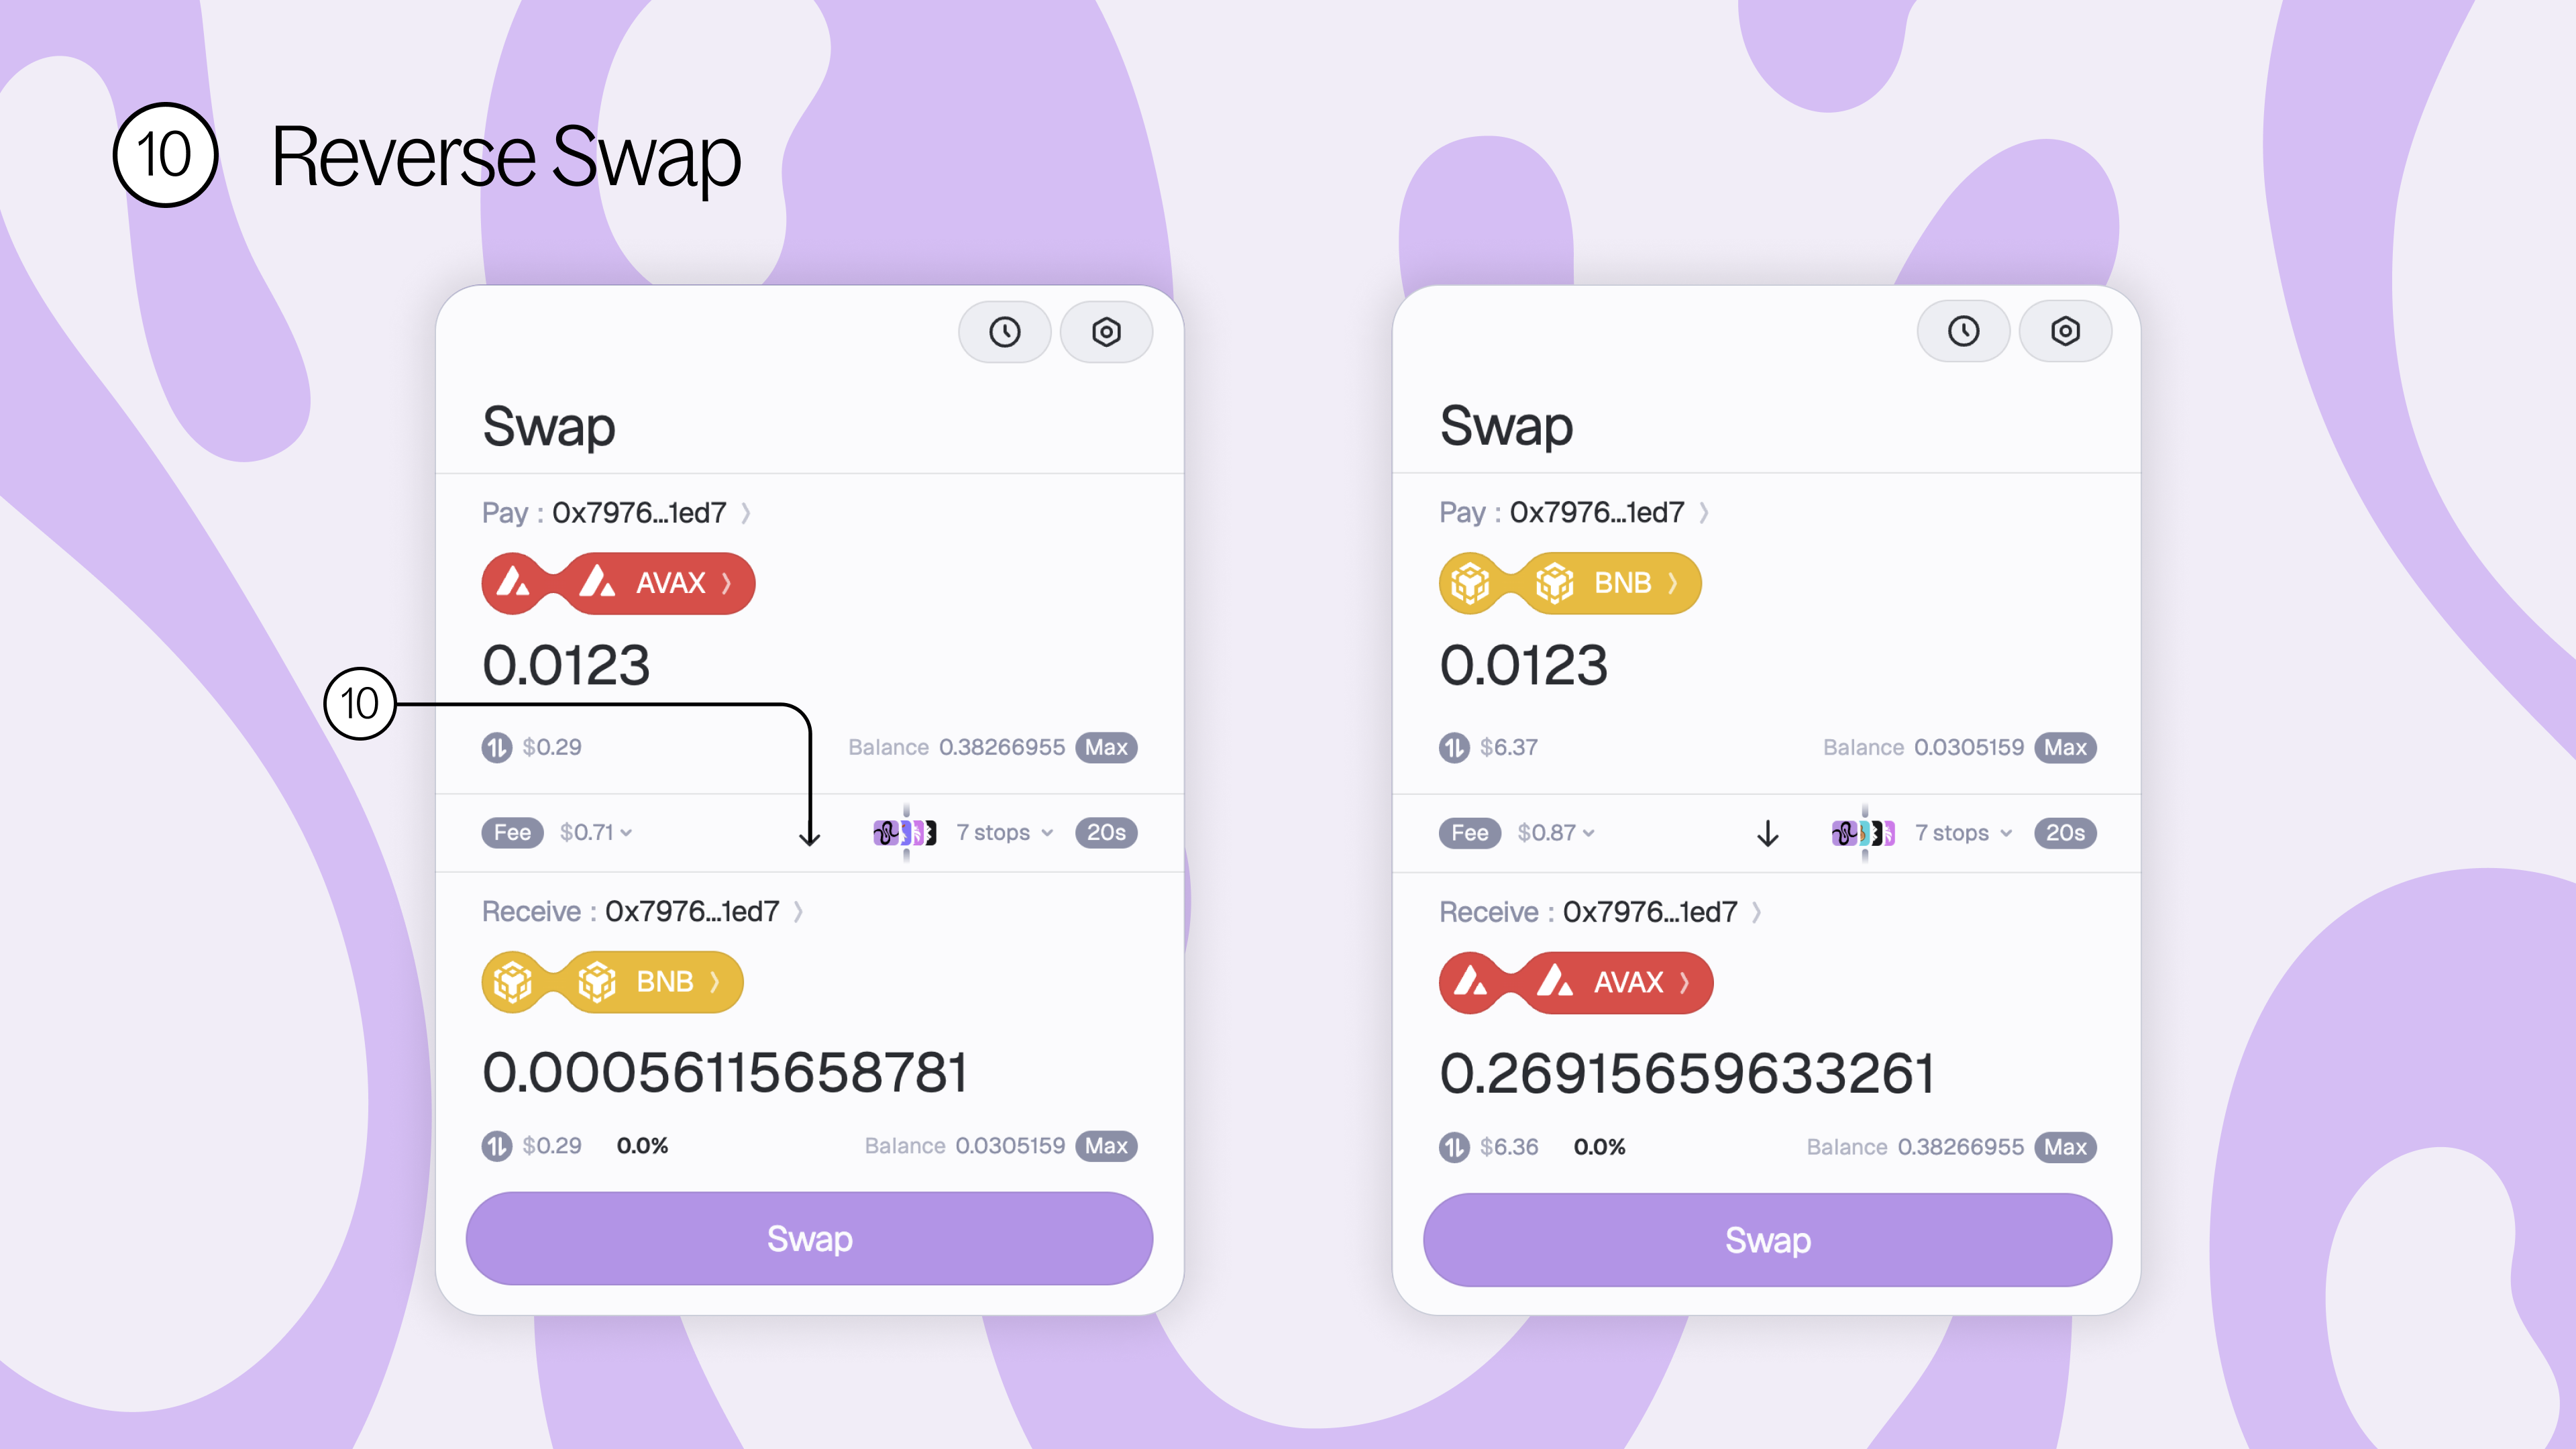
10. Reverse swap - reverse your swap so that your source will be your destination and your destination will be your source.
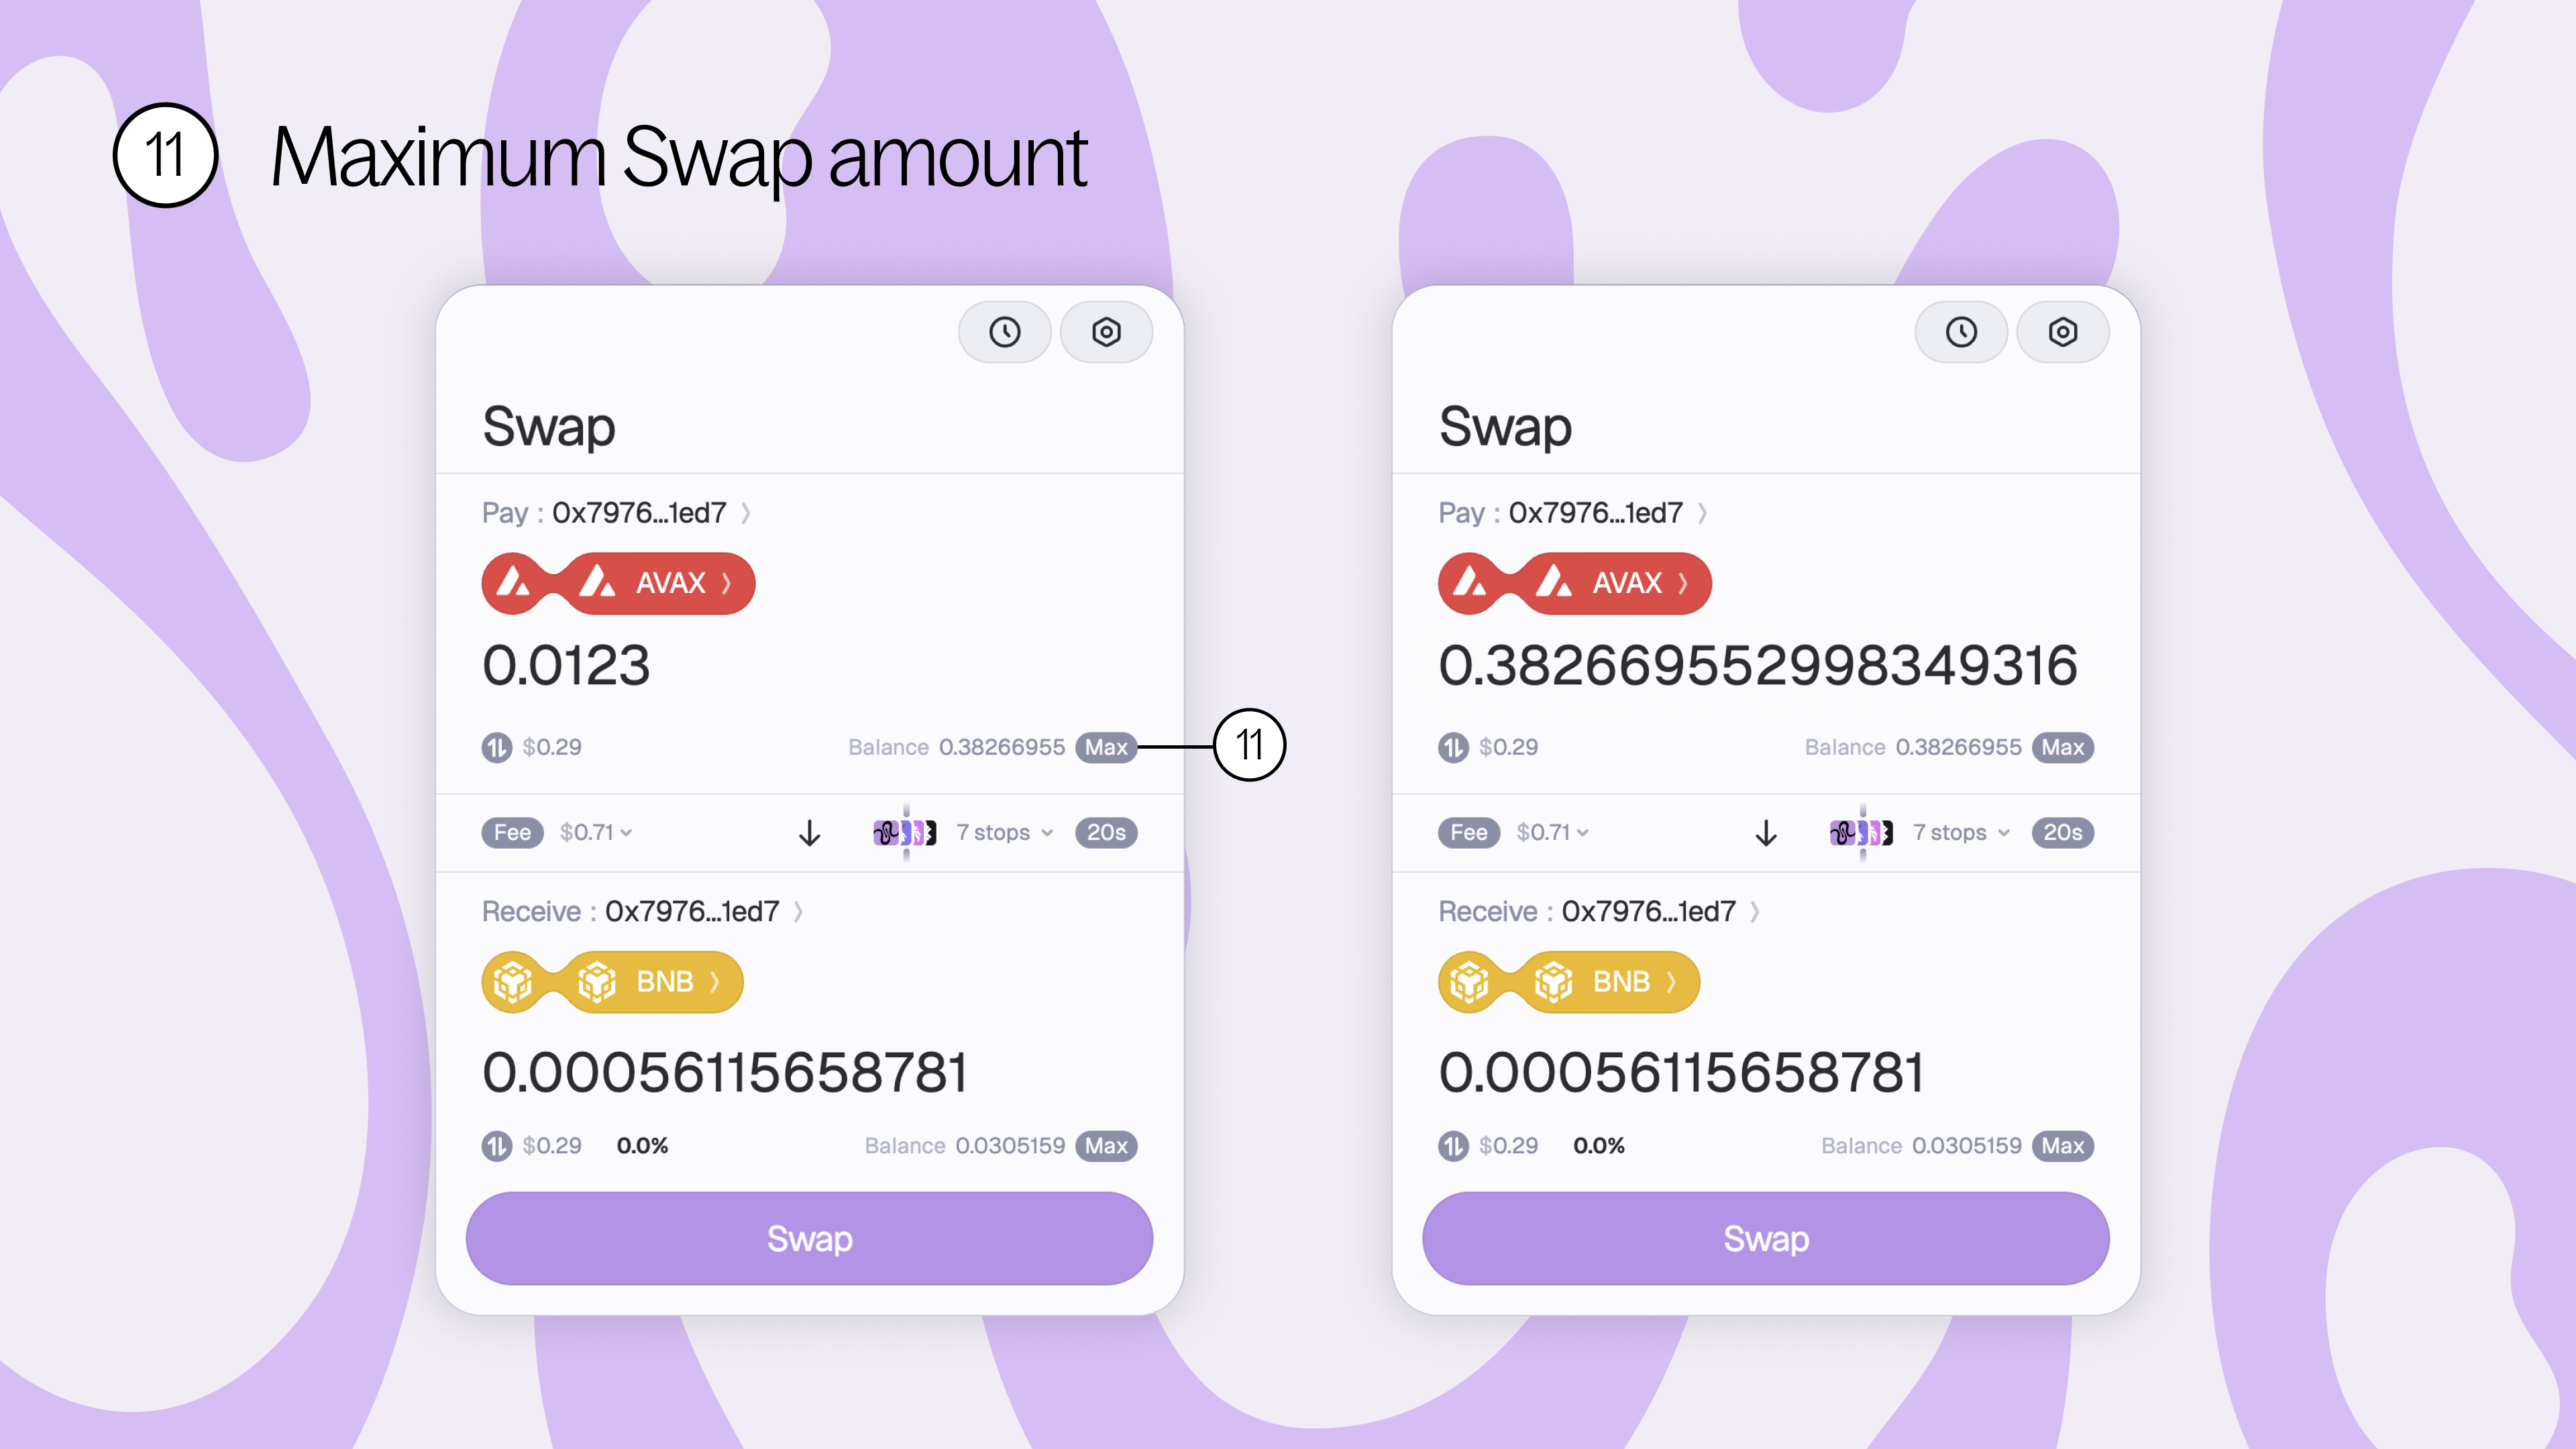
11. Max swap amount - instead of entering a certain amount of tokens to swap, swap the maximum amount of the selected tokens you have in your wallet.
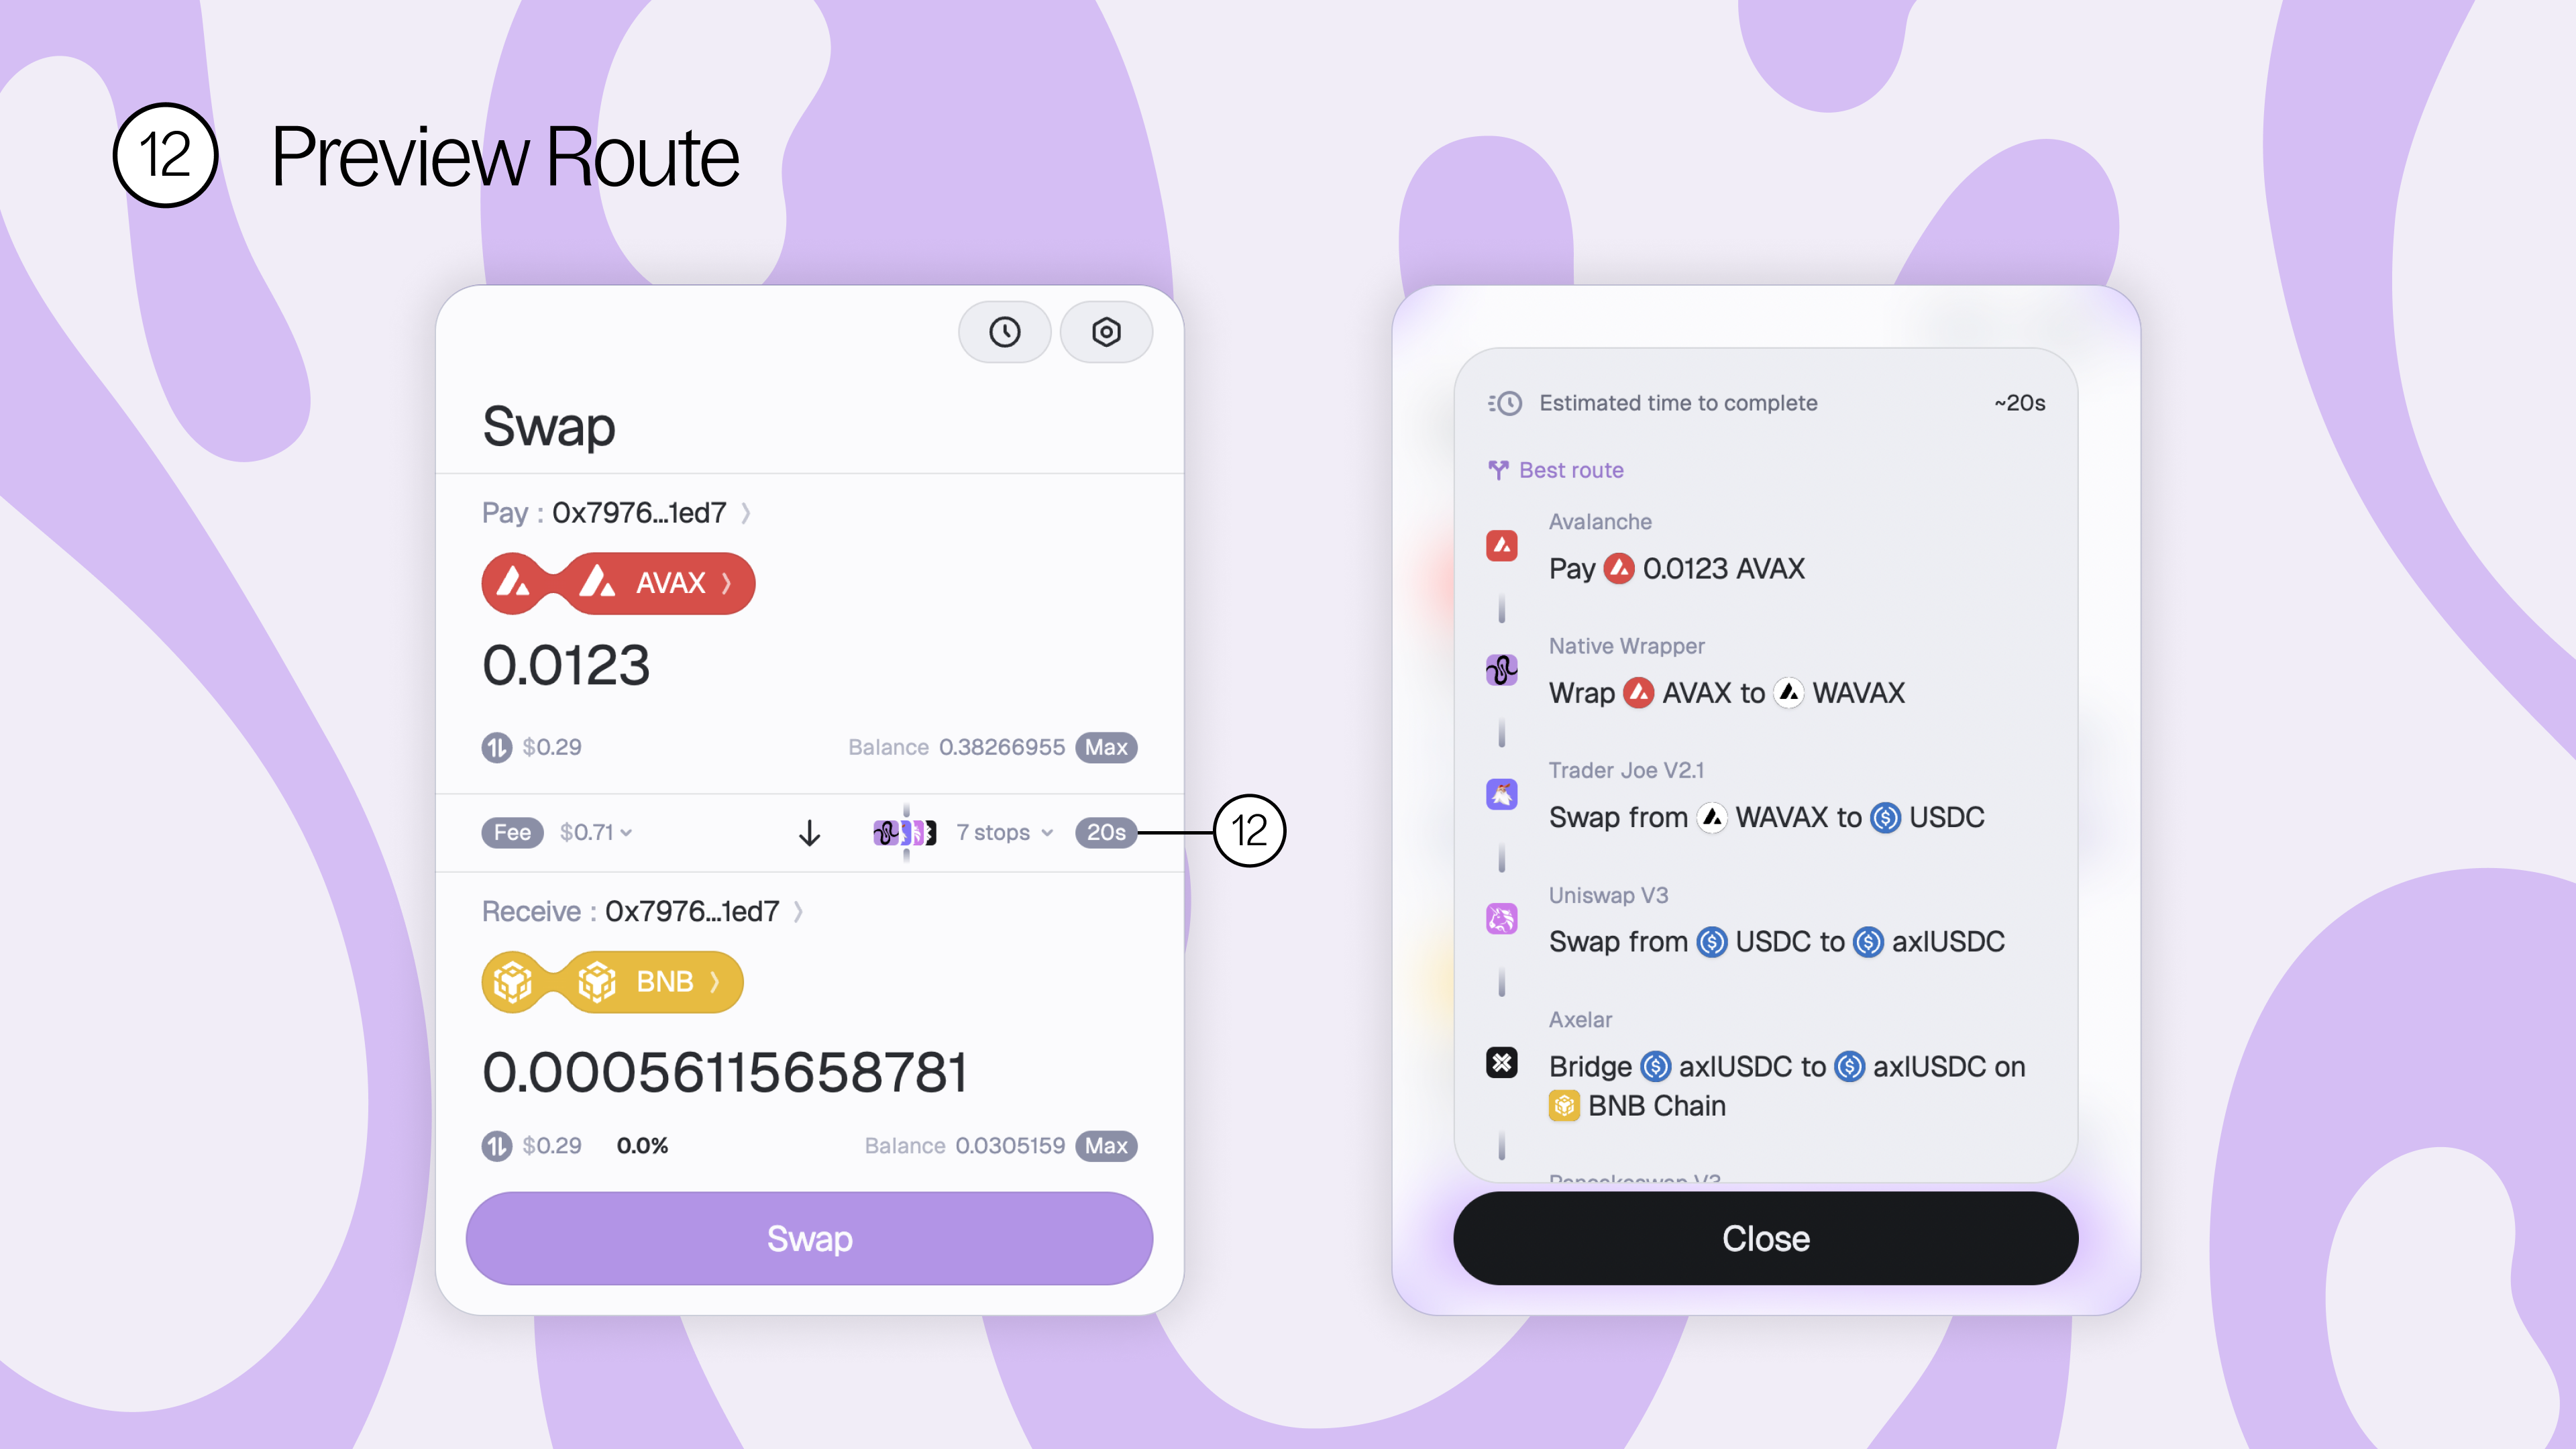
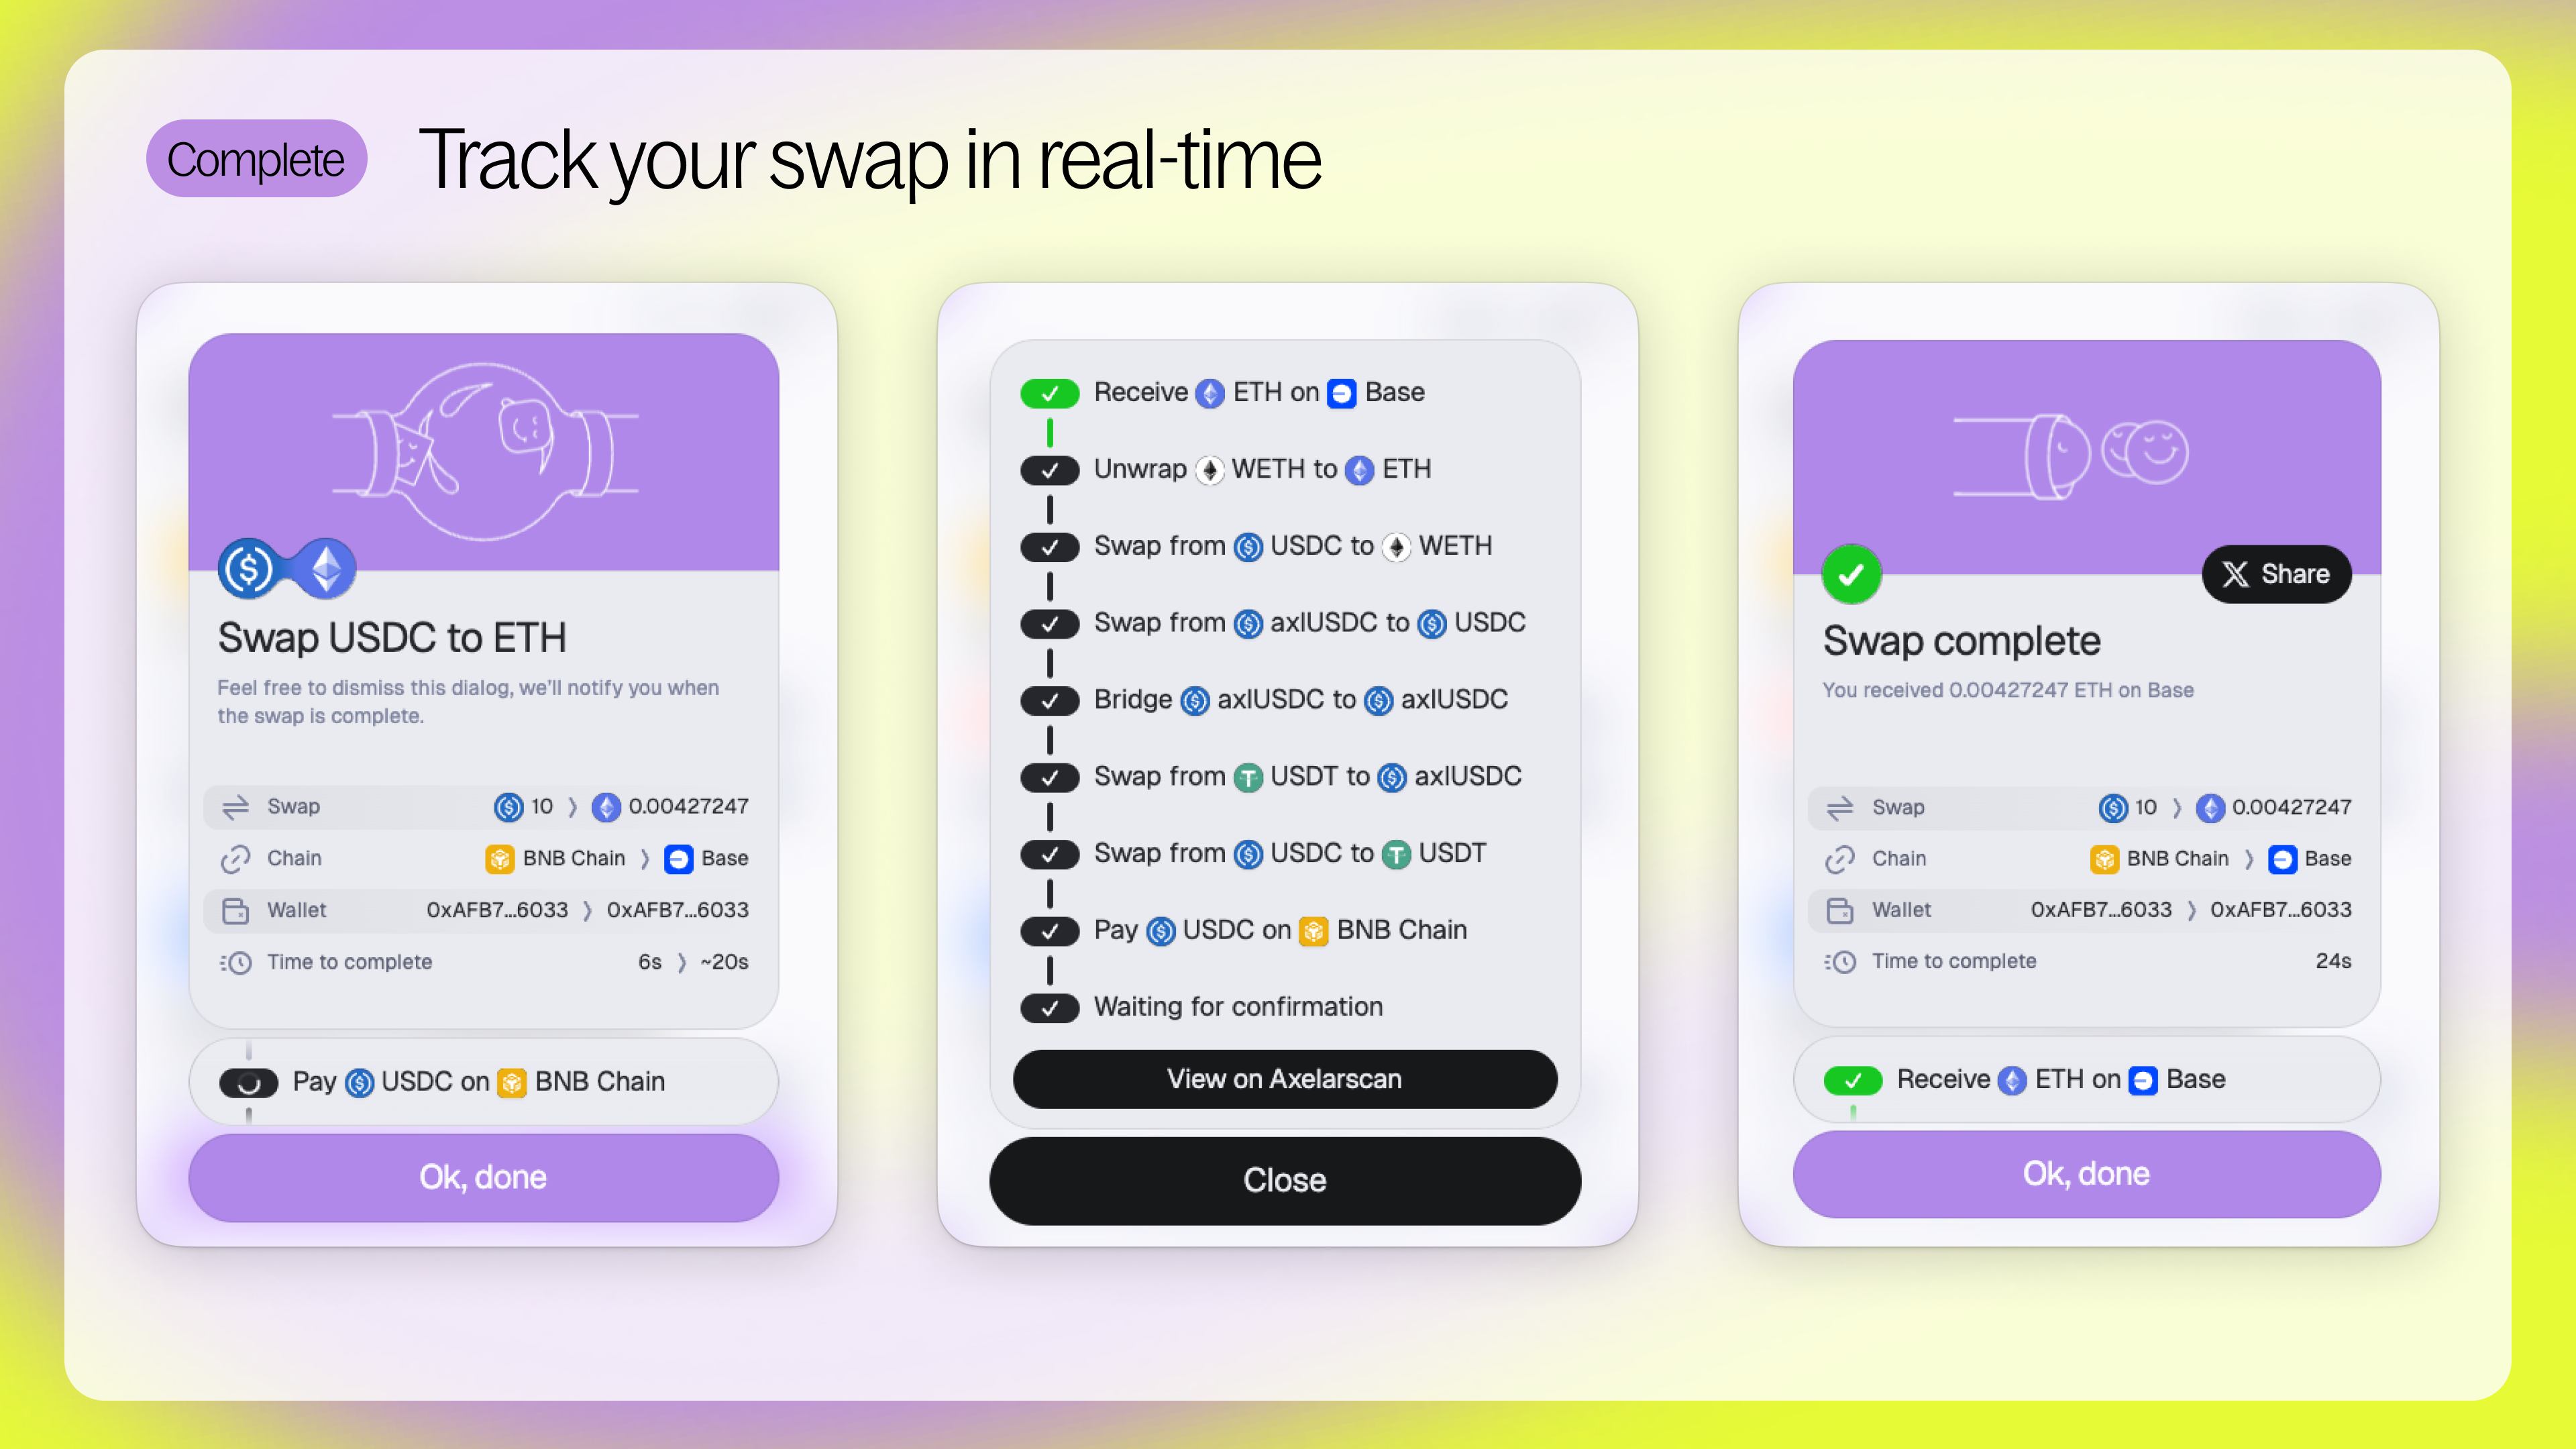
12. Preview route - preview the swap route of your intended transaction. Once you confirm your swap, track your transaction in real-time as your tokens are routed to their final destination!
Swapping with Squid 2.0
Here’s your step-by-step guide to swapping with Squid 2.0. It’s easier and faster than ever, with more tokens, enhanced tracking, and better prices.
Step 1 - Visit app.squidrouter.com and connect your wallet. Note: Squid 2.0 can detect which wallets you already have installed on your browser.

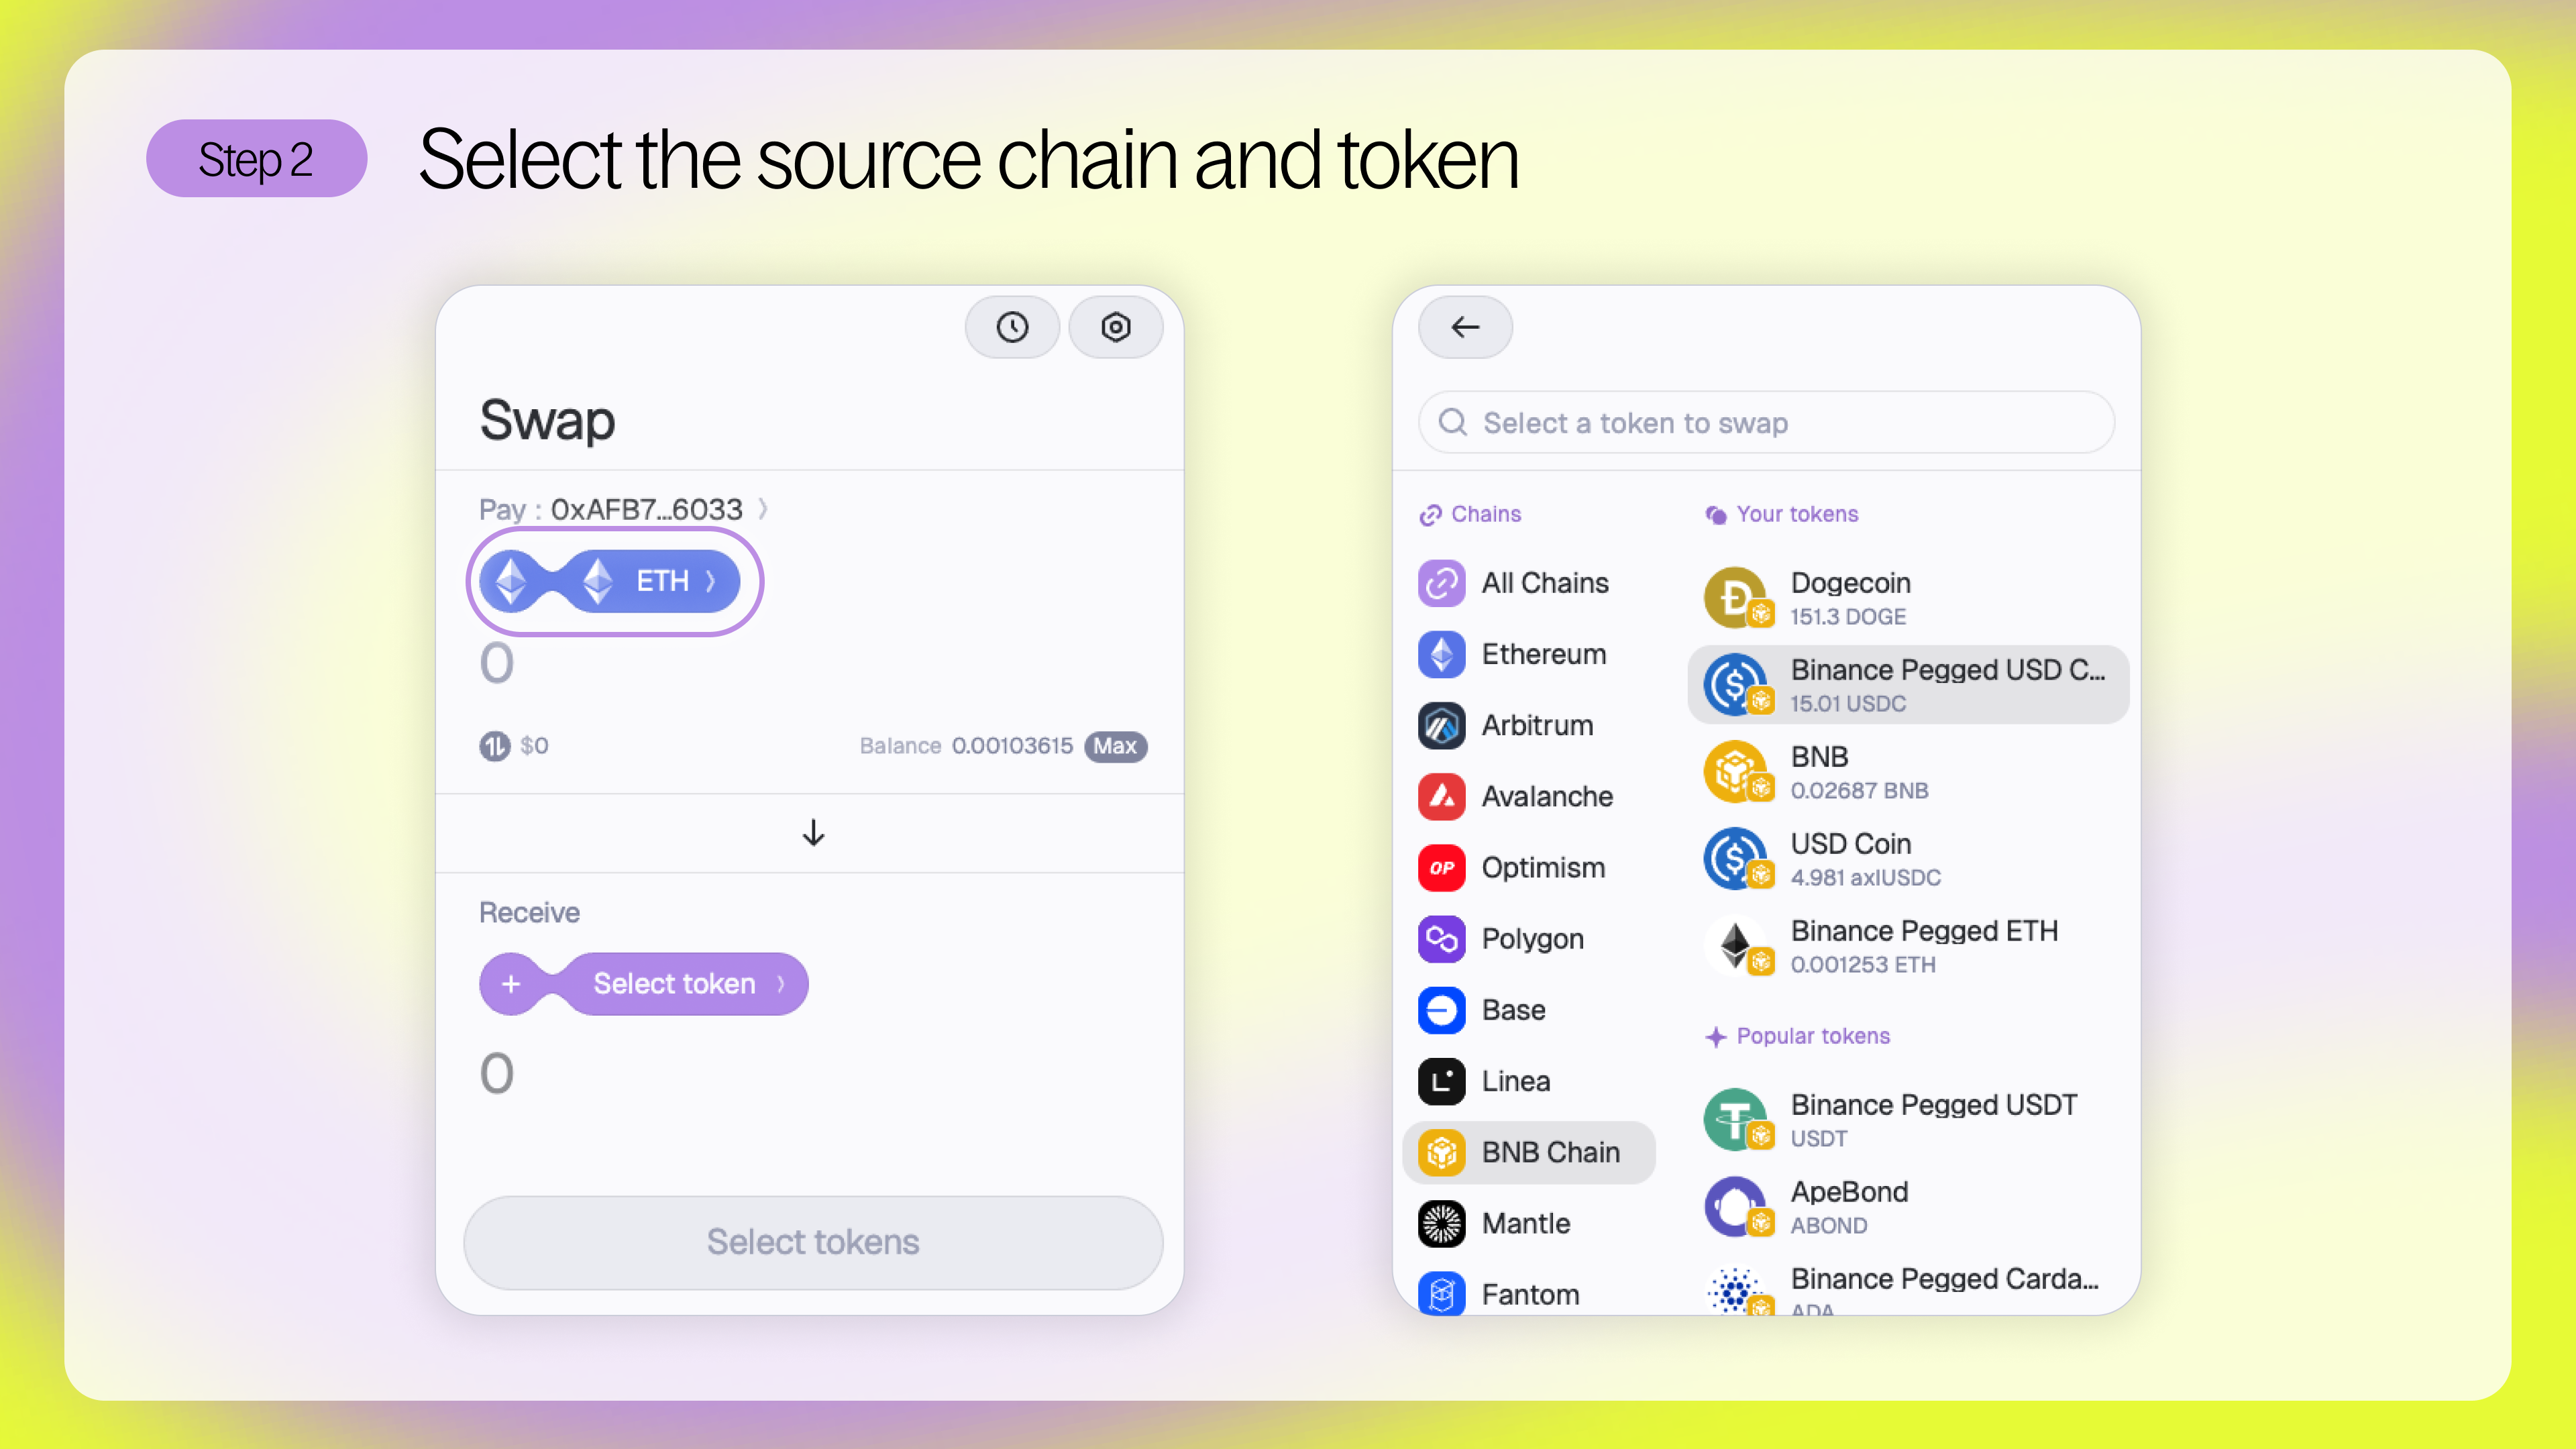
Step 2 - Select the source chain and token you’ll be swapping from. For this example we’ll be swapping $USDC on BNB Chain to $ETH on Base.
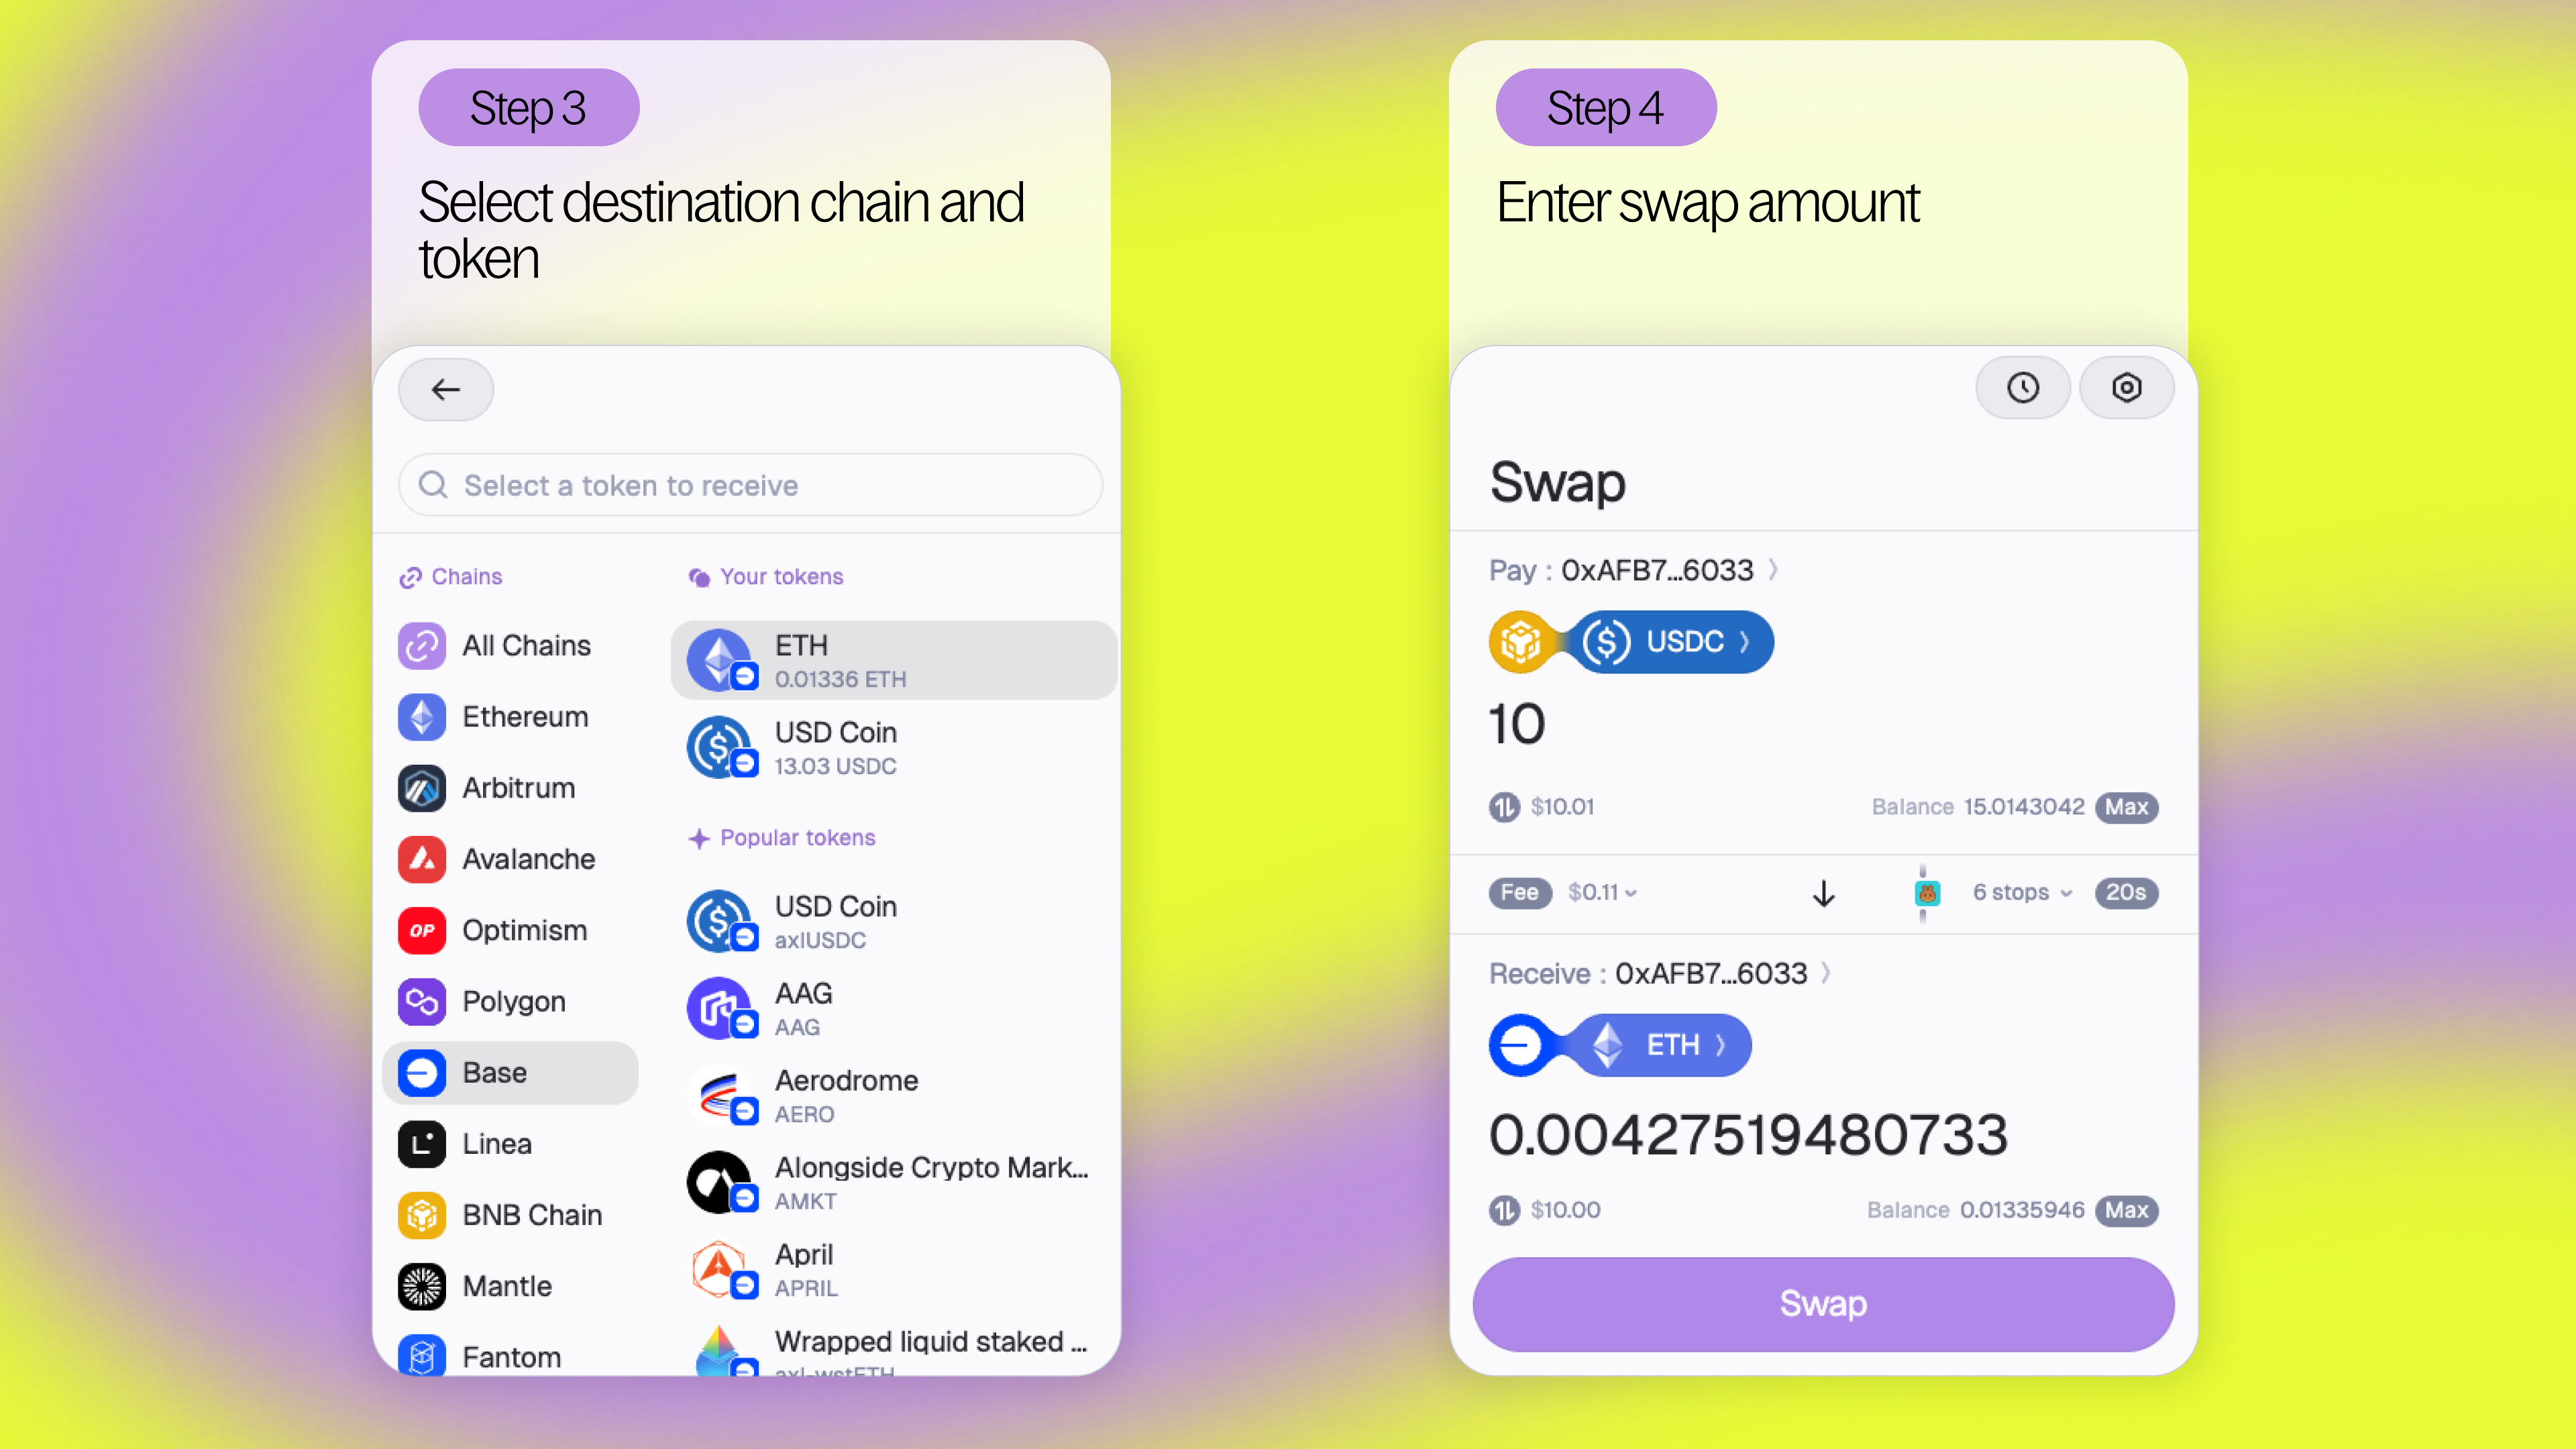
Steps 3 & 4 - Select the destination chain and token you’ll be swapping to and enter the amount of the source token you’d like to swap. Don’t forget: Squid 2.0 supports swaps across EVM and Cosmos chains and same-chain swaps too!
Step 5 - Review your order and click “swap” to place your swap. Note: Check out your swap fees and preview your route to get all the info.

Once you click “swap” your transaction will start processing. You can track your swap in real-time and see each route your tokens take as they make their way to your wallet.
Squid 2.0 FAQ
What is slippage?
What is Degen mode?