How to Bridge to the XRP Ledger from Ethereum, Arbitrum & Other Chains
The XRP Ledger (XRPL) is a decentralized, layer 1 blockchain with reliability and stability proven for over a decade that is trusted by businesses and builders globally for the efficient tokenization and exchange of crypto-native and real-world assets.
With Squid, you can bridge from Ethereum, Arbitrum, and dozens of other chains straight into native XRP on the XRP Ledger. Here’s how to do it in minutes.
How to bridge from Ethereum or any EVM chain to the XRP Ledger
In this example, we’ll be exchanging USDC from Arbitrum to XRP on the XRP Ledger, but the steps are the same across all supported chains.
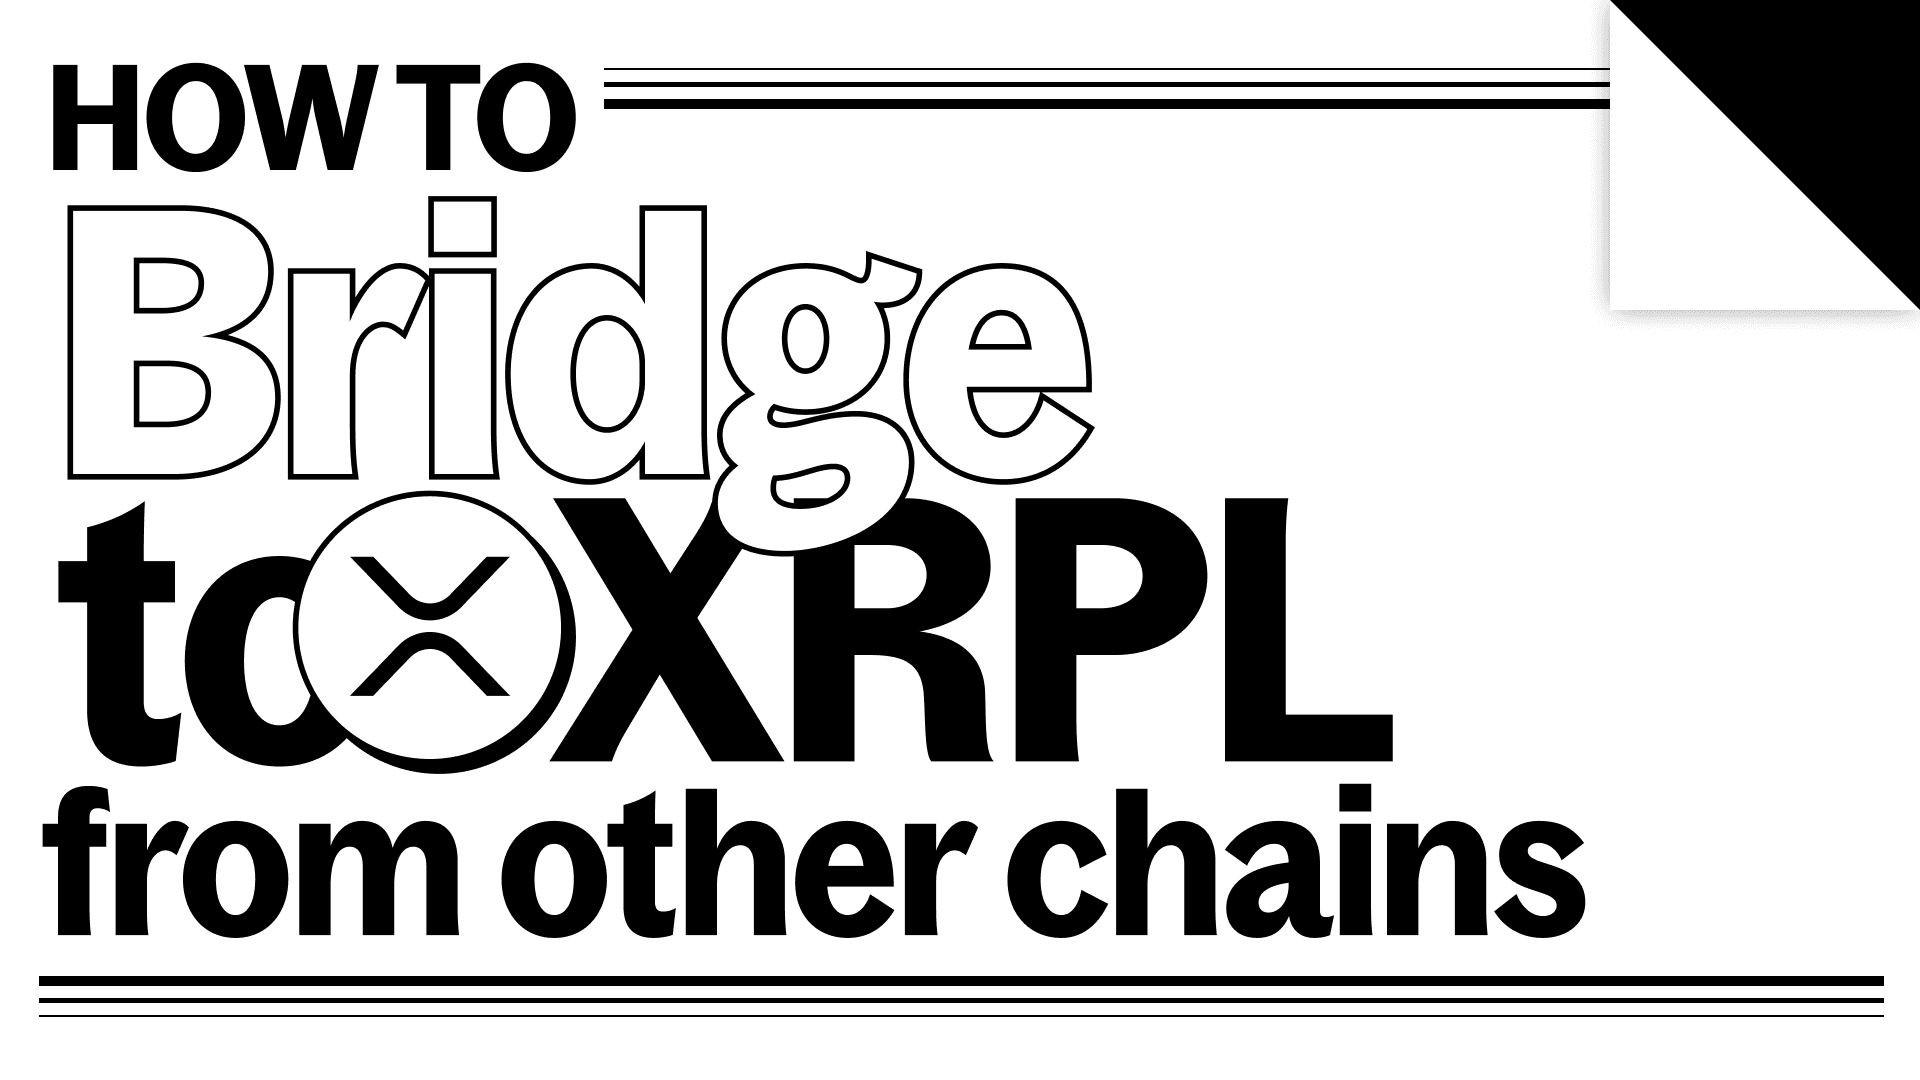
Step 1 – Connect your EVM wallet
Head to app.squidrouter.com and click Connect Wallet. Choose MetaMask or your preferred EVM wallet, and approve the connection.
Your wallet address will appear once connected.
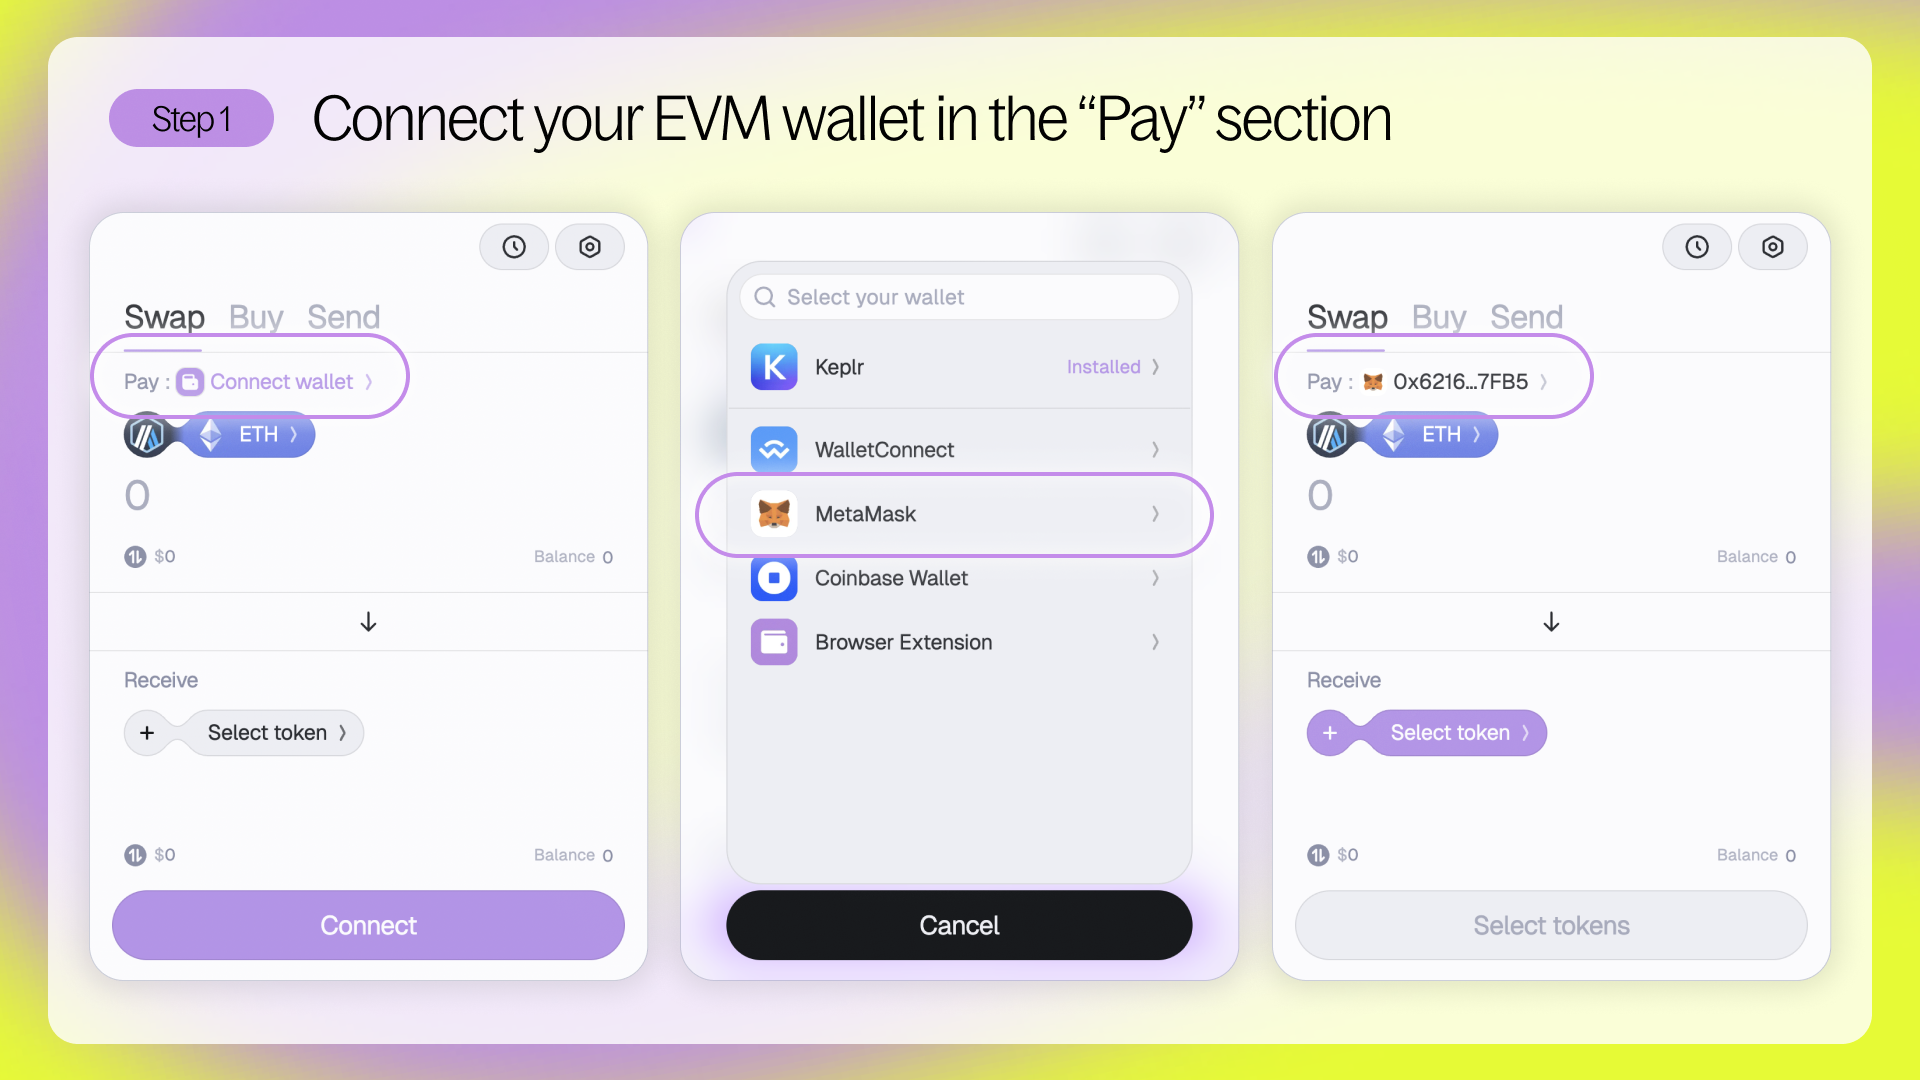
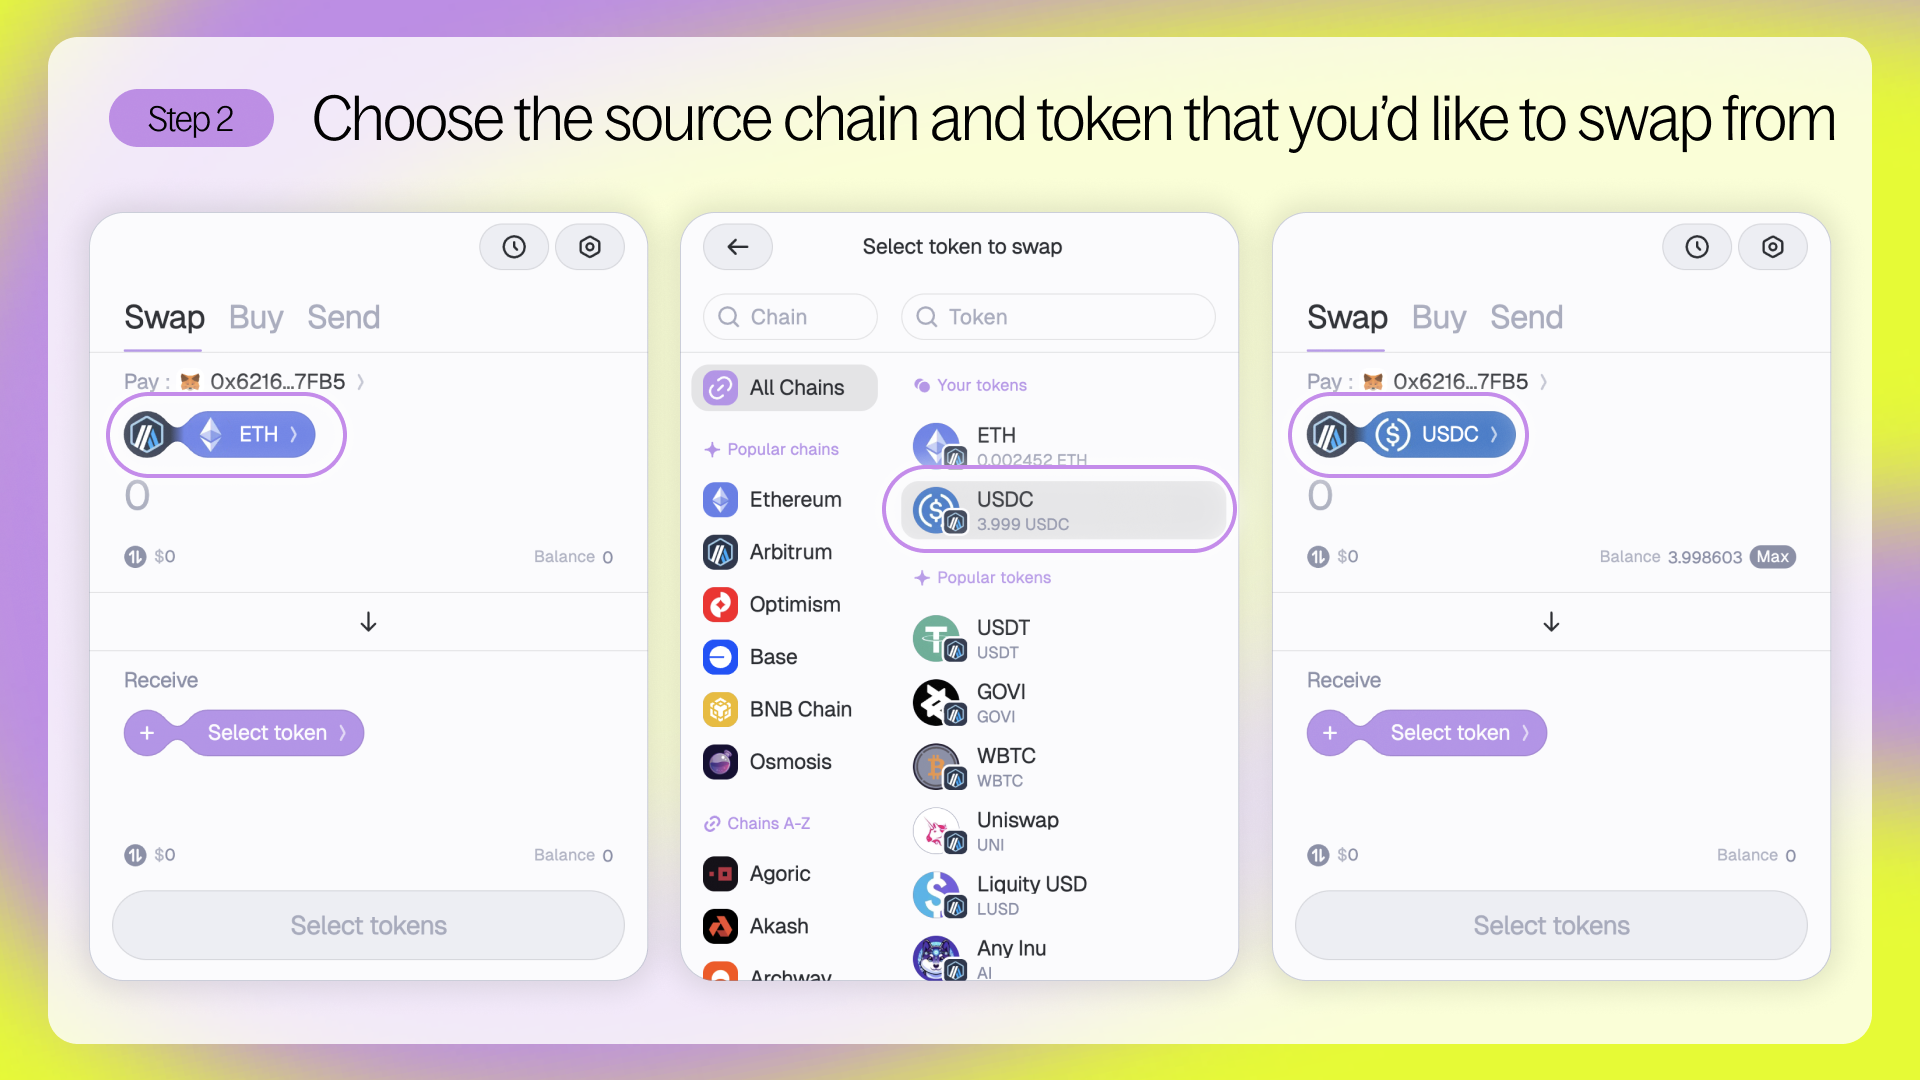
Step 2 – Choose your source chain and token
Click the dropdown under Pay to select the chain and token you want to swap from. For example, select Arbitrum and USDC.
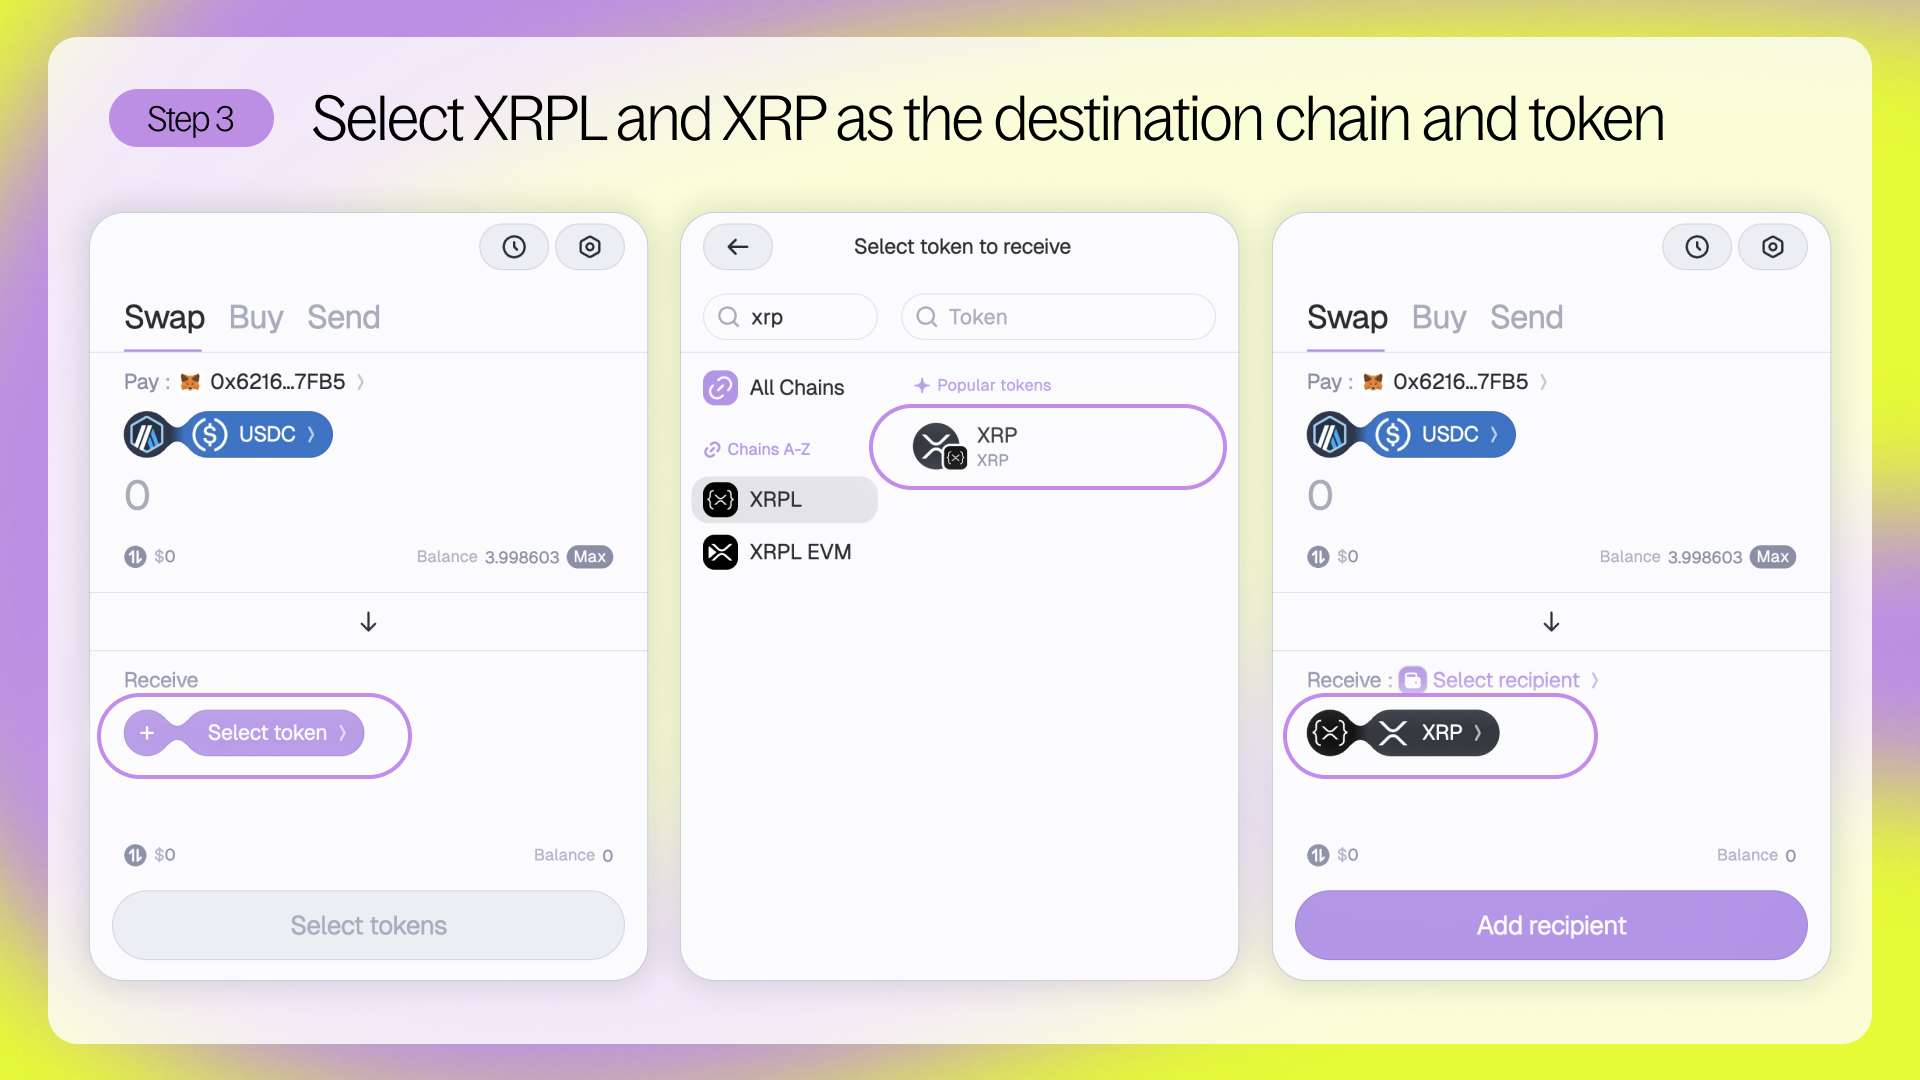
Step 3 – Set your destination chain and token to XRPL and XRP
Under Receive, click the dropdown and choose XRPL as the chain and XRP as the token.
This sets up a direct route from your current chain to the XRP Ledger.
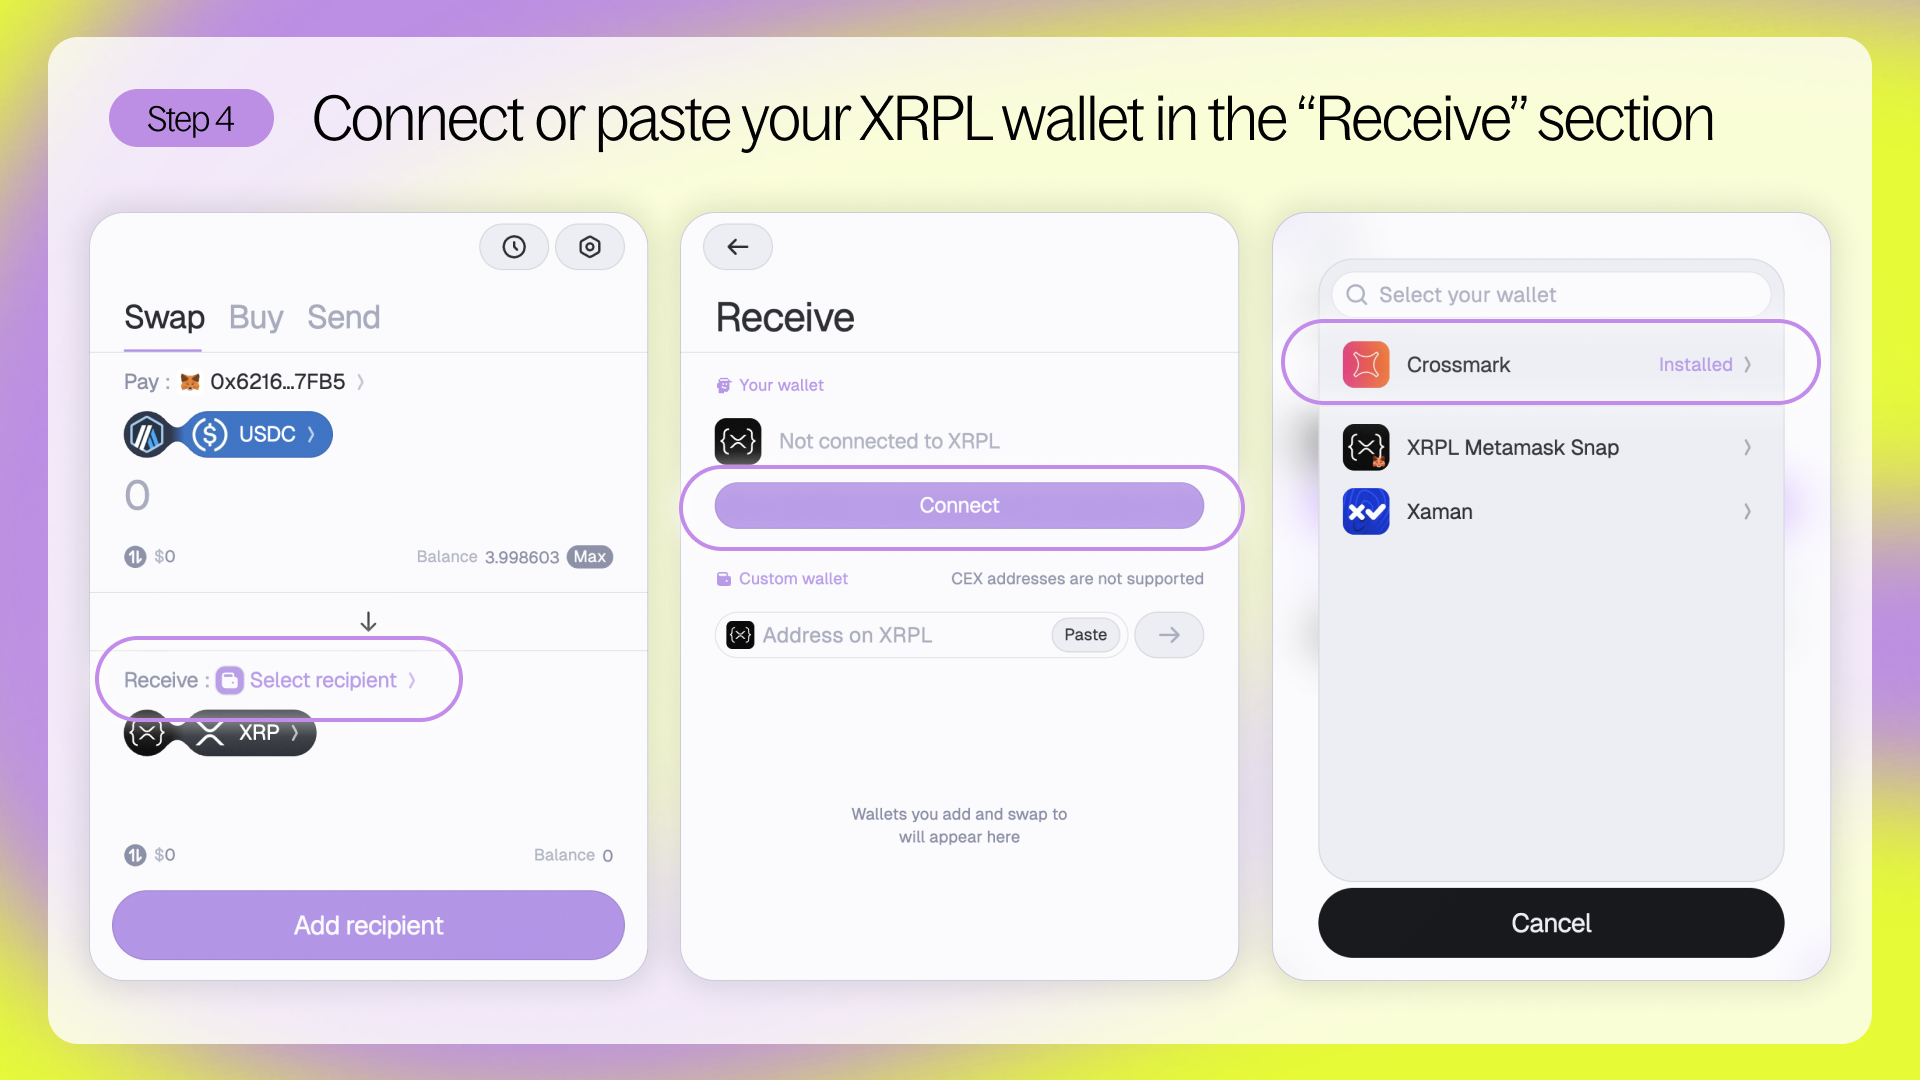
Step 4 – Add your XRPL wallet address
Click Select Recipient and either connect your XRPL wallet (e.g. Xaman or Crossmark) or paste your XRPL address directly.
Your XRP will be sent to this address.
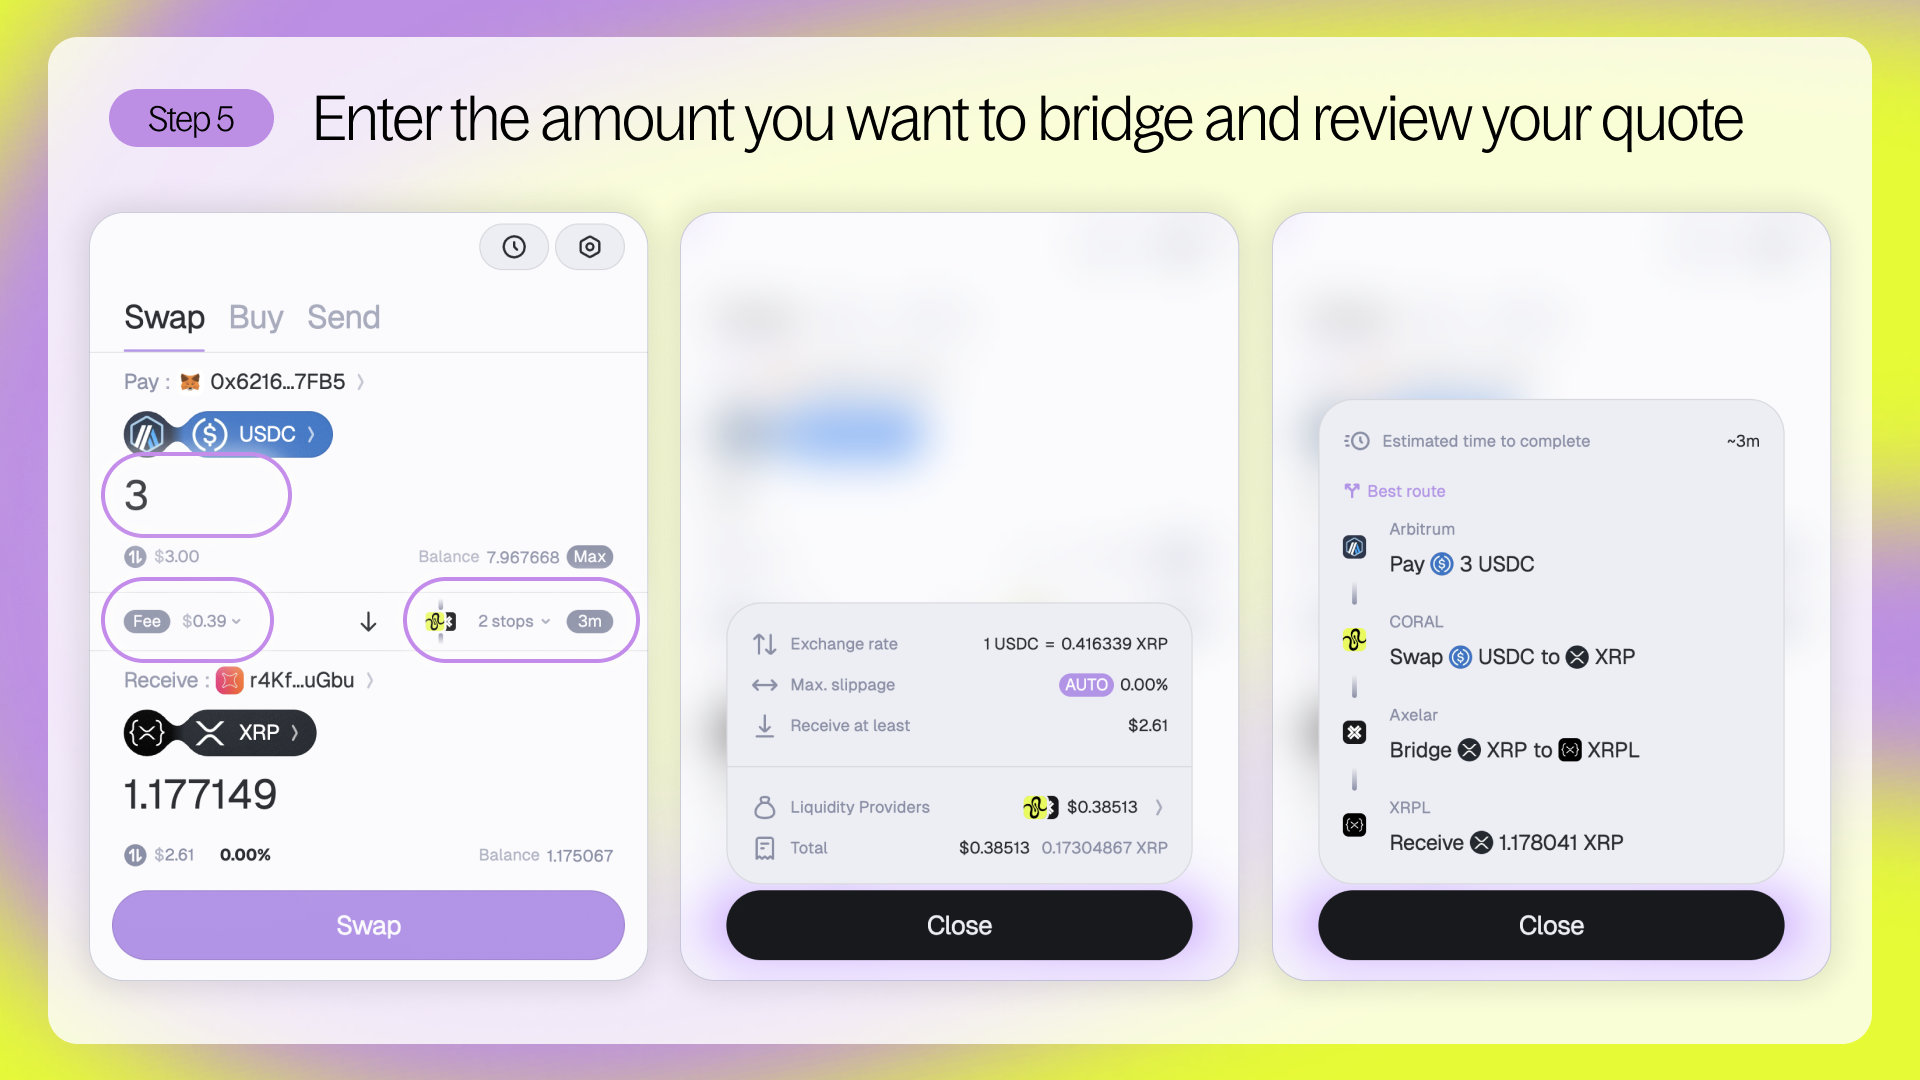
Step 5 – Enter the amount and check your quote
Type in the amount of your source token (e.g. ETH) to swap. Squid will show a full breakdown, including:
You may be asked to approve the token for swapping.
Step 6 – Confirm and complete your bridge
Click Swap and approve the transaction in your wallet. Squid will route your tokens automatically, and you’ll be able to follow the transaction status in real time.

Done — you now have XRP on the XRP Ledger!
Once your bridge is complete, you can view your XRP on the XRP Ledger directly in Squid’s Wallet View.
This lets you see your balances across all supported chains - XRPL, EVM chains, Cosmos, and more.