
How to stake $QUID: a step-by-step guide
In this guide, you'll learn how to stake $QUID and start earning rewards.
Staking lets your $QUID earn continuously based on the current APR, with rewards building up automatically for as long as your tokens stay staked. There's no lockup, so you can unstake at any time.
Staking QUID also leads to more opportunities for participation within governance and throughout the Squid ecosystem. Learn more about staking, along with governance, buybacks, and in-app utility here.
To get started, you'll need $QUID on Base in your wallet. If you don't have any yet, check out our How to buy $QUID: onchain and offchain guide first.
How to Stake $QUID
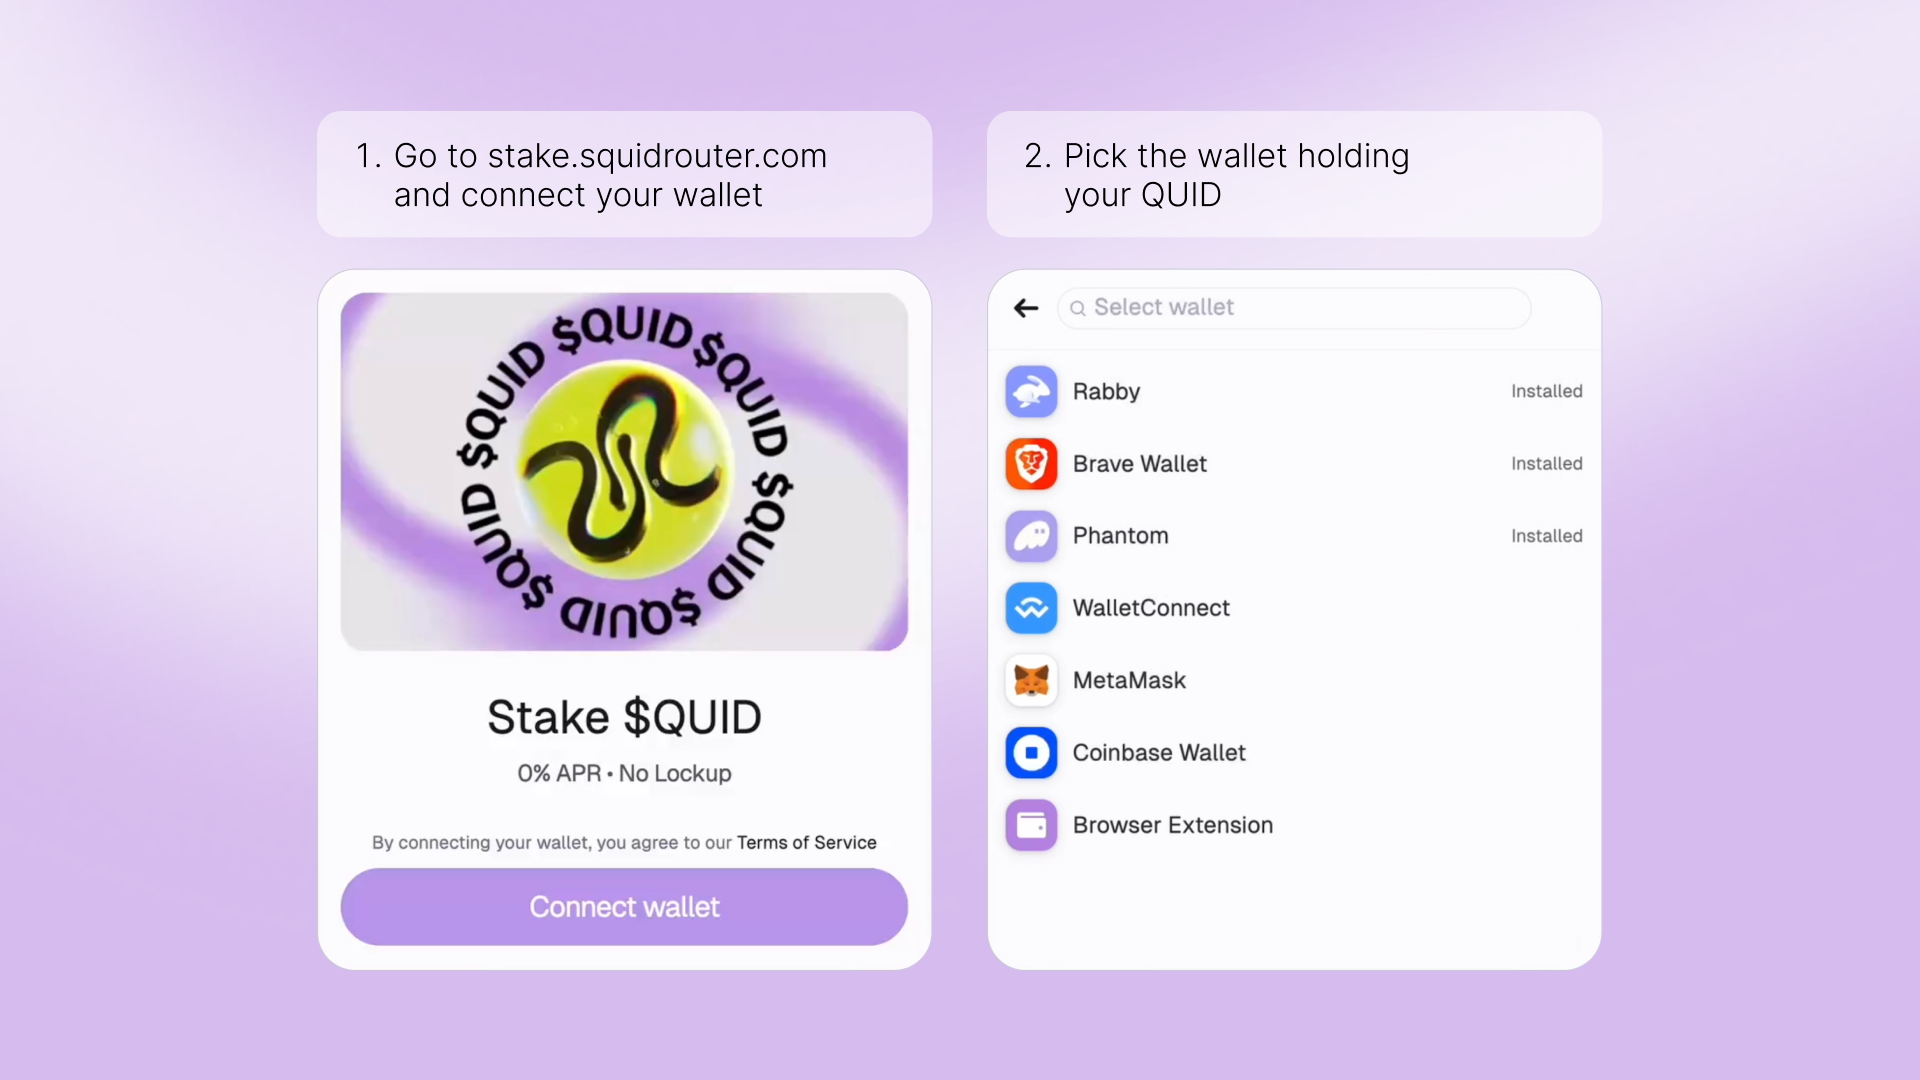
Step 1: Go to stake.squidrouter.com and click "Connect wallet." Staking is live on Base, and there's no lockup, so you can unstake at any time.
Step 2: Choose the wallet that holds your QUID. Squid supports MetaMask, Rabby, Phantom, Coinbase Wallet, Brave Wallet, and any wallet via WalletConnect. Once connected, the staking dashboard shows four things:
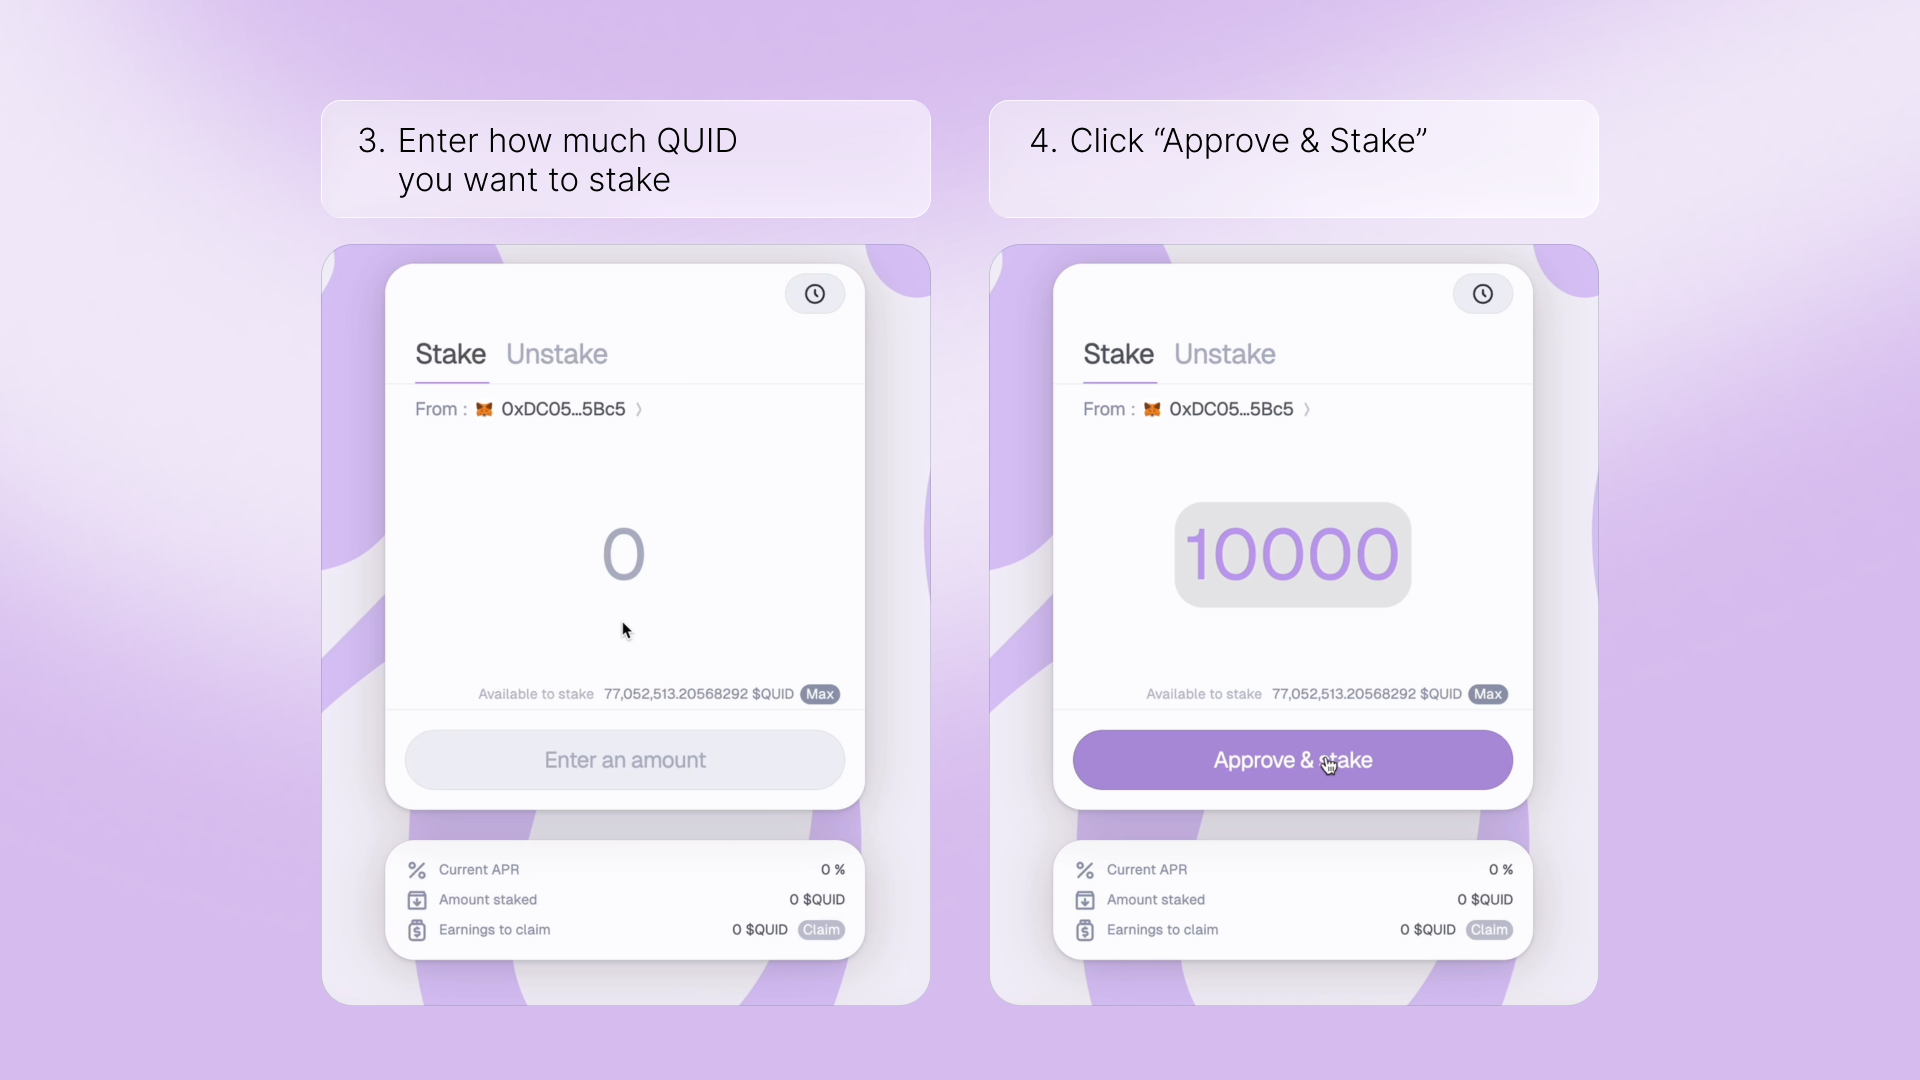
Step 3: Enter the amount of QUID you want to stake, or click "Max" to stake your full available balance.
Step 4: Click "Approve & Stake" to begin.
Step 5: You'll be asked to sign two transactions in your wallet:
Step 6: Once both transactions confirm, the dashboard updates to show your staked balance, and your QUID begins earning immediately. Your staked tokens leave your wallet while staked and return when you unstake.
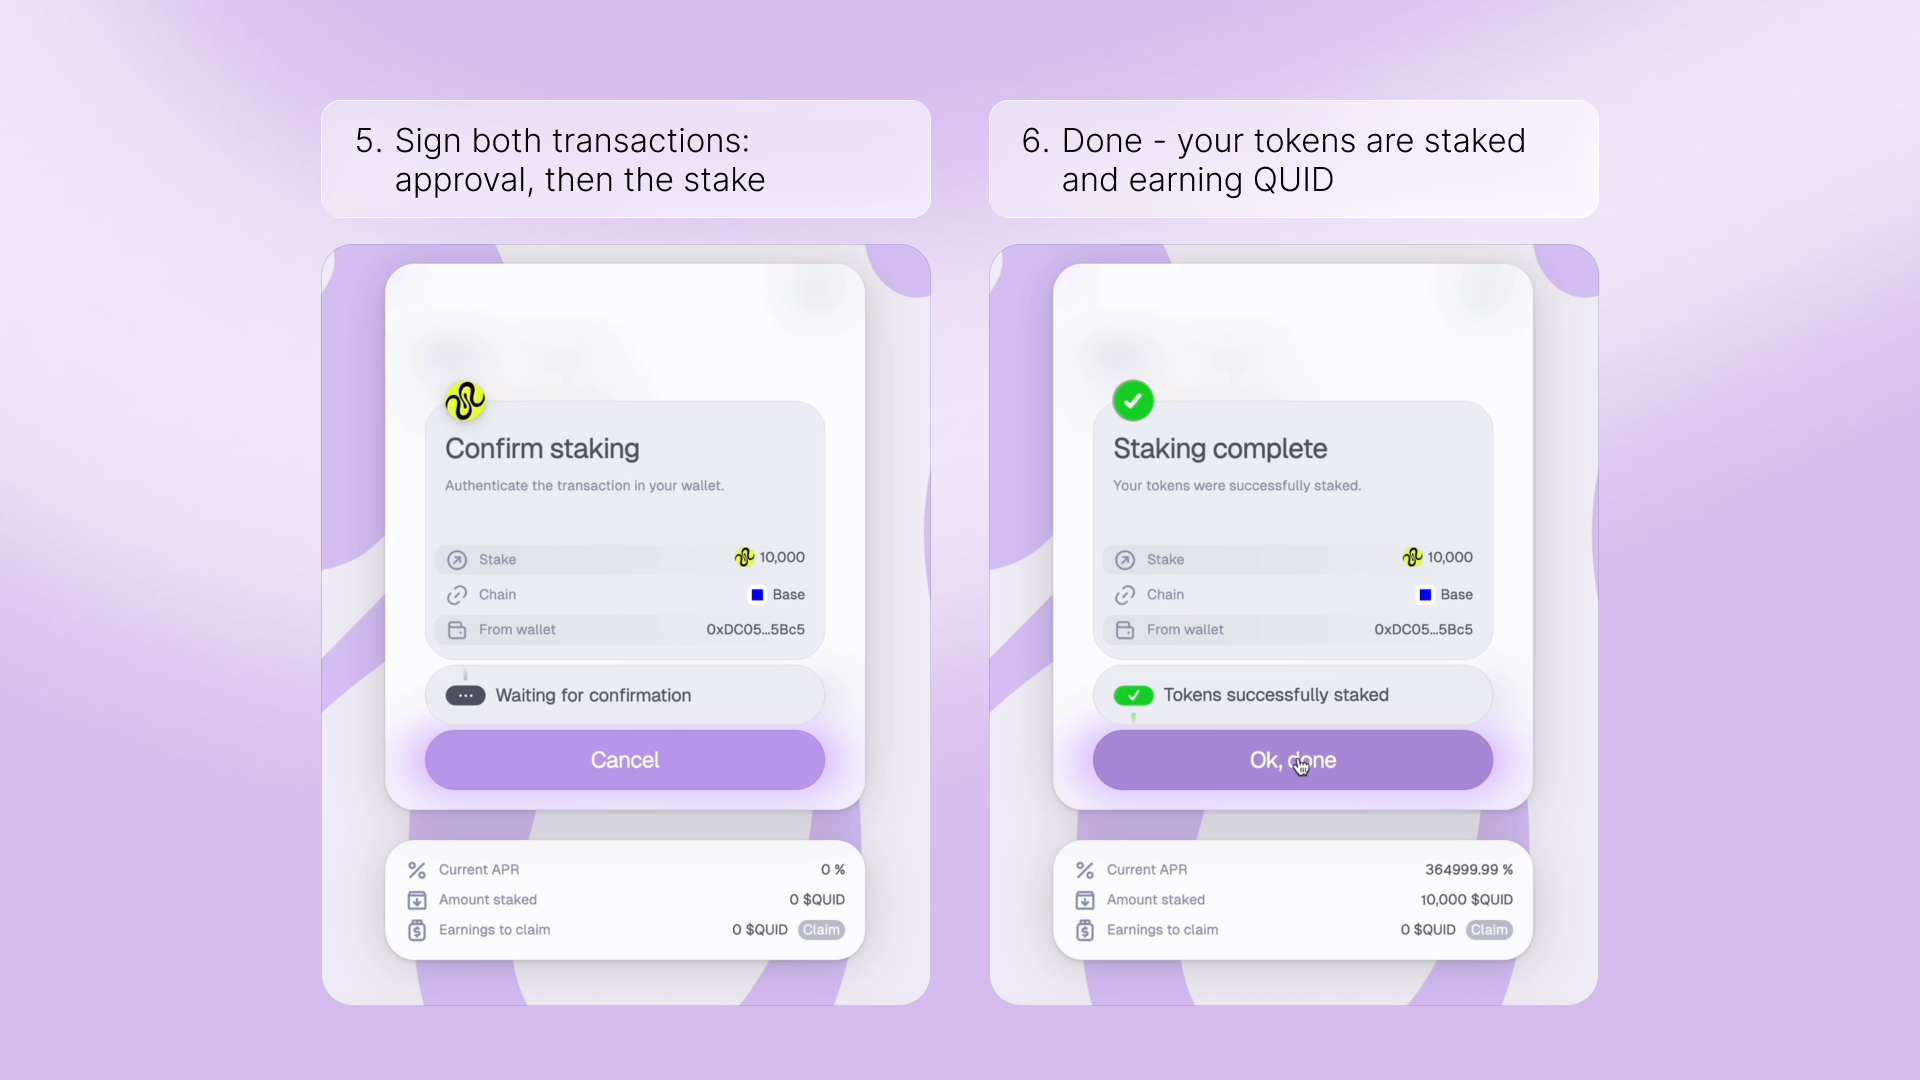
That's it! Your QUID is now staked and earning. When you're ready to claim your rewards or withdraw, follow the How to Claim $QUID and How to Unstake $QUID sections below.
How to Claim $QUID
Once your QUID has been staked for a while, it starts earning rewards based on the current APR. These build up automatically, and you can claim them to your wallet anytime without unstaking. Here's how.
Step 1: Go to stake.squidrouter.com and click "Connect wallet." Your staking rewards accrue automatically while your QUID is staked, and you can claim them at any time without unstaking.
Step 2: Choose the wallet that holds your staked QUID.
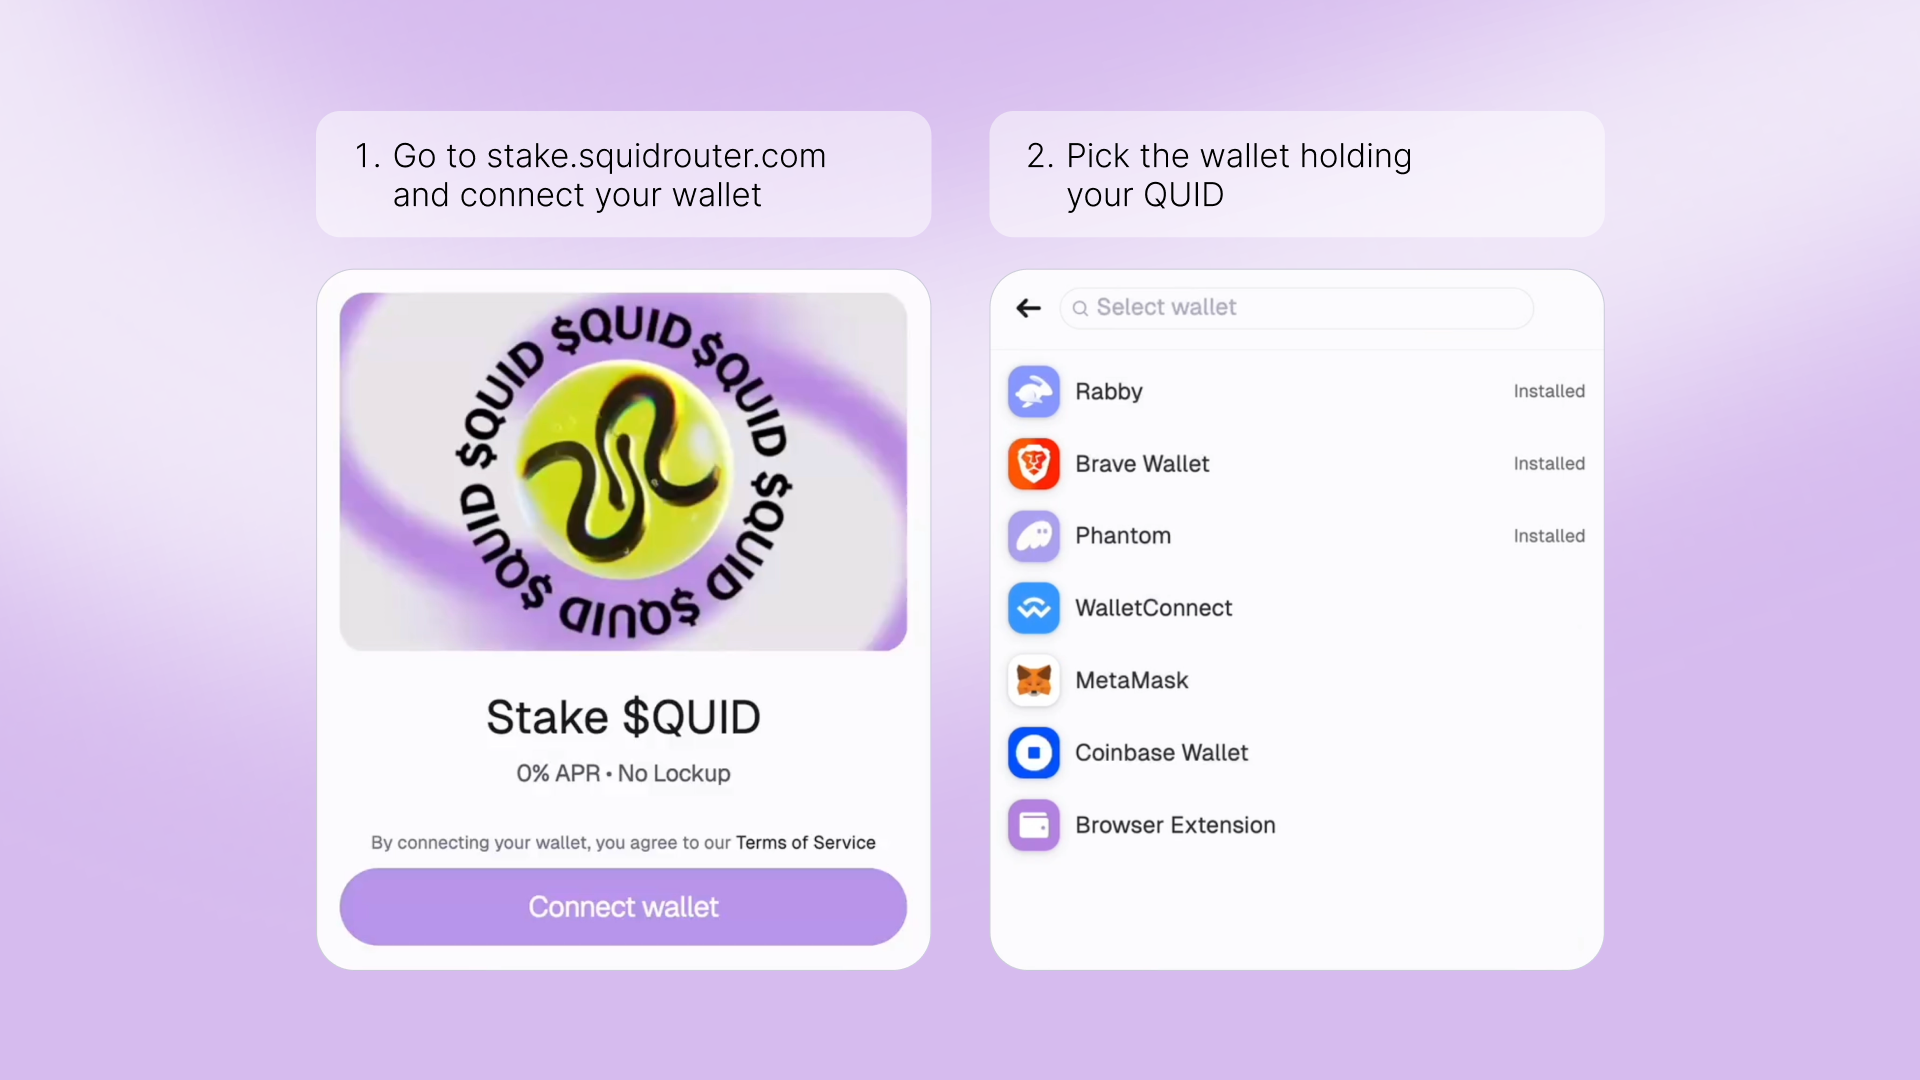
Step 3: Find your earnings in the dashboard and click "Claim." This claims your accumulated rewards while leaving your staked balance untouched, so your QUID keeps earning.
Step 4: Sign the transaction in your wallet to confirm the claim. You'll pay a small network gas fee on Base. Unlike staking, claiming only needs a single signature, there's no approval step.
Step 5: Once the transaction confirms, your claimed earnings land in your connected wallet and your earnings-to-claim balance resets to zero. Your staked QUID stays staked and immediately starts building new rewards.
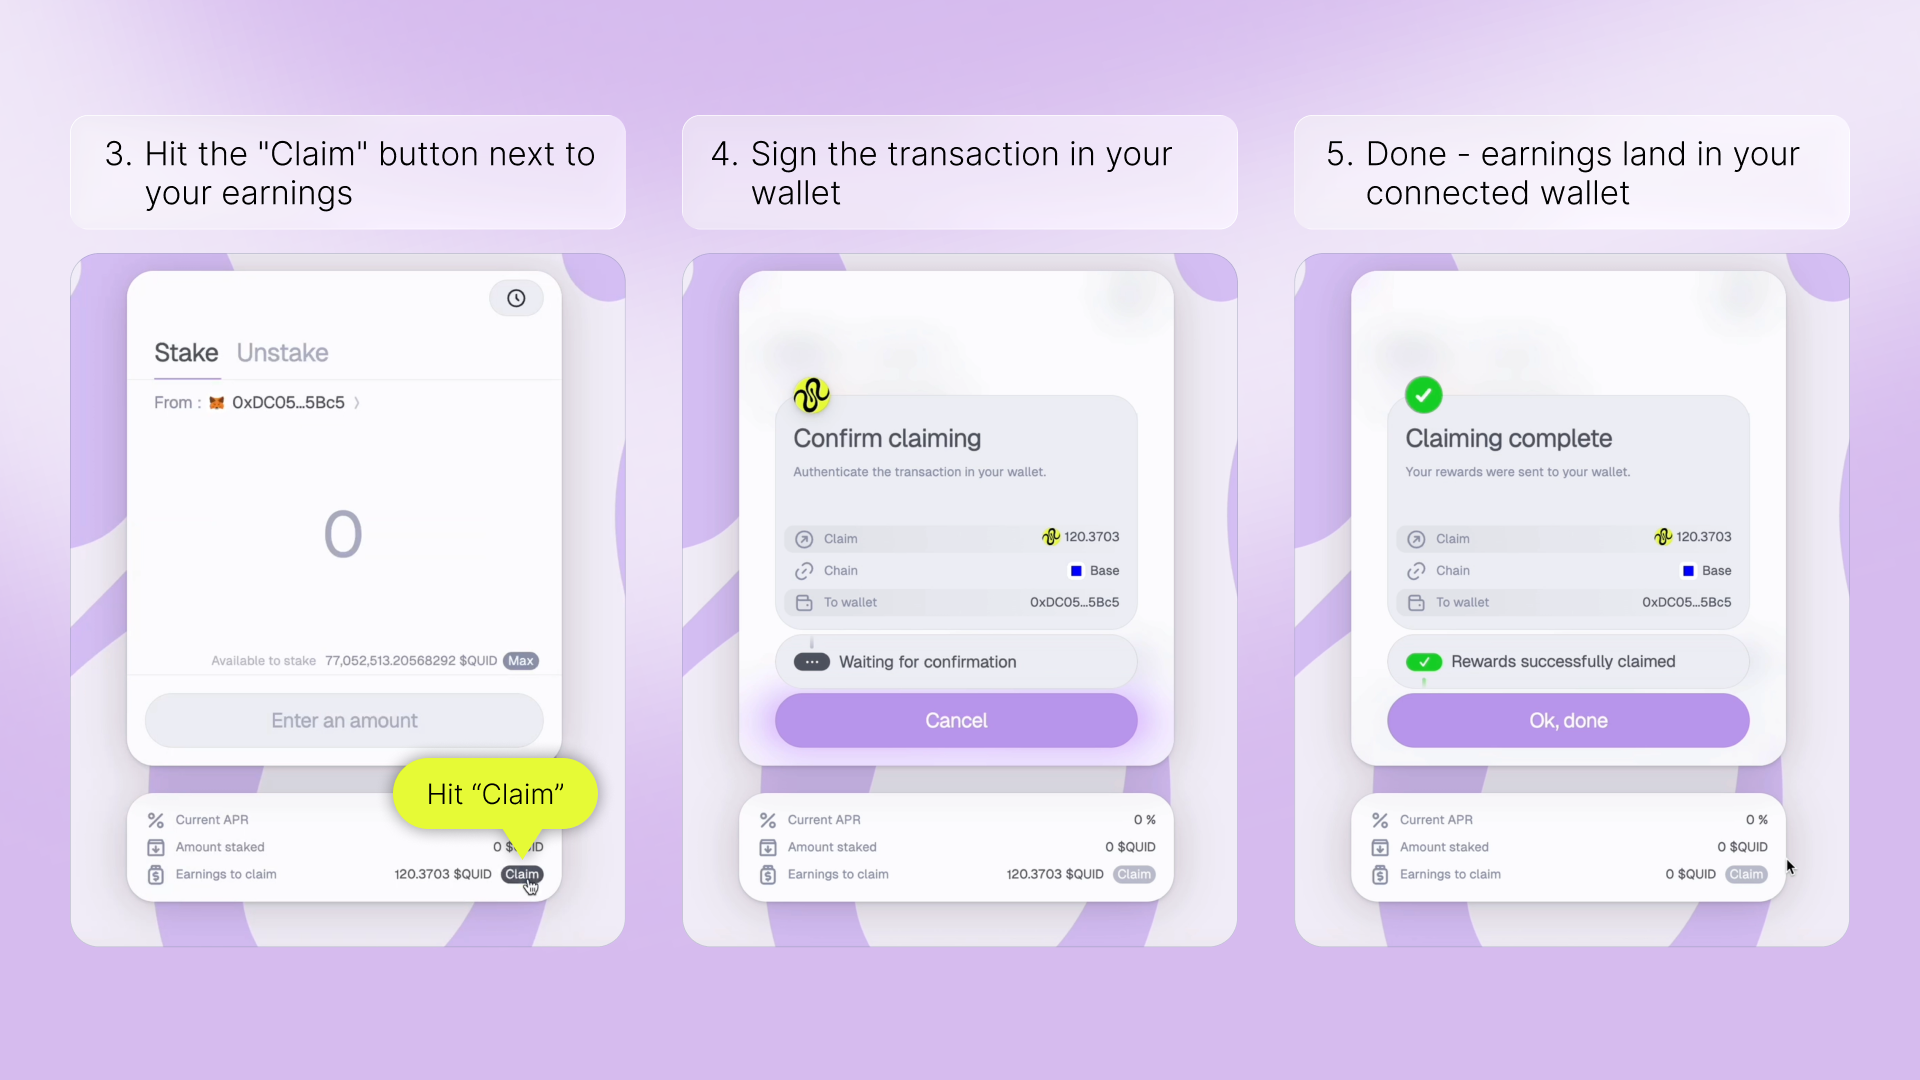
That's it! Your rewards are now in your wallet. Your QUID stays staked and keeps earning, so you can come back and claim again whenever you like. When you're ready to withdraw your staked tokens, follow the How to Unstake $QUID guide below.
How to Unstake $QUID
There's no lockup on staked $QUID, so you can withdraw at any time. Unstaking automatically claims any rewards you've built up, so your tokens and earnings return to your wallet together. Here's how.
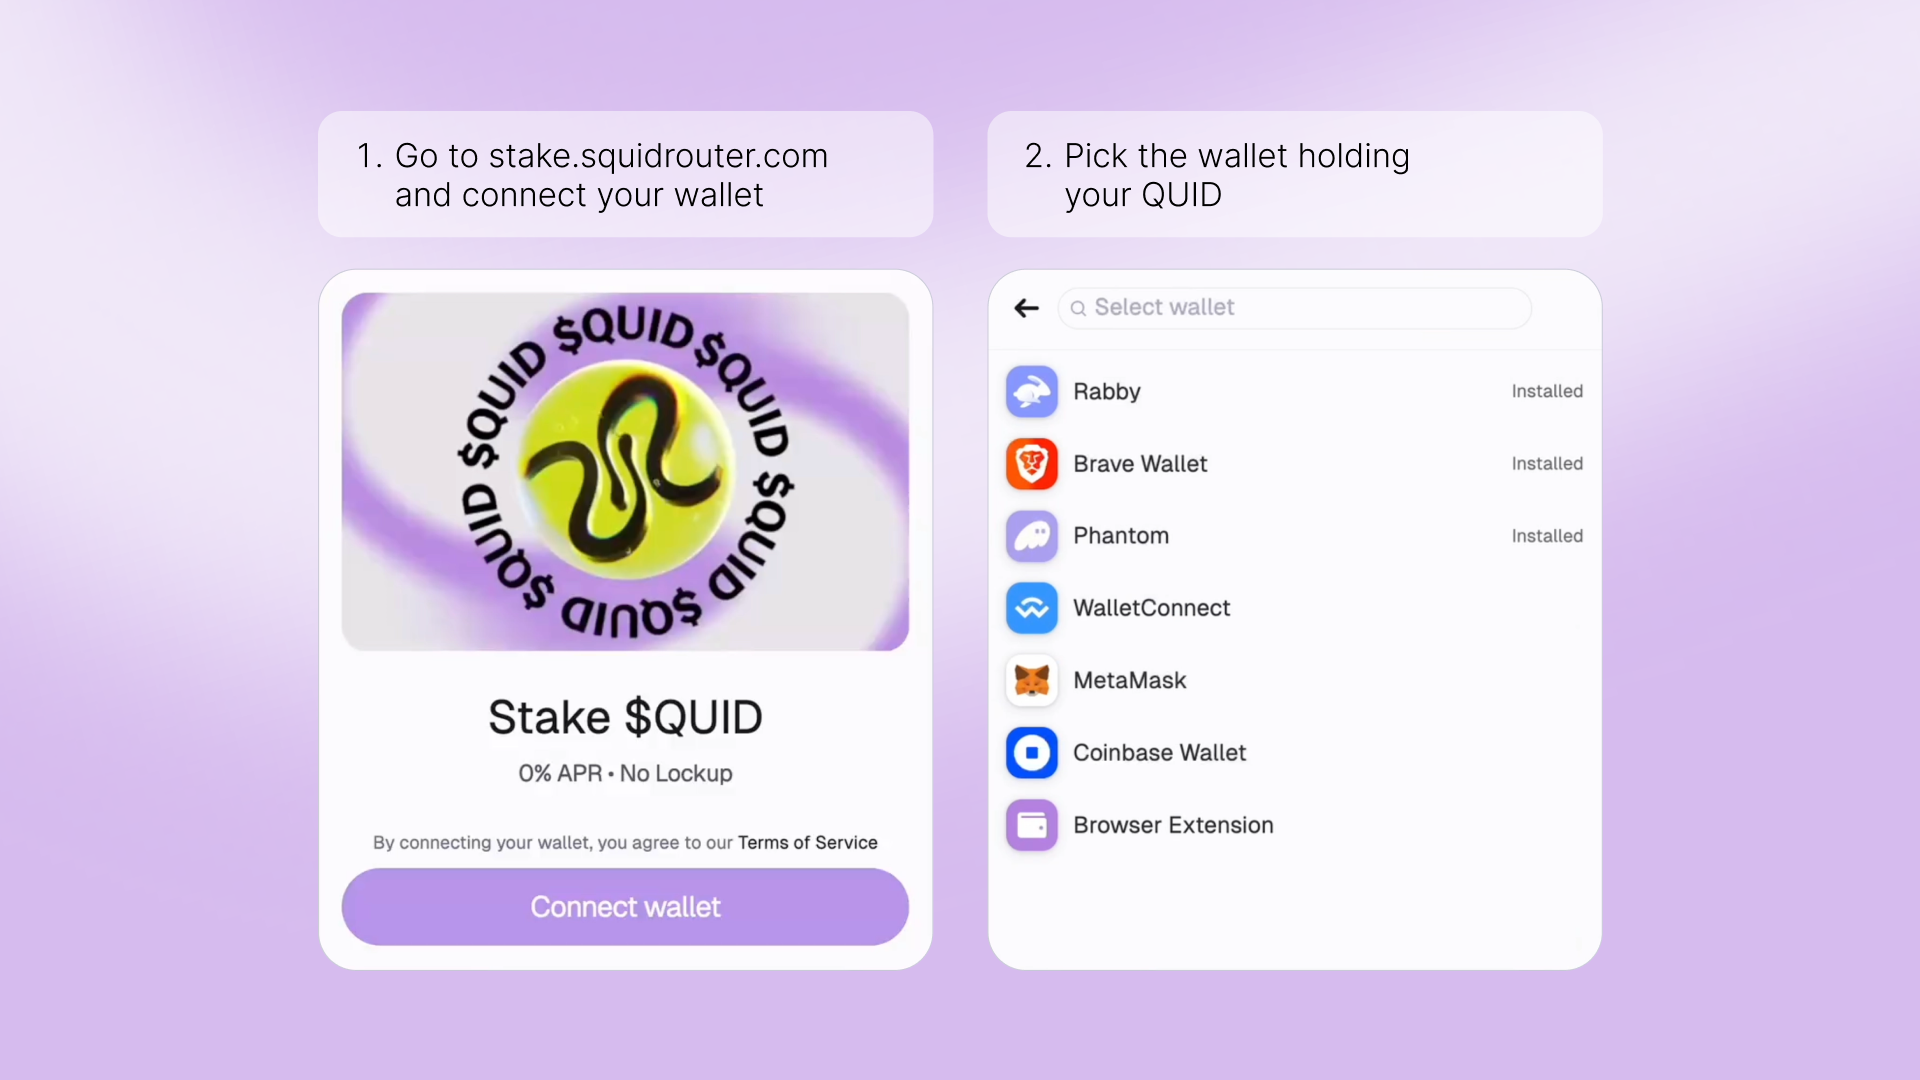
Step 1: Go to stake.squidrouter.com and click "Connect wallet." There's no lockup on staked QUID, so you can unstake any amount at any time.
Step 2: Choose the wallet that holds your staked QUID.
Step 3: Click the "Unstake" tab at the top of the staking panel, next to "Stake".
Step 4: Enter the amount of staked QUID you want to withdraw, or click "Max" to unstake your full staked balance.
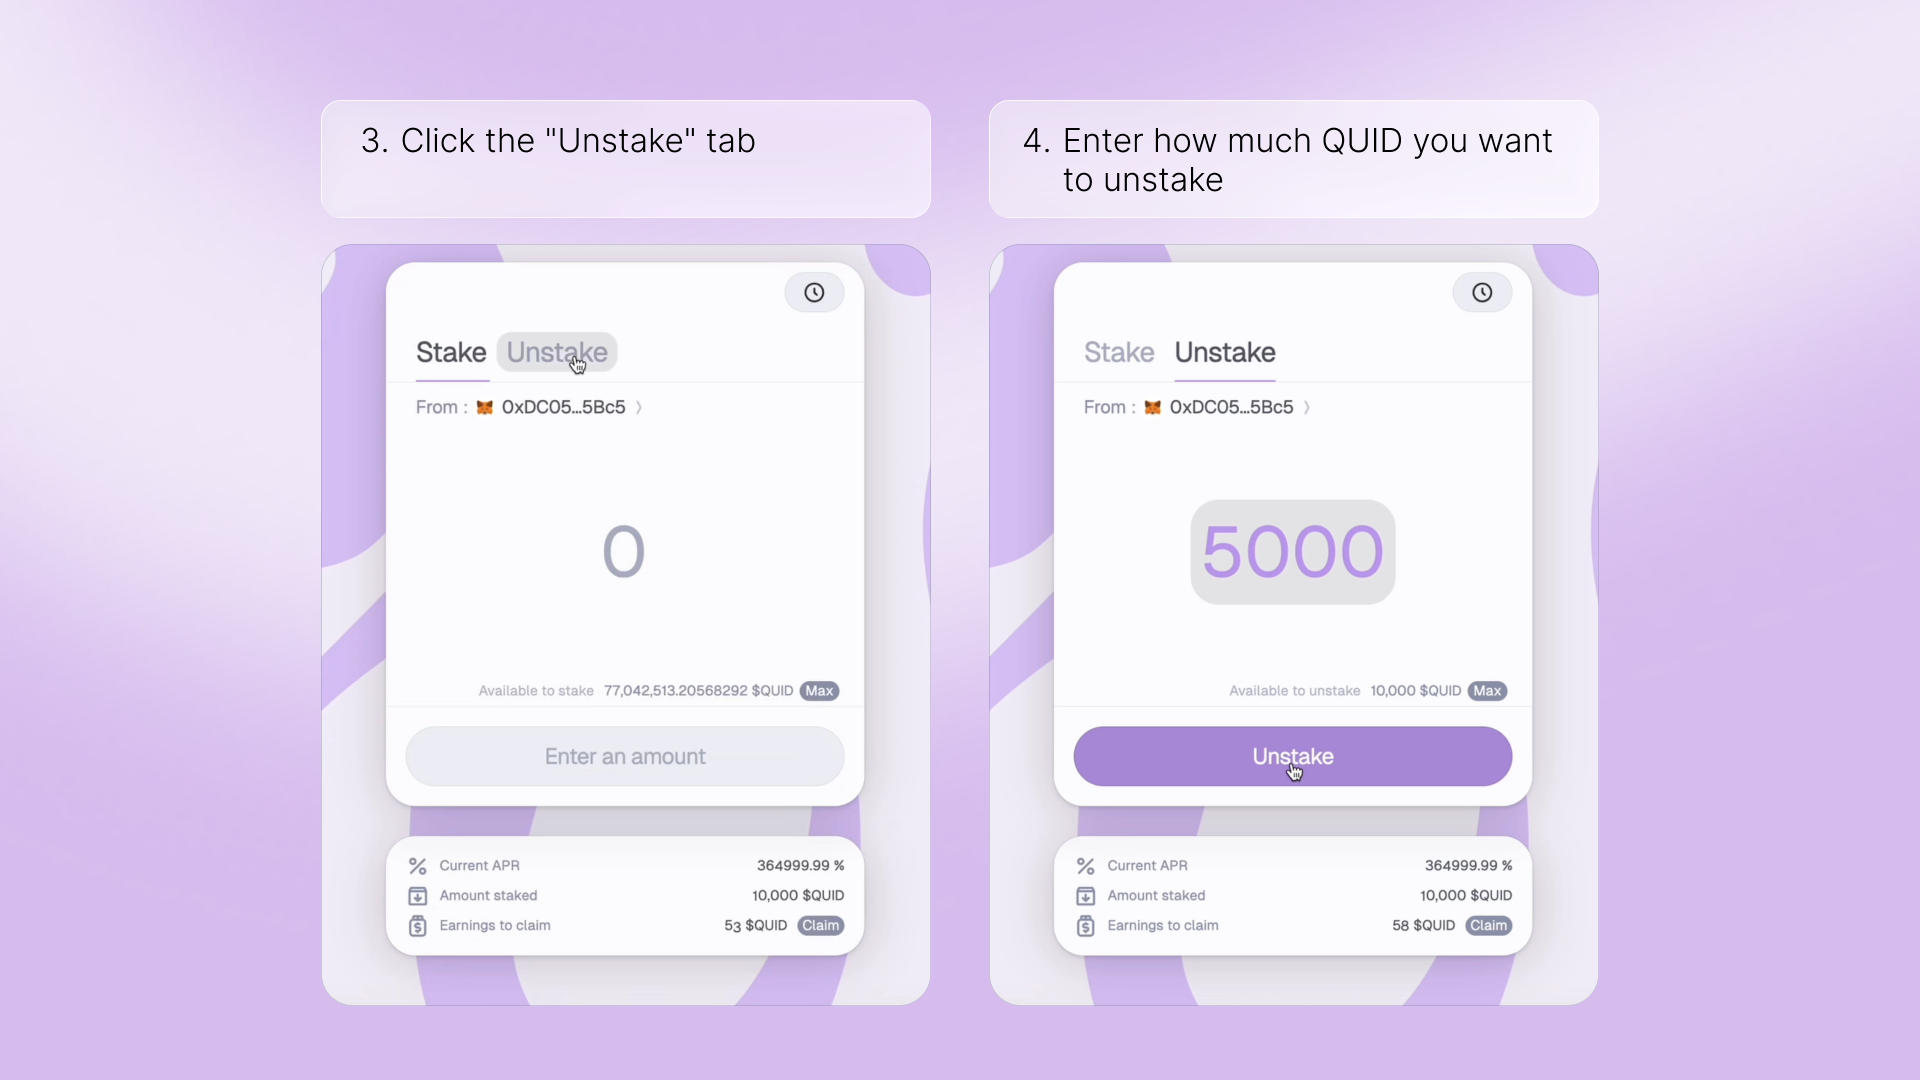
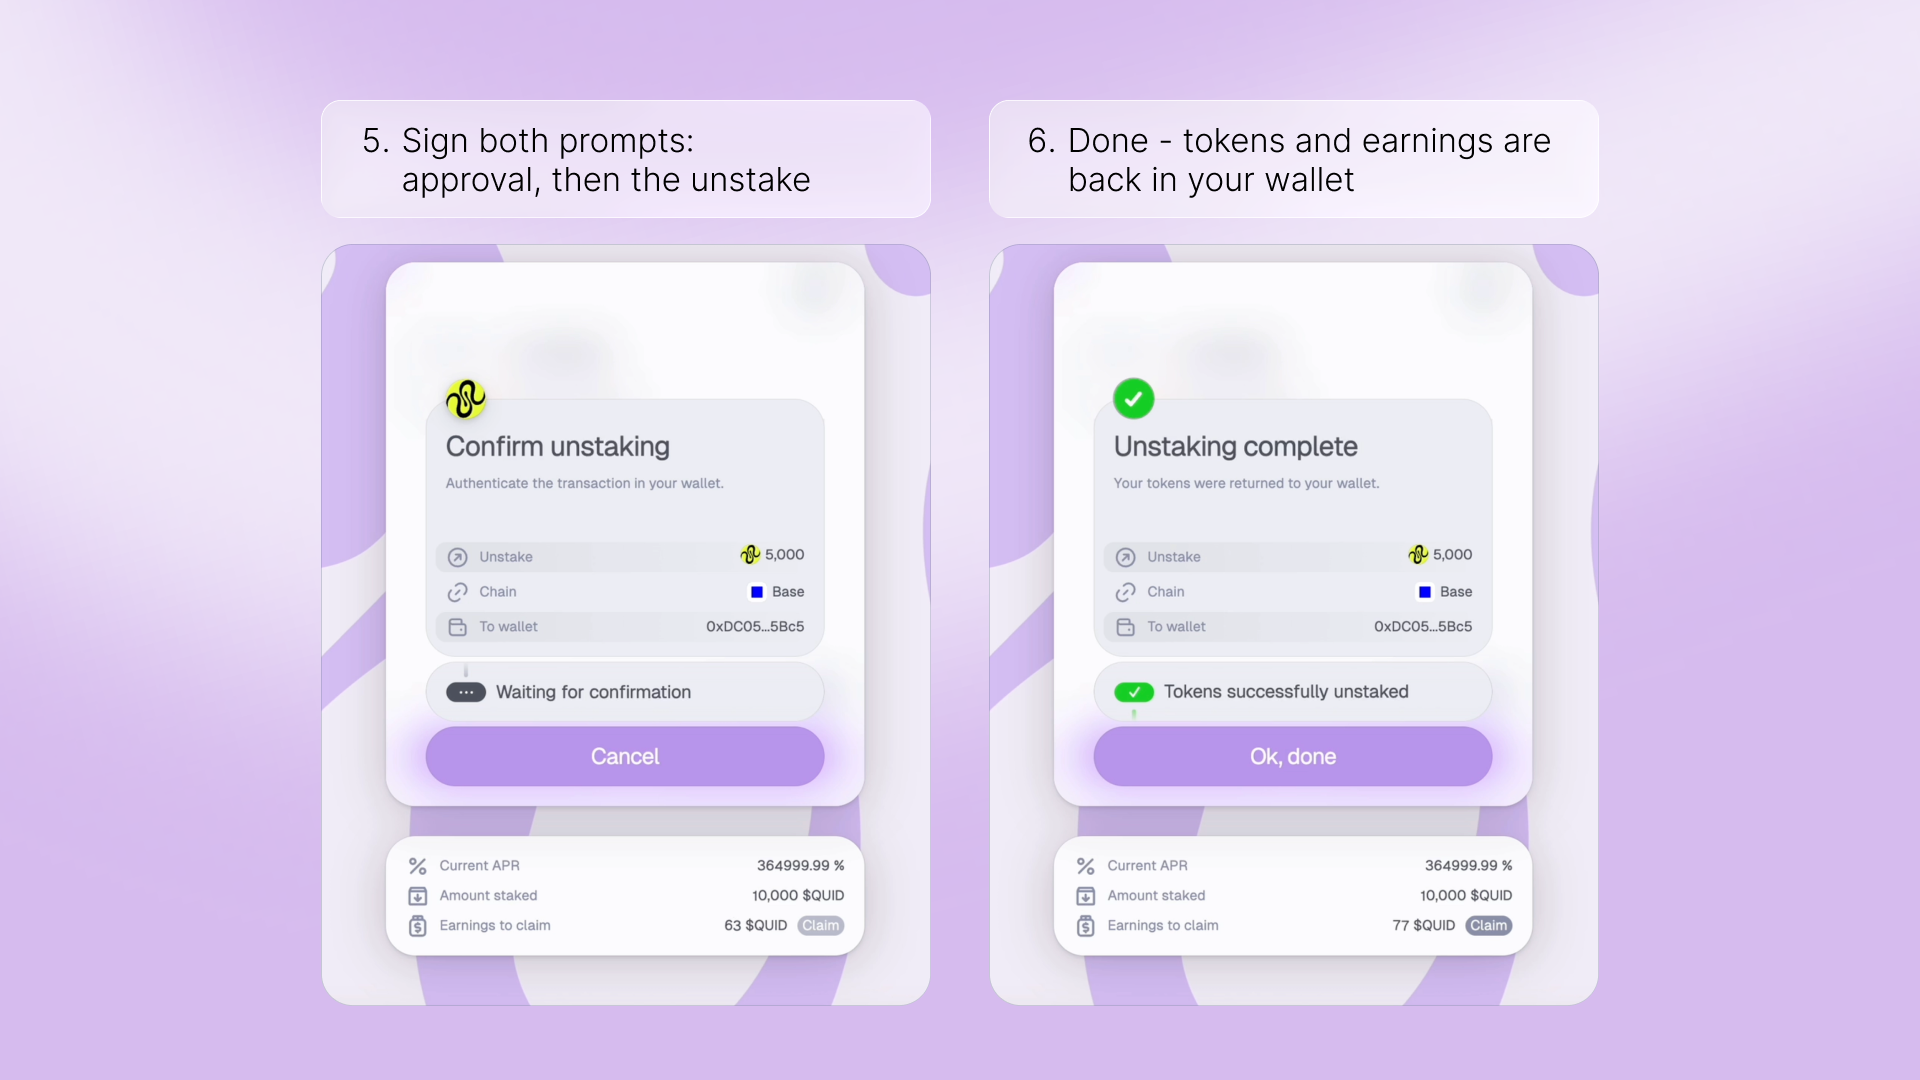
Step 5: Click "Unstake." You'll be asked to sign two transactions in your wallet.
Step 6: Once both transactions confirm, your unstaked QUID and your claimed earnings both land in your connected wallet. Any tokens you unstake stop earning rewards from that point on.
That's it! Your QUID and any earnings are back in your wallet. If you left some QUID staked, it keeps earning, and you can unstake the rest whenever you like.