
Joey Wallet: Your Companion for trading and DeFi on the XRP Ledger
Mobile Wallet: Joey for XRPL
Joey Wallet makes it easier than ever to hold XRP and explore other tokens and apps on the XRP Ledger. With a quick social login, no upfront fees, and built-in recovery, it’s one of the fastest and easiest ways to get started on XRPL.
About Joey Wallet
Joey Wallet is a mobile self-custody wallet for the XRP Ledger that combines speed, simplicity, and privacy.
Designed for the next generation of crypto users with security and customization in mind, Joey offers flexible recovery methods - create an XRPL wallet the traditional way, or use Web3Auth to recover your wallet through social login if your phone is ever lost. Plus, Joey doesn't collect your personal info - no email, no phone number, no hidden data tracking.
Joey makes it easy to do more than just hold XRP. From your wallet view, you can:
Tips to Stay Safe
While Joey makes wallet creation easy, you're still responsible for your funds. Here's how to keep your wallet secure:
How to Set Up Joey Wallet: Complete Step-by-Step Guide
Ready to join the XRP Ledger? Getting started with Joey Wallet takes just a few minutes. Here's everything you need to know to create your wallet and start exploring XRPL.
Before You Begin
Head to joeywallet.xyz and follow the links to download Joey from the App Store or Google Play. The app is available for both iOS and Android devices.
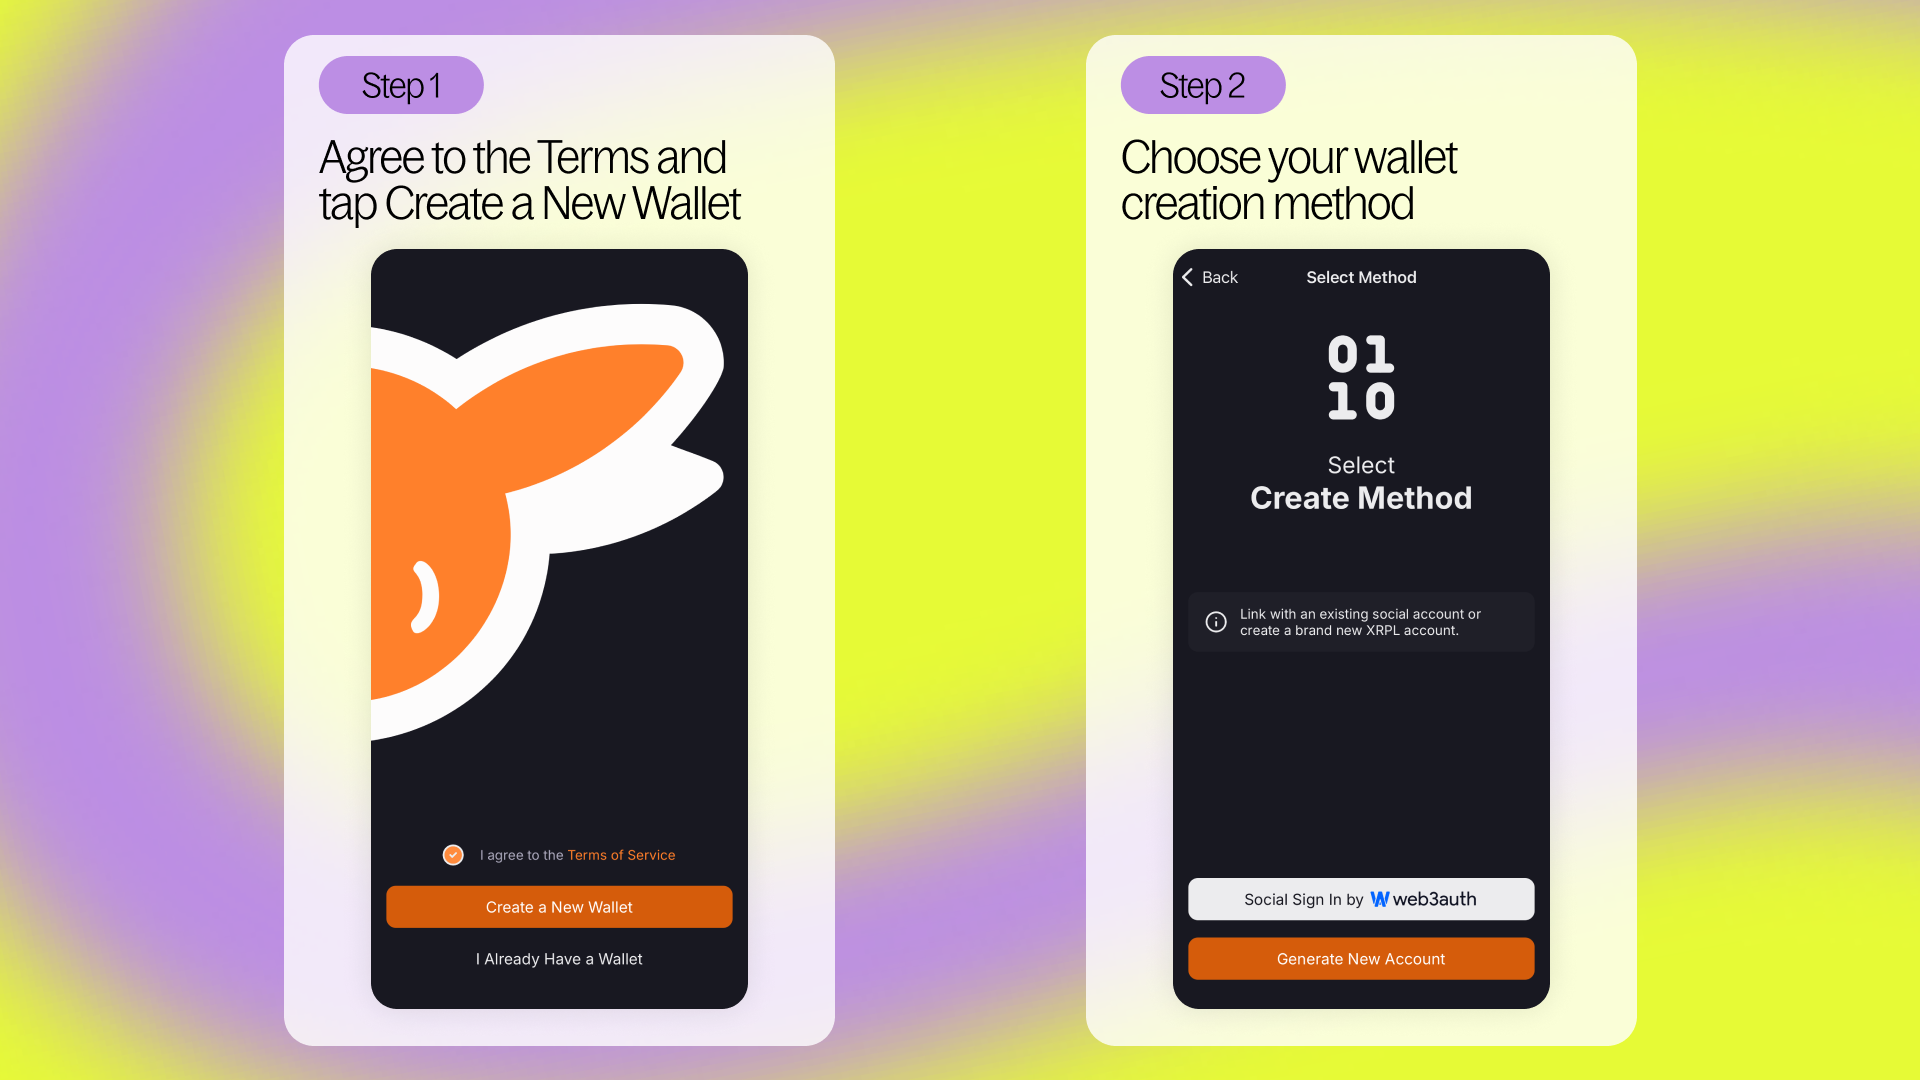
Step 1: Agree to the Terms and Create Your Wallet
Open the app, accept Joey's Terms of Service, and tap "Create a New Wallet".
Step 2: Choose Your Wallet Creation Method
You'll be asked to choose from two options:
Which method should you pick? Both are secure - it depends on how comfortable you are connecting social accounts versus backing up your recovery phrase manually.
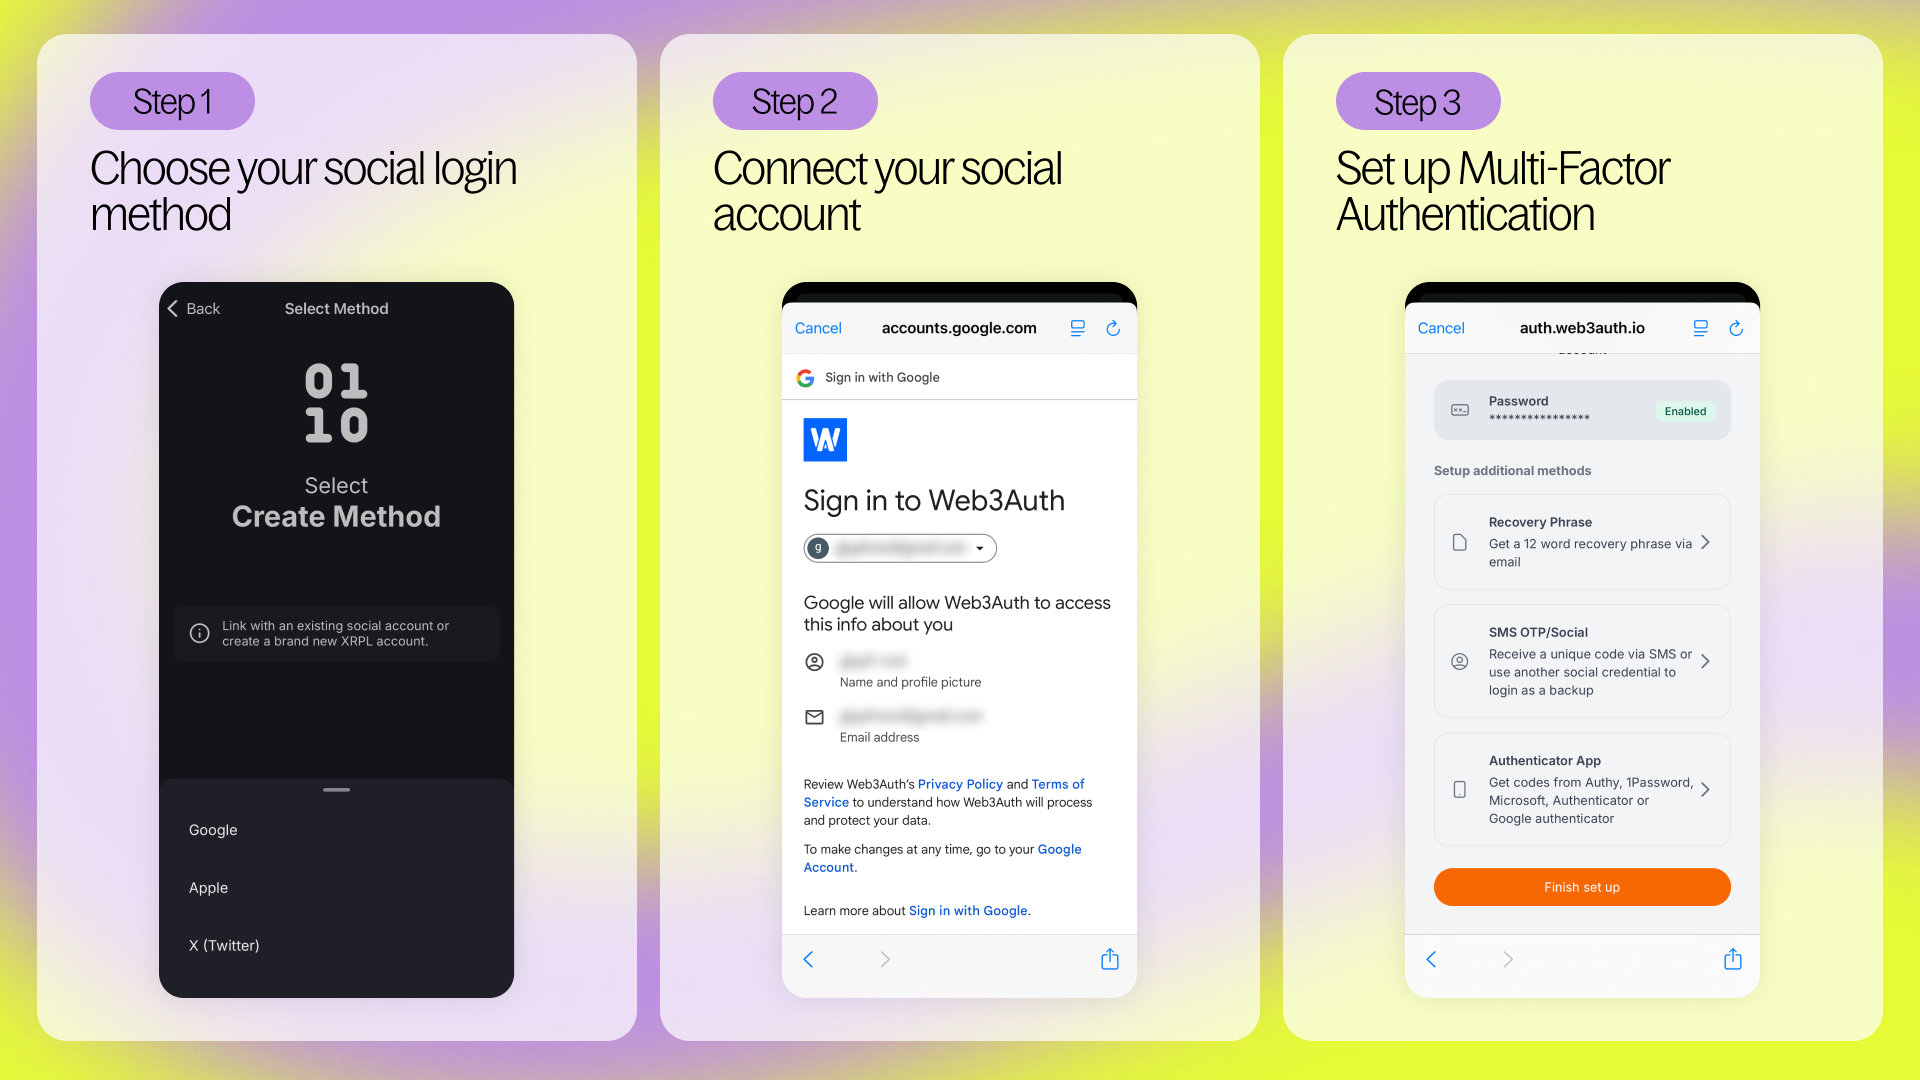
Option 1: Social Login Setup (Recommended for Beginners)
This method lets you log into your wallet using a social account and protect it with Multi-Factor Authentication (MFA). Joey creates a secure self-custodial wallet using Multi-Party Computation (MPC) to keep your keys safe behind the scenes.
Step 1 - Choose your social login method: Select which social login method you'd like to use: Google, Apple, or X. For this example, we'll use Google.
Step 2 - Connect your social account: Sign into Google using Web3Auth using the email you'd like to associate with your wallet.
Important: If you lose access to your linked Gmail account, you may also lose access to your Web3Auth account. You'll need to recover your Google account first, then use Web3Auth recovery methods.
Step 3 - Set up Multi-Factor Authentication: Tap "Enable MFA" to set up additional security. Beyond your social login, you'll need:
Why MFA matters: This gives you backup access if you forget your password or lose access to one method. For additional security, you can set up a passkey that enables fingerprint, face recognition, or screen lock login across all your compatible devices.
Option 2: Manual Account Generation (For Experienced Users)
This method doesn't require social login but means your account isn't recoverable via social login. You'll need to ensure your keys are backed up privately and securely.
If you prefer the traditional crypto approach, tap "Generate New Account" and follow the prompts to create and securely store your recovery phrase.
Step 3: Choose Your Security Settings
Your wallet is created! Select your transaction security method:
We recommend device authentication or biometric verification.
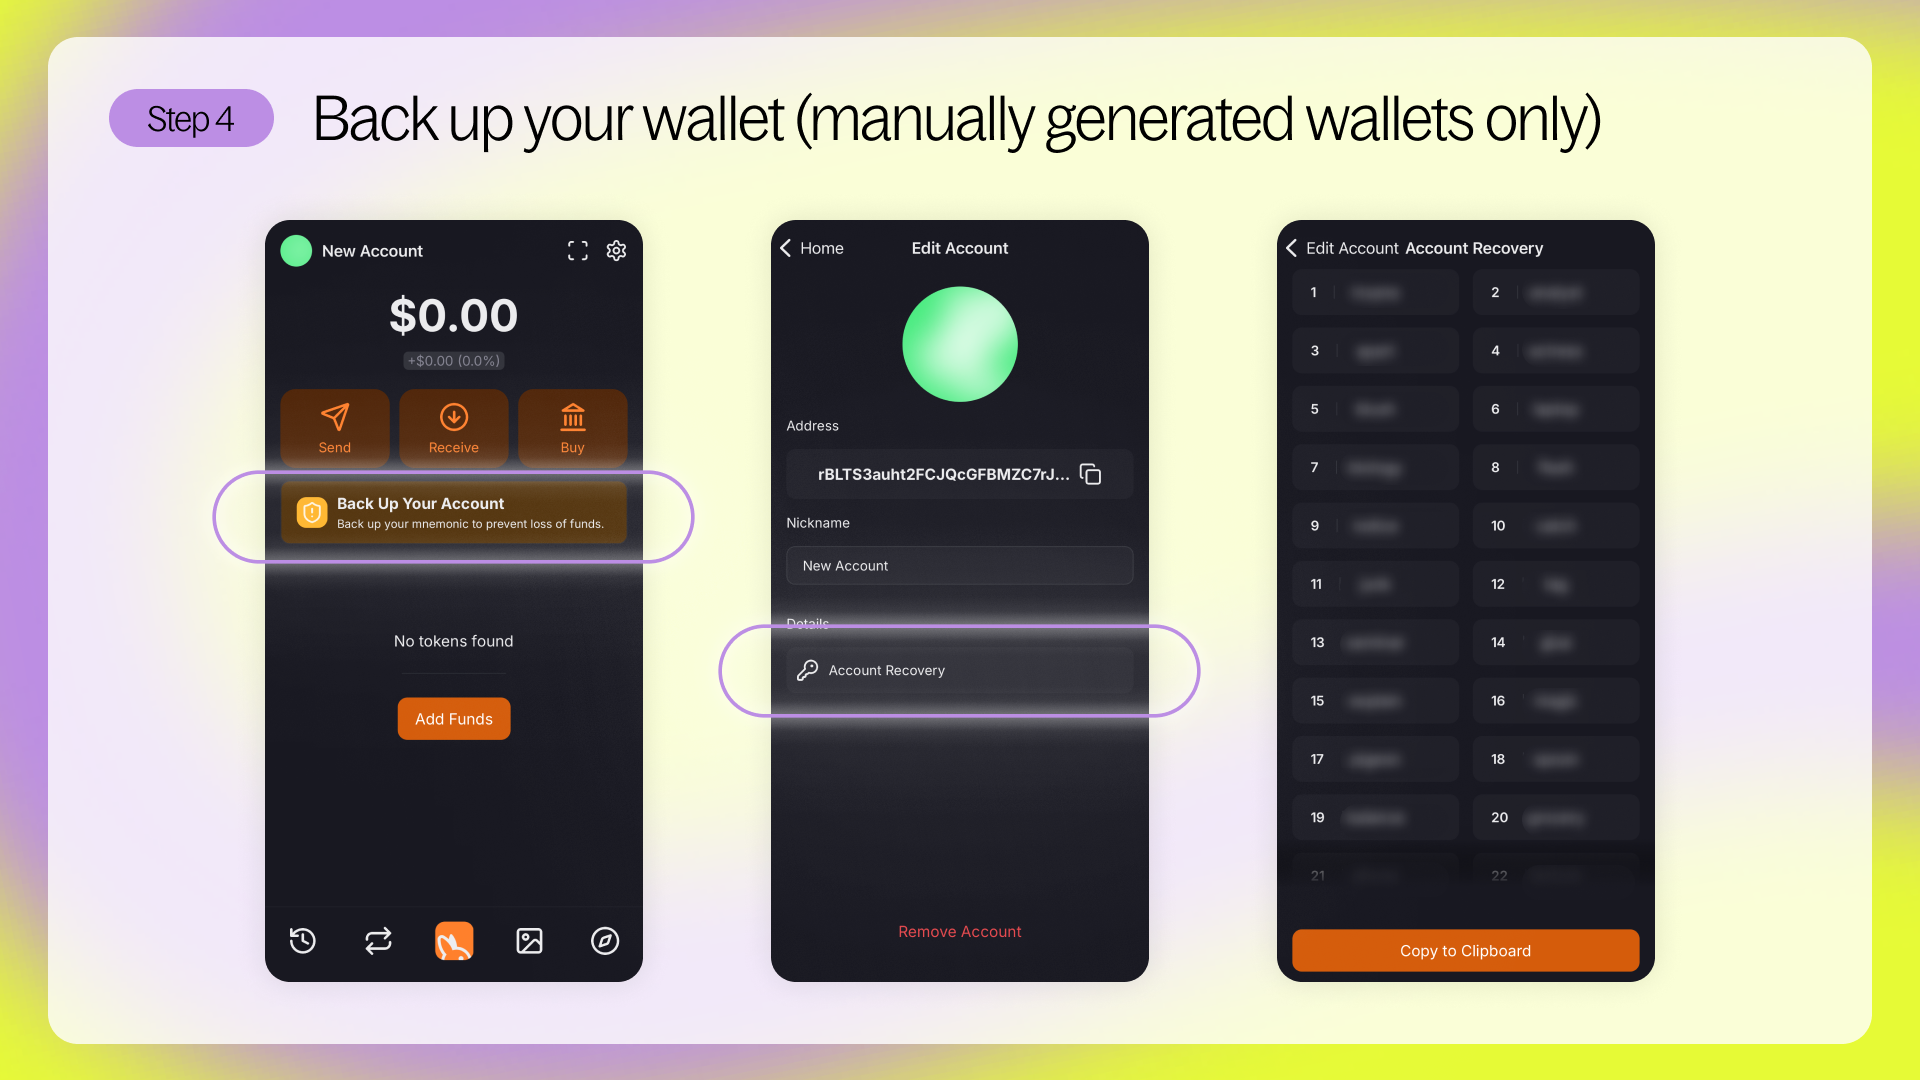
Step 4: Back Up Your Wallet (Manually generated wallets only)
If you manually generated your account, you'll see a backup prompt. Note: Social login accounts can't export recovery phrases.
Tap the backup notification or go to Settings → Accounts → Edit Account → Account Recovery to view your 24-word seed phrase.
Write it down offline (pen and paper). Never save digitally. Without this phrase, you cannot recover your account.
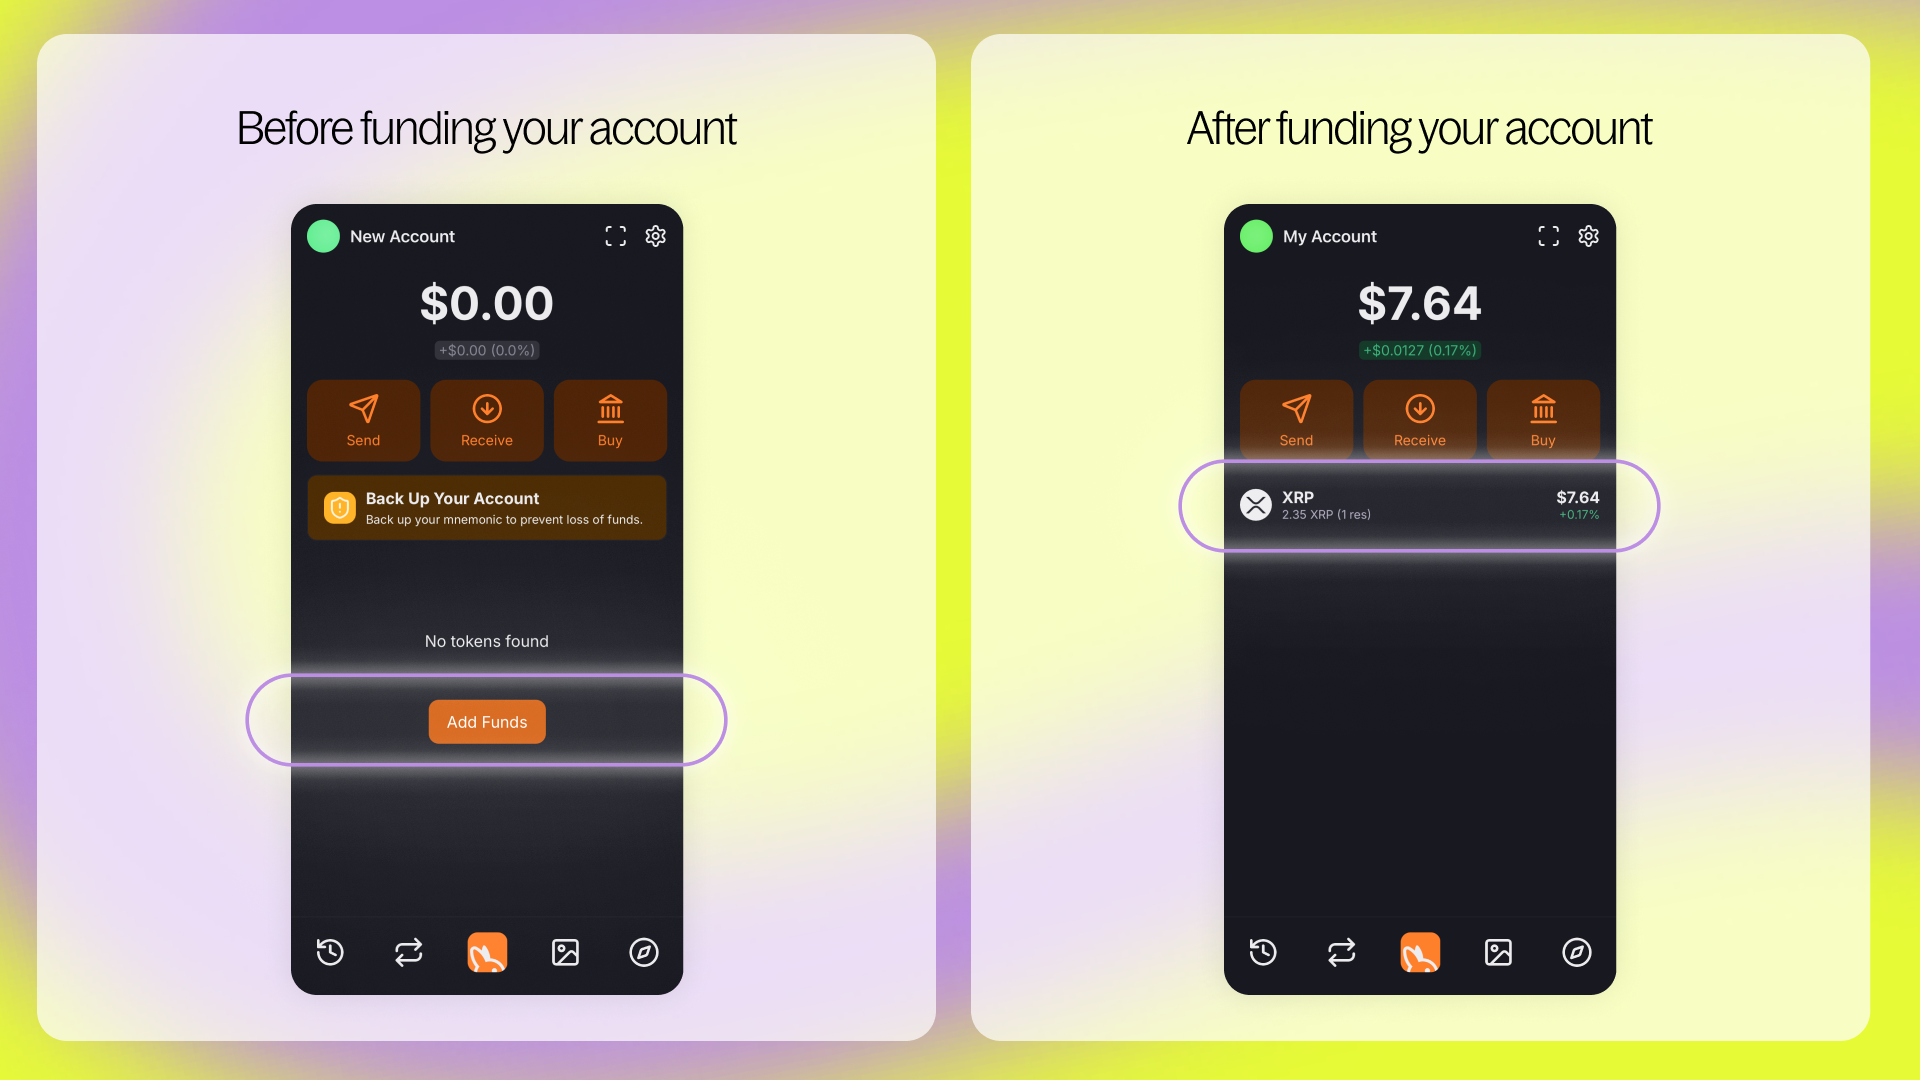
Step 5: Fund Your Account
To activate your account, you'll need to send at least 1 XRP to your address. This is an XRPL network requirement - not a fee, just a reserve to keep your wallet live. Tap "Add Funds" to use Moonpay, or use these other methods:
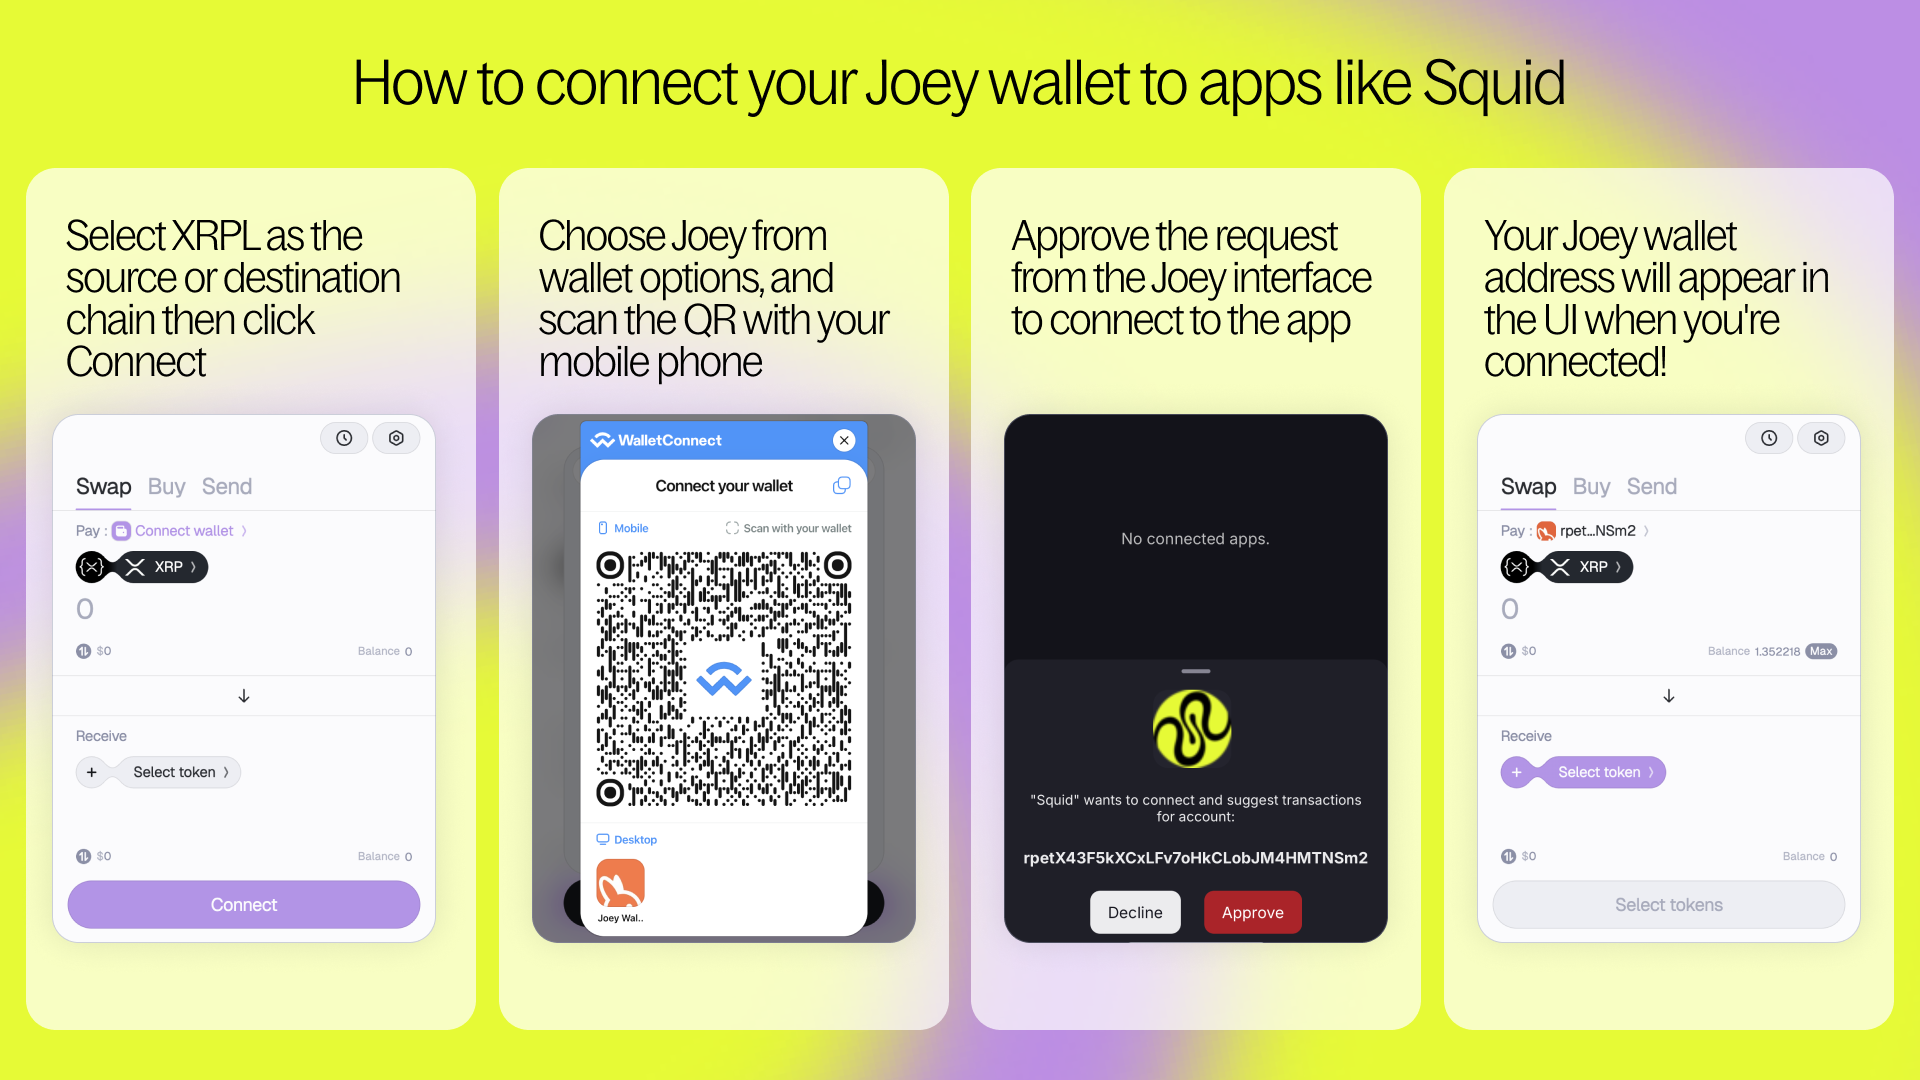
Connecting Joey to Apps like Squid
Want to bridge to XRPL from other ecosystems like Ethereum, Solana, or Cosmos? Head to Squid’s app and follow the steps to connect your wallet:
If your Joey wallet address appears in the UI, you're connected!
Welcome to the XRP Ledger!
You're all set and ready to explore everything XRPL has to offer! You can now use Squid and Joey to: