
How to Set Up Crossmark (Desktop Wallet) to Hold and Use XRP on XRPL
Desktop Wallet: Crossmark for XRPL
The first step to going onchain with XRPL is setting up a self-custodial wallet and funding it with a little XRP. If you’re on desktop, Crossmark is a great browser-based option - simple, fast, and built for exploring XRPL and Xahau dApps.
Looking for a mobile-friendly wallet instead? Check out our Xaman guide →
Crossmark is a self-custodial hot wallet built for the XRPL and Xahau networks. It lets you connect directly to onchain apps, mint NFTs, access DeFi, and bridge assets without relying on a centralized exchange.
Because it’s a hot wallet, Crossmark stays connected to the internet for fast, real-time use. But with that convenience comes responsibility: you hold your own keys, stored locally and encrypted on your device. That means full control over your assets - but also full responsibility for keeping them safe.
Tips to Stay Safe
How to Set Up Your Crossmark Wallet
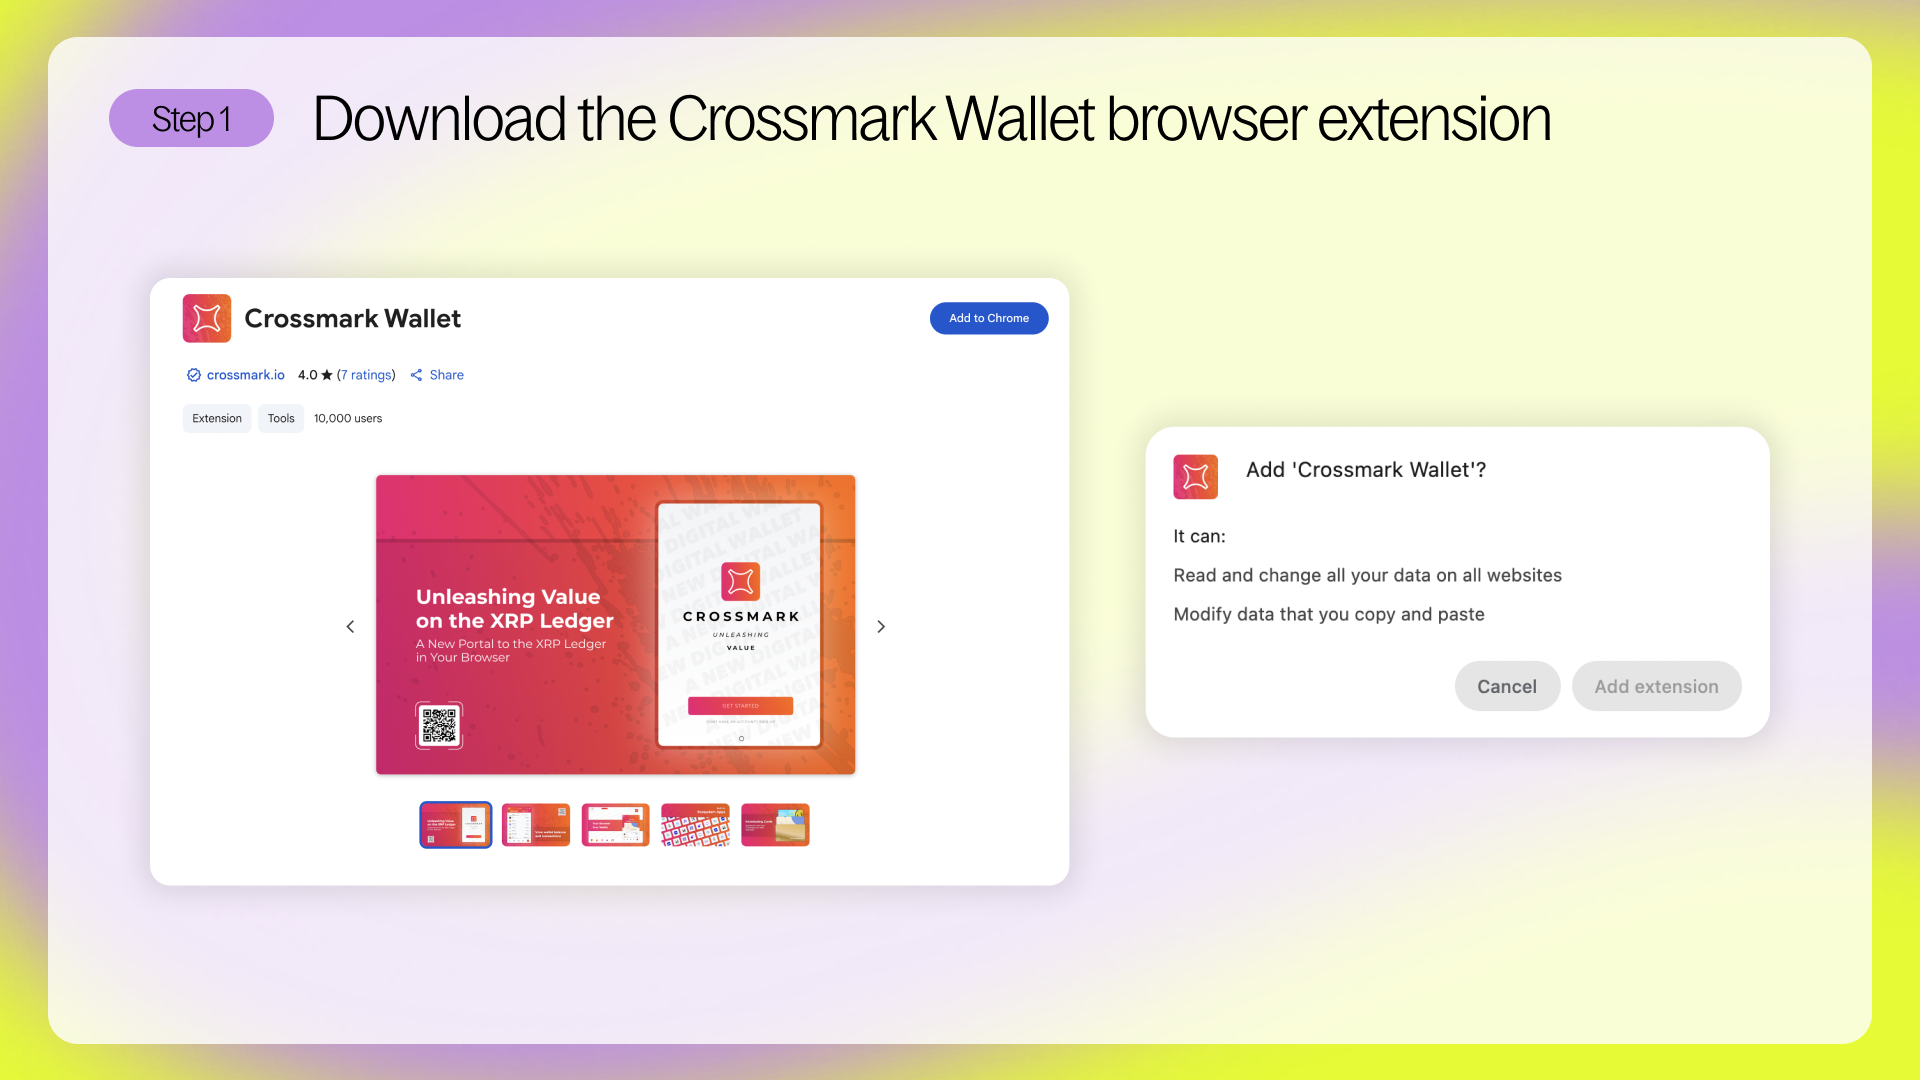
Step 1: Download Crossmark
Visit crossmark.io and click Download, then add Crossmark wallet extension to your Chrome browser. This will let you create and manage a self-custodial XRPL wallet directly from your browser.
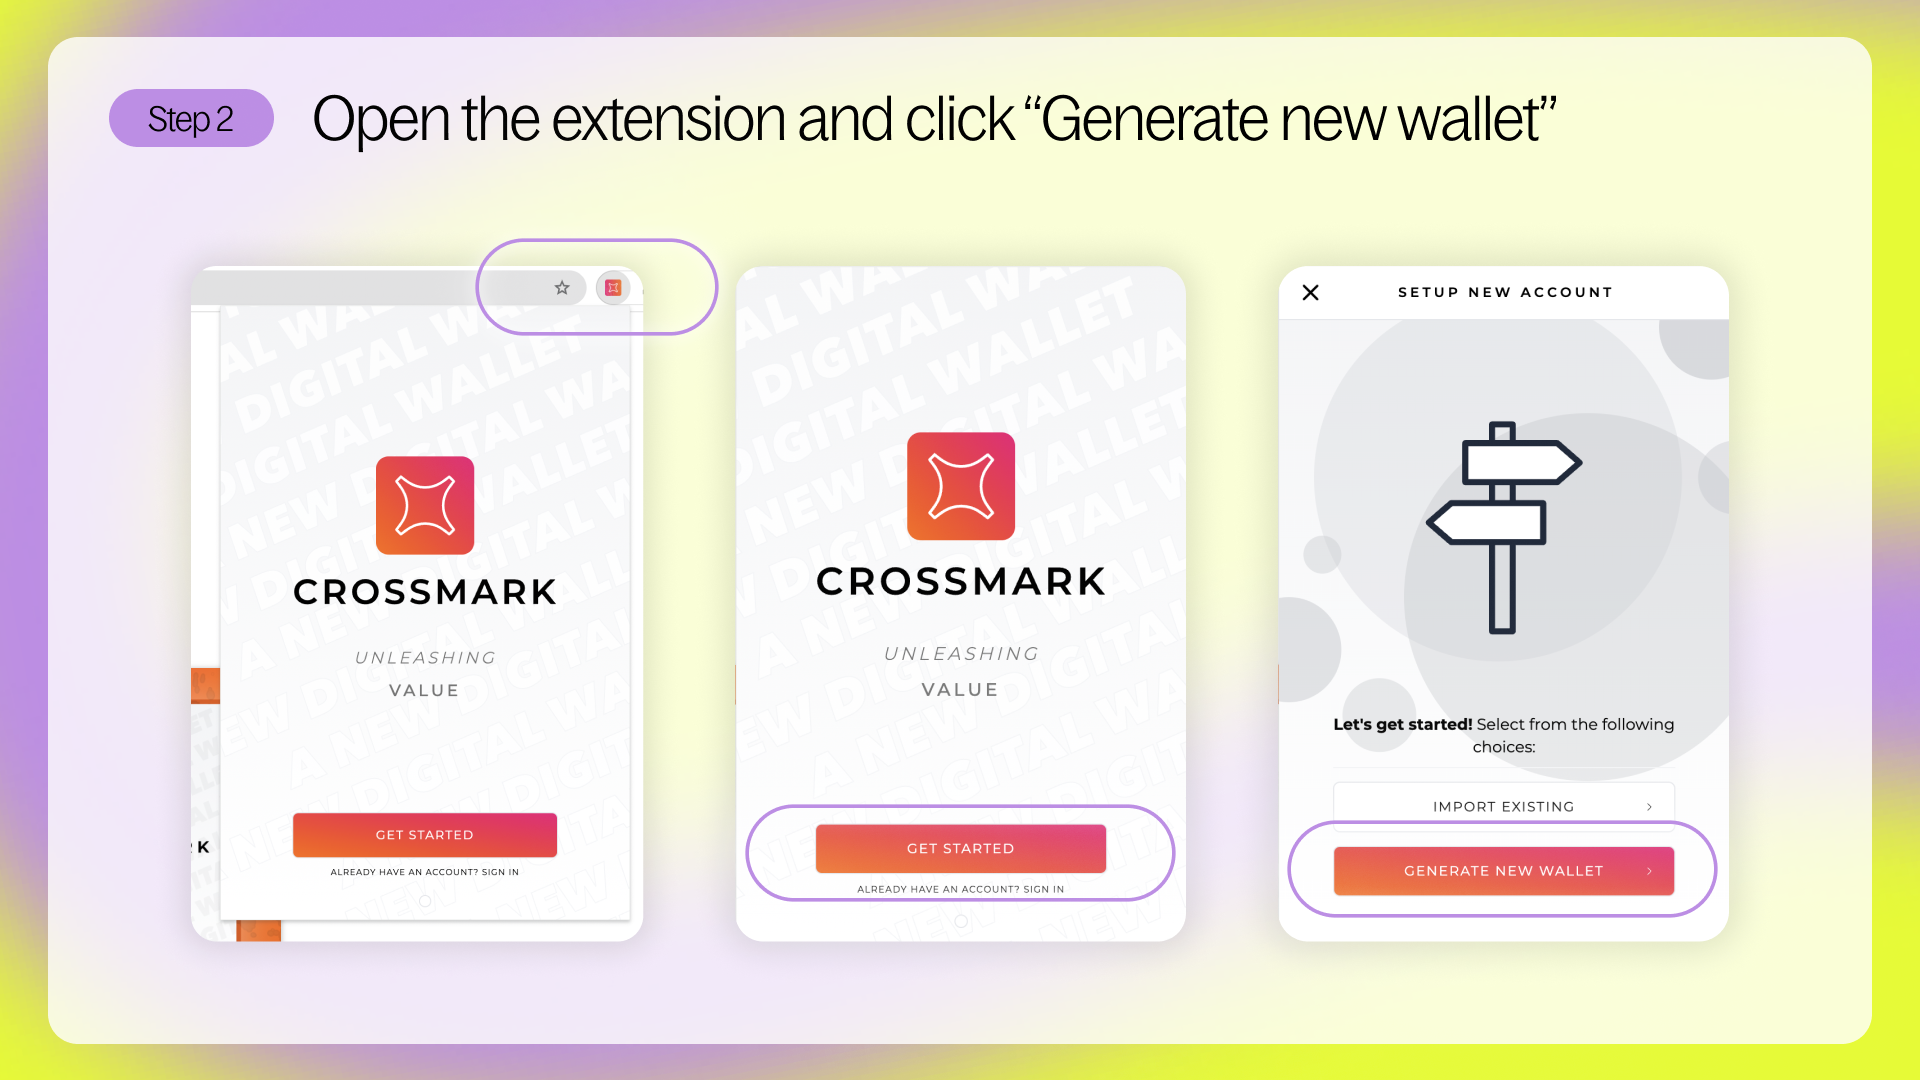
Step 2: Open the extension and click “Generate New Wallet”
Click Get Started and select Generate New Wallet. You’re now just a few clicks away from your own XRPL wallet - no sign-up or email required.
Step 3: Set a secure password
Choose a password you’ll use to unlock the wallet and approve transactions. This protects your wallet on your device.
Note: This is not your recovery phrase. If you forget your password, you can still recover the wallet using your recovery phrase.

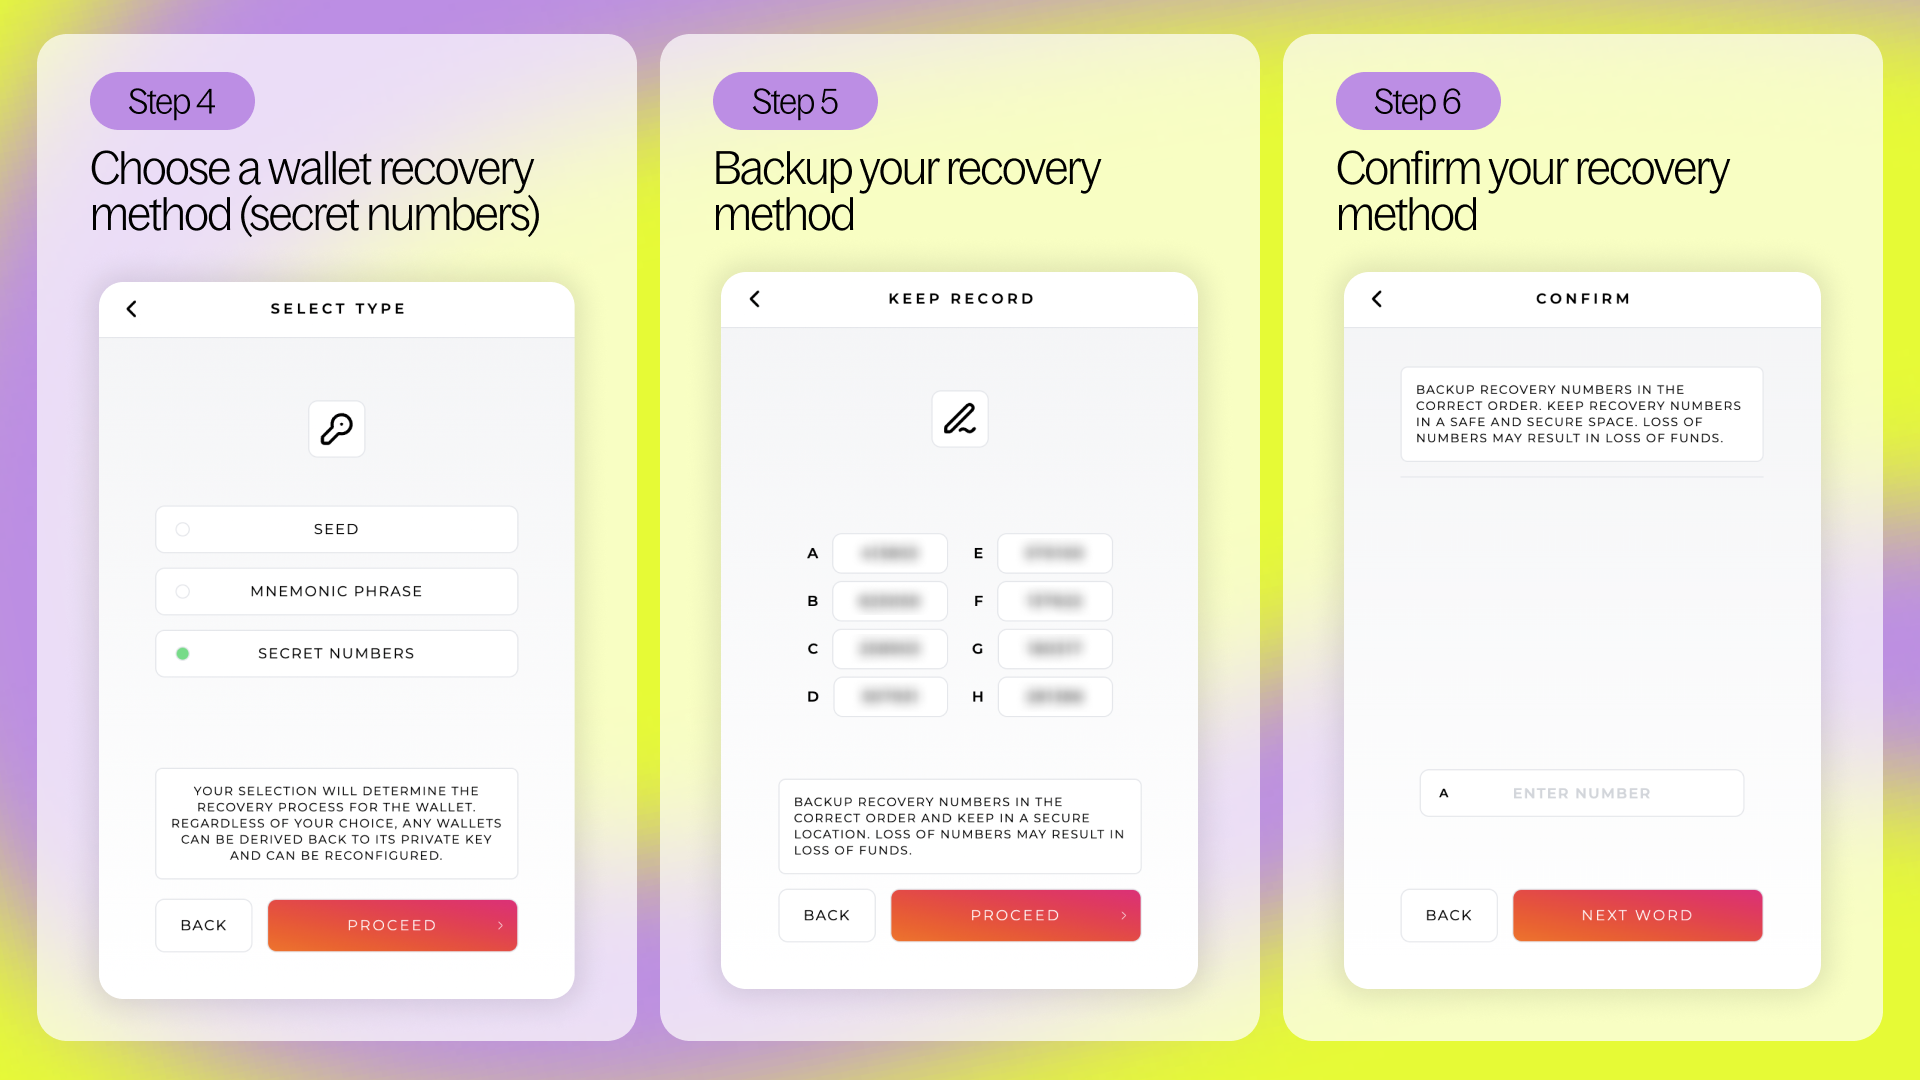
Step 4: Choose a recovery method
You’ll now choose how to back up your wallet. Crossmark gives you options - this guide uses the secret numbers recovery method. Whichever you pick, just make sure to store it safely. This is your master key: if it’s lost, there’s no recovery. If it’s safe, so are your assets.
Step 5: Backup your secret numbers
You’ll now see your secret numbers - a sequence of numbers that grant full access to your wallet. Write them down and store them offline **in a secure place. Never save them on your phone, browser, or cloud storage. Anyone with these numbers can access your wallet.
Step 6: Confirm your secret numbers
You’ll be asked to re-enter your recovery numbers to confirm you’ve written them down correctly. This step ensures your backup is accurate before you move forward.
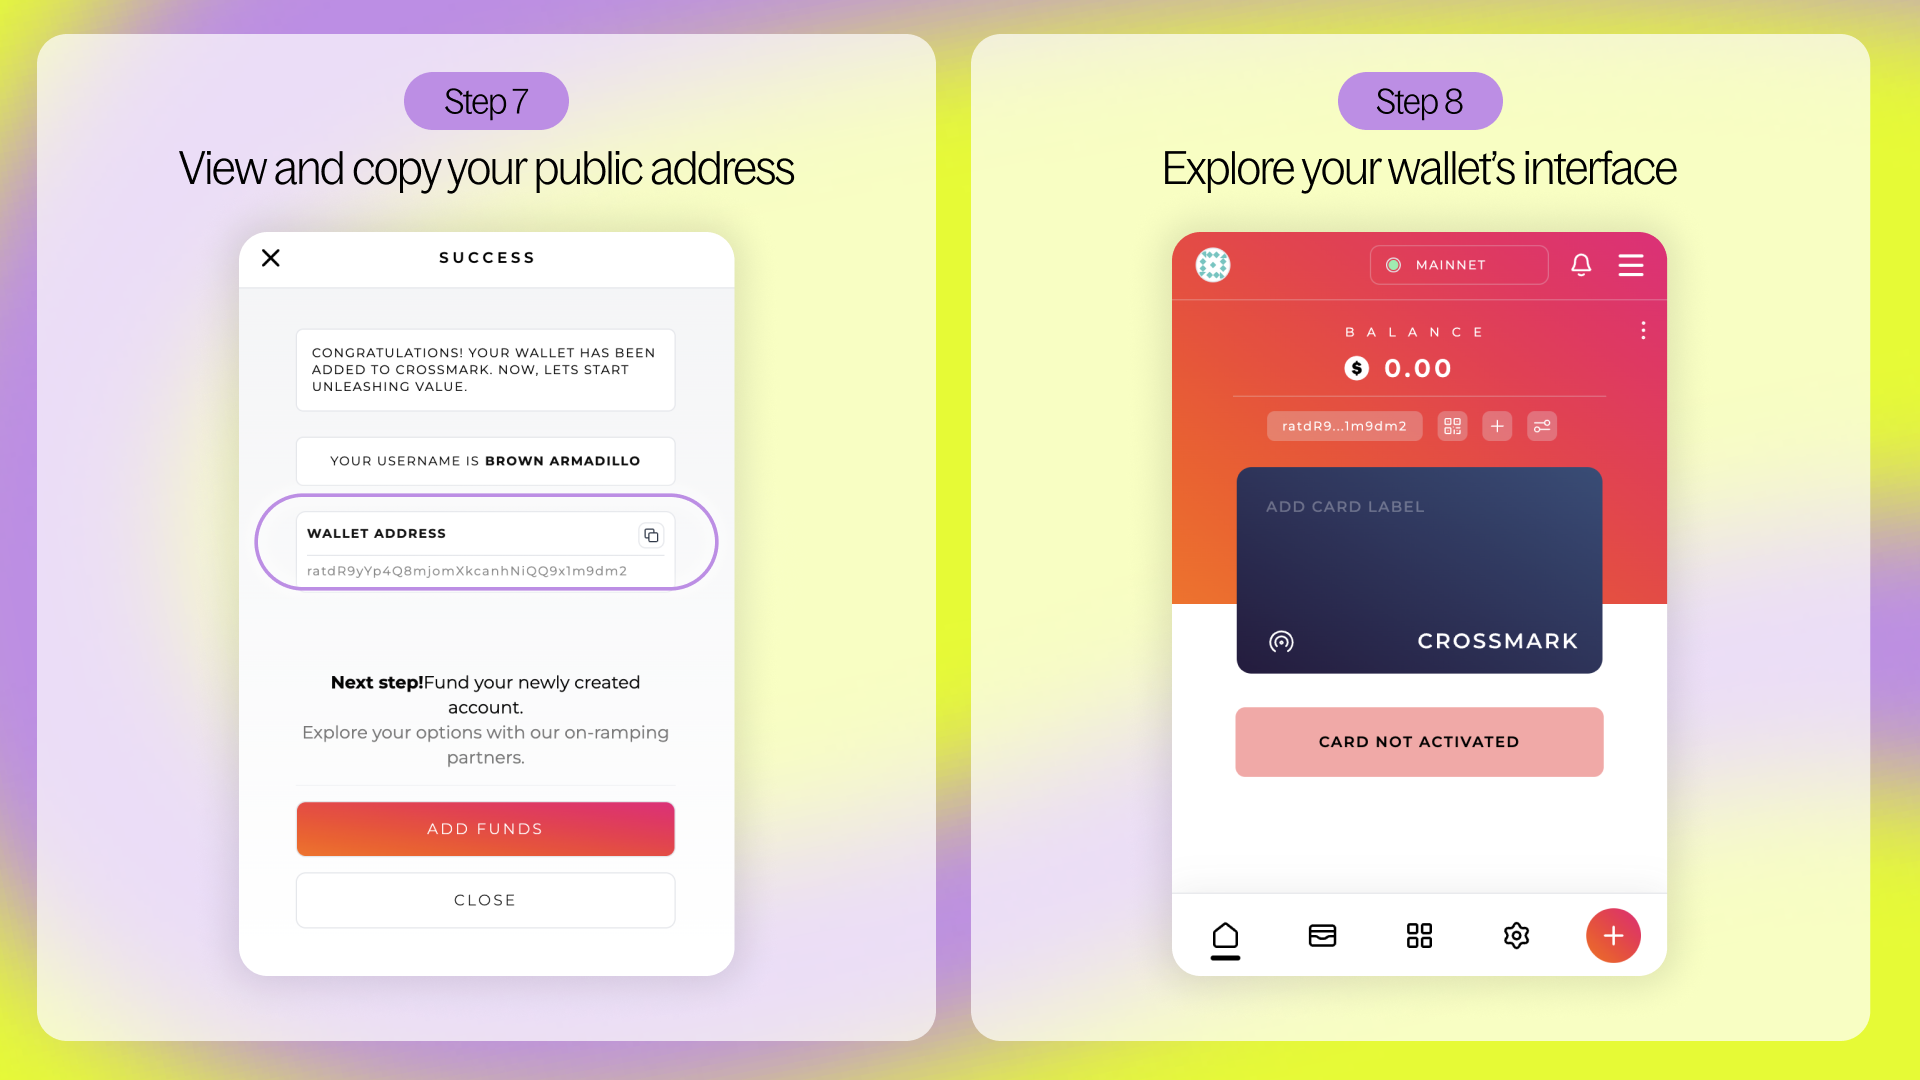
Step 7: View your public address
Once the wallet is created, your public XRPL address will be shown. This is like your wallet’s account number - it’s safe to share with others so they can send you XRP or tokens, but it can’t be used to access your wallet.
Note it down - we’ll use it in the next step.
Step 8: Explore your wallet
Take a moment to familiarise yourself with the Crossmark interface. You’ll see your wallet balance, transaction history, and tools to manage assets, sign transactions, and connect to dApps.
Step 9: Activating your Crossmark Wallet
Before you can start using your wallet, you’ll need to activate it by sending at least 1 XRP to your address. This is an XRPL requirement - not a fee, just a reserve to keep your wallet live on the network.
We recommend sending 11 XRP so you have 10 XRP ready to use right away. Follow the guides below to complete this step.
You can activate your wallet by:
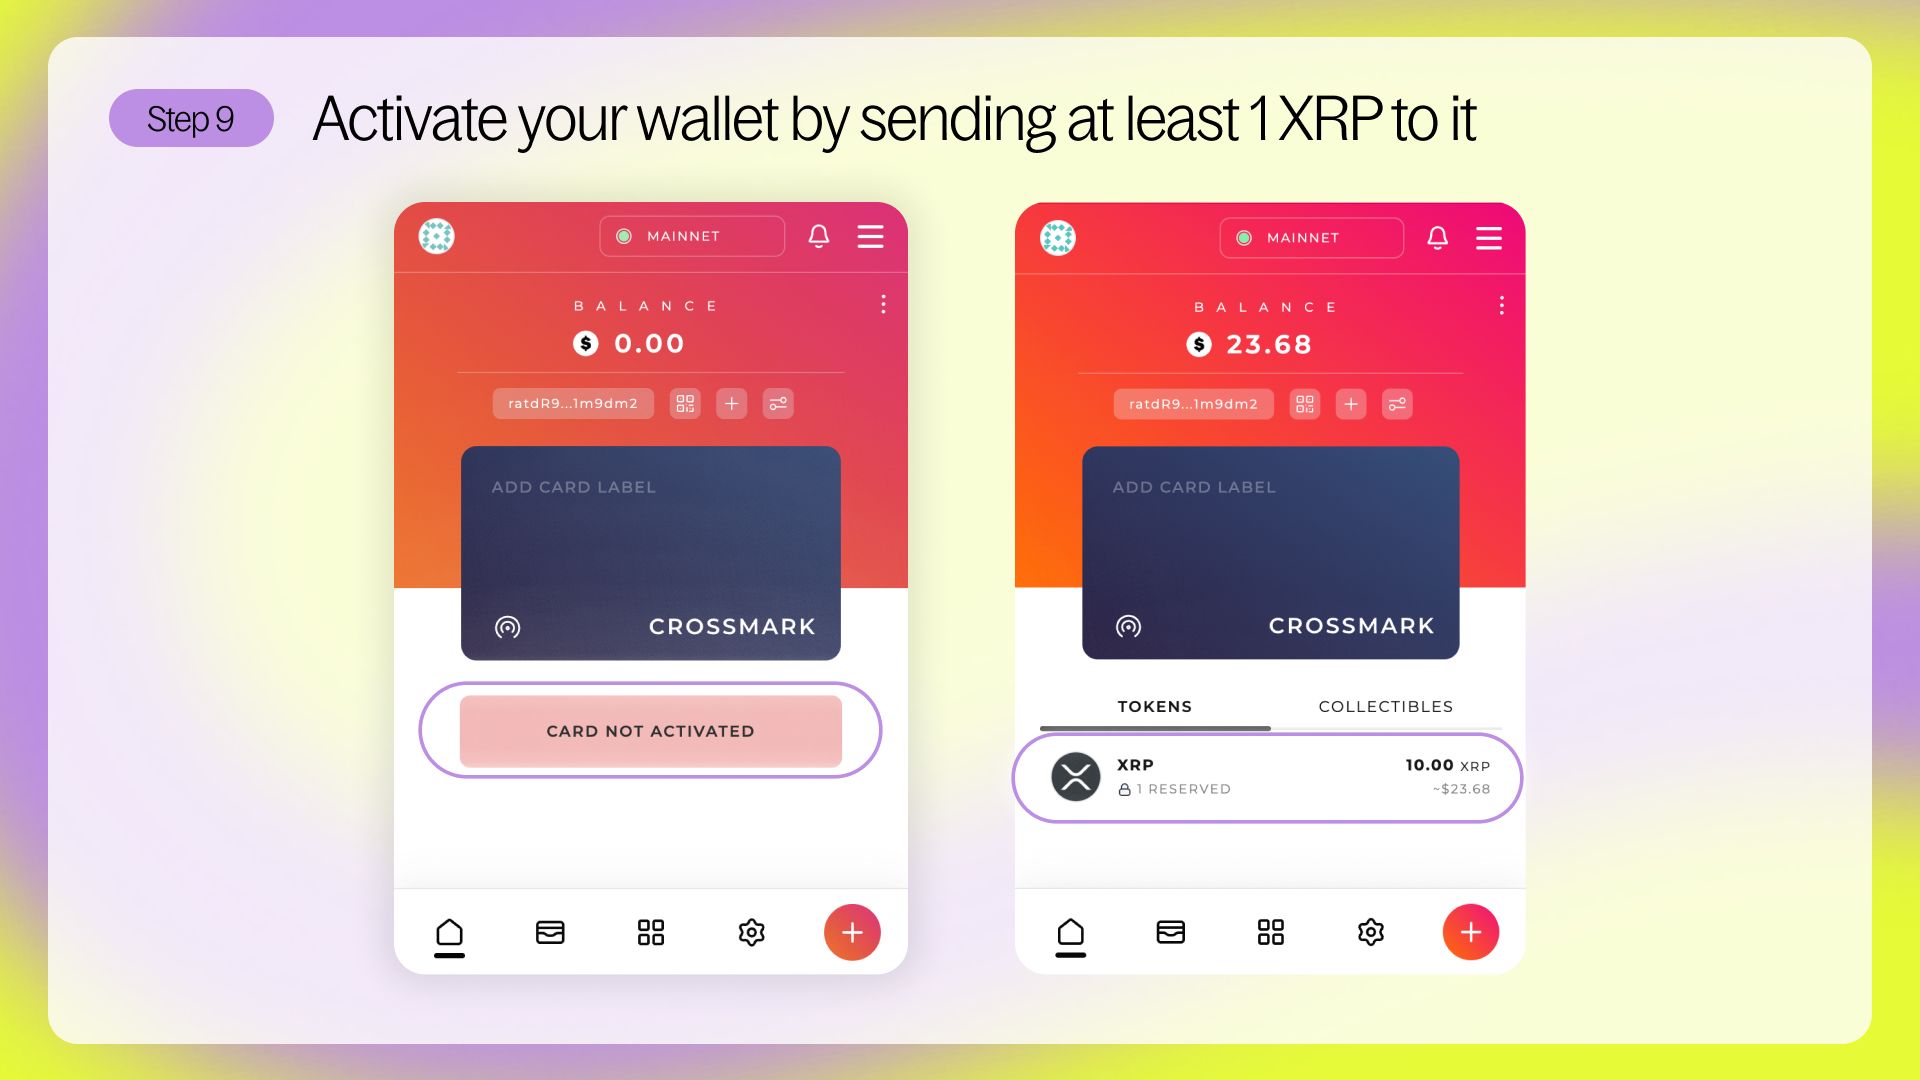
Until your wallet is funded, you’ll see “Card not activated.” Once the XRP is received, your account will automatically activate. You’ll see your XRP balance reflected in the app, along with a label showing that 1 XRP is reserved (the onchain requirement to keep your account active).
You're now ready to start exploring the XRPL ecosystem!